Manage contacts with Node.js
This page explains how to manage contacts with the Nylas Node.js SDK and Contacts API.
Before you begin
Before you start, you must have done the following tasks:
List contacts
The example below lists the first and last names, email addresses, and IDs of the first 10 contacts in an end user's contact list.
import Nylas from 'nylas'

const NylasConfig = {
  apiKey: '<NYLAS_API_KEY>',
  apiUri: '<NYLAS_API_URI>',
}

const nylas = new Nylas(NylasConfig)

async function fetchContacts() {
try {
  const identifier = '<NYLAS_GRANT_ID>'

  const contacts = await nylas.contacts.list({
    identifier,
    queryParams: {
      limit: 5,
    }
  })

  console.log('Contacts:', contacts)
} catch (error) {
  console.error('Error fetching contacts:', error)
}
}

fetchContacts();
Create a contact
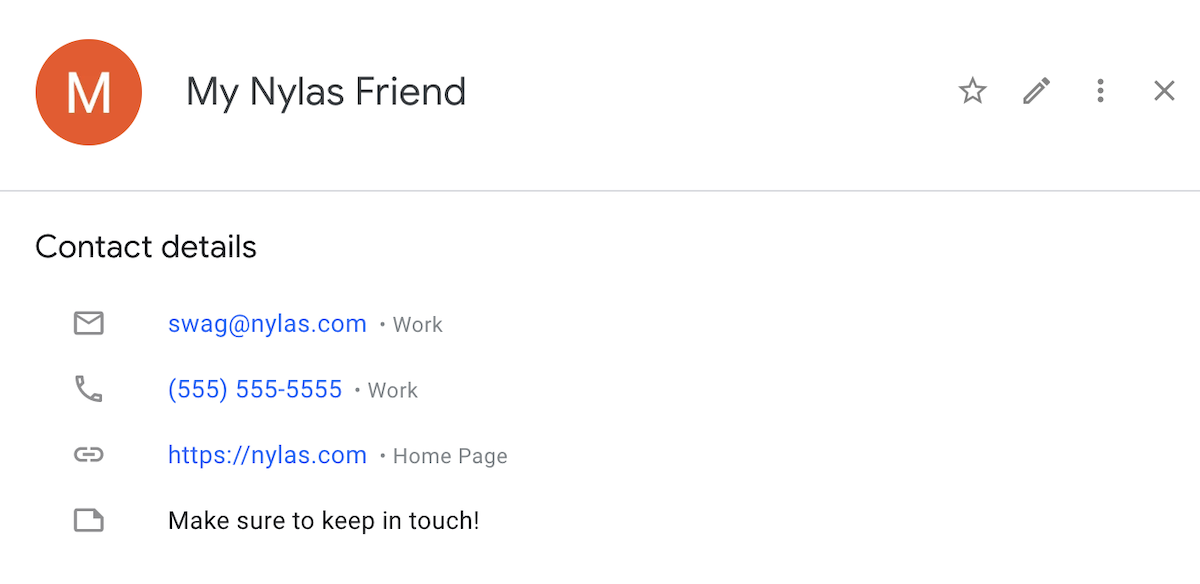
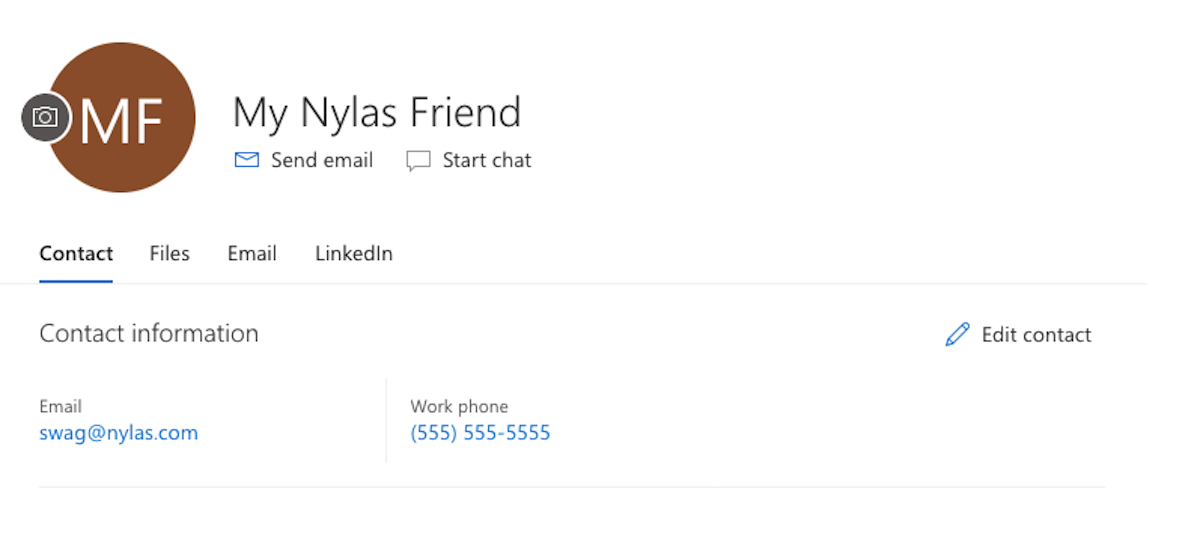
When you create a contact, Nylas syncs it to the end user's provider. The following example creates a contact, assigns its attributes, and saves it to Nylas.
async function createContact() {
  try {
    const contact = await nylas.contacts.create({
      identifier: '<NYLAS_GRANT_ID>',
      requestBody: {
        givenName: "My",
        middleName: "Nylas",
        surname: "Friend",
        notes: "Make sure to keep in touch!",
        emails: [{type: 'work', email: '[email protected]'}],
        phoneNumbers: [{type: 'work', number: '(555) 555-5555'}],
        webPages: [{type: 'other', url: 'nylas.com'}]
      }
    })

    console.log('Contact:', contact)
  } catch (error) {
    console.error('Error to create contact:', error)
  }
}

createContact()
For more information on Contact objects and their attributes, see the Contacts reference documentation.
When you create a contact for a Google account, it renders like this on the provider:
For Microsoft Outlook, new contacts look like this:
Delete a contact
To delete a contact from an end user's account, you must get the contact's id and pass it as an argument to the contacts.destroy() function. You can use the same code from the List contacts section to retrieve a contact's ID.
⚠️ The following code snippet deletes the contact you specify! Make sure the contact is one that you actually want to delete.
The code sample below finds and deletes a specific contact from an end user's account.
const deleteContact = async () => {
  try {
    await nylas.contacts.destroy({ identifier, contactId })

    console.log(`Contact with ID ${contactId} deleted successfully.`)
  } catch (error) {
    console.error(`Error deleting contact with ID ${contactId}:`, error)
  }
};

deleteContact();
Explore the Contacts API
If you've made it to this point, congratulations! You've learned how to manage contacts with the Nylas Node.js SDK and Contacts API! 🎉
There's plenty more that you can do with Nylas. Take a look at the following resources to learn more.
- Read about the features of the Nylas Contacts API.
- Read about how Nylas works.
- Review the Nylas Getting Started guide to learn about how to integrate the Nylas Contacts API.