Manage contacts with the Nylas Ruby SDK
The Nylas Ruby SDK is the quickest way to integrate Google and Microsoft (Exchange, Outlook, Office365) contacts into your app with Ruby and the Nylas Contacts API. The Nylas Contacts API makes it very easy to create and modify contacts for your users' Google and Microsoft accounts.
Learn how to manage Google and Microsoft contacts with the Nylas Ruby SDK and Contacts API. A contact can include basic information, such as names and email addresses, and extended information, such as notes and websites.
What you'll learn
In this tutorial, you'll learn how to do the following:
- Read contacts from an account's contact list.
- Create and save Google and Microsoft contacts.
- Delete contacts.
Prerequisites
Prerequisites include installing the Nylas Ruby SDK and setting up your environment. Before you start this tutorial, make sure that you complete the Getting started with the Nylas Ruby SDK tutorial.
Step 1: Initialize the Nylas object
At its core, the Nylas Communication Platform is an API client that interfaces with all major contact providers.
All of the functionality of the Nylas Communications Platform is available through the API
object. Before you make requests, initialize the API
object with your client ID, client secret, and access token.
#!/usr/bin/env ruby
CLIENT_ID = 'your_nylas_client_id'
CLIENT_SECRET = 'your_nylas_client_secret'
ACCESS_TOKEN = 'your_account_access_token'
require 'nylas'
nylas = Nylas::API.new(
app_id: CLIENT_ID,
app_secret: CLIENT_SECRET,
access_token: ACCESS_TOKEN
)
For more information on initializing the API
object, refer to the Getting started with the Nylas Ruby SDK tutorial.
Step 2: Change the base API URL
You can optionally change the base API URL depending on your location:
Location | API URL | Scheduler API URL |
---|---|---|
United States (Oregon) | https://api.nylas.com |
https://api.schedule.nylas.com |
Europe (Ireland) | https://ireland.api.nylas.com |
https://ireland.api.schedule.nylas.com |
For more information, see Data residency and Migration guide for data centers.
Pass API_URL
to change the base API URL.
#!/usr/bin/env ruby
CLIENT_ID = 'your_nylas_client_id'
CLIENT_SECRET = 'your_nylas_client_secret'
ACCESS_TOKEN = 'your_account_access_token'
API_URL='your_base_api_url'
require 'nylas'
nylas = Nylas::API.new(
app_id: CLIENT_ID,
app_secret: CLIENT_SECRET,
access_token: ACCESS_TOKEN,
api_server: API_URL
)
Step 3: Read contacts
Use the nylas
object to read contacts from an account.
In this tutorial, we'll read the first and last name, email address, and ID for the first ten contacts.
-
Read the first ten contacts.
contacts = nylas.contacts.limit(10)
-
Use the
each
method to log the first name (contact.given_name
), last name (contact.surname
), first email address (contact.emails[0].email
), and ID (contact.id
) for each contact.contacts.each{|contact|
puts "Name: #{contact.given_name} #{contact.surname} | Email: #{contact.emails[0].email} | ID: #{contact.id}"
}For information on available attributes, see GET /contacts
Example: Read contacts
#!/usr/bin/env ruby
CLIENT_ID = 'your_nylas_client_id'
CLIENT_SECRET = 'your_nylas_client_secret'
ACCESS_TOKEN = 'your_account_access_token'
require 'nylas'
nylas = Nylas::API.new(
app_id: CLIENT_ID,
app_secret: CLIENT_SECRET,
access_token: ACCESS_TOKEN
)
contacts = nylas.contacts.limit(10)
contacts.each{|contact|
puts "Name: #{contact.given_name} #{contact.surname} | Email: #{contact.emails[0].email} | ID: #{contact.id}"
}
Step 4: Create and save contacts
Create a new contact and assign contact attributes.
Create contacts
-
Use
nylas
to create a new contact object.contact = nylas.contacts.create
-
Assign attributes.
contact.given_name = "My"
contact.middle_name = "Nylas"
contact.surname = "Friend"
contact.emails['work'] = ['[email protected]']
contact.notes = "Make sure to keep in touch!"
contact.phone_numbers['business'] = ['(555) 555-5555']
contact.web_pages['homepage'] = ["https://nylas.com"]contact.given_name
,contact.middle_name
, andcontact.surname
define the contact's first, middle, and last name.contact.emails
adds an email address to the contact and setstype
towork
. Supportedtype
values arework,
,personal
, andother
.contact.notes
adds a note to the contact.contact.phone_numbers
adds a phone number to the contact and setstype
asbusiness
. Google and Microsoft label the phone number with thebusiness
type as the contact’s work phone number. Supportedtype
values arebusiness
,home
,mobile
,page
,business_fax
,home_fax
,organization_main
,assistant
,radio
andother
.webPages
connects a website URL to the contact and setstype
tohomepage
. Supportedtype
values arehomepage
,profile
,work
, andblog
.
For information on available attributes, see POST /contacts.
Save contacts
Call contact.save
on the contact object to save the contact to Nylas. Nylas syncs the new contact to the end user's service provider.
contact.save
Example: Create and save contacts
The following example creates and saves a contact called "My Nylas Friend":
#!/usr/bin/env ruby
CLIENT_ID = 'your_nylas_client_id'
CLIENT_SECRET = 'your_nylas_client_secret'
ACCESS_TOKEN = 'your_account_access_token'
require 'nylas'
nylas = Nylas::API.new(
app_id: CLIENT_ID,
app_secret: CLIENT_SECRET,
access_token: ACCESS_TOKEN
)
contact = nylas.contacts.create
# Add a first, middle, and last name for the contact.
contact.given_name = "My"
contact.middle_name = "Nylas"
contact.surname = "Friend"
# Email address 'type' must be either 'work' or 'personal'
contact.emails = [{type: 'work', email: '[email protected]'}]
contact.notes = "Make sure to keep in touch!"
# Phone number type must be one of 'business', 'organization_main',
# 'mobile', 'assistant', 'business_fax', 'home_fax', 'radio', 'car', 'home', or 'pager'
# Google and Microsoft label 'business' phone numbers as the contact's Work phone number
contact.phone_numbers = [{type: 'business', number: '555 555-5555'}]
# Web page type must be one of 'homepage', 'profile', 'work', or 'blog'
contact.web_pages = [{type: 'homepage', url: 'https://nylas.com'}]
contact.save
puts contact.to_json
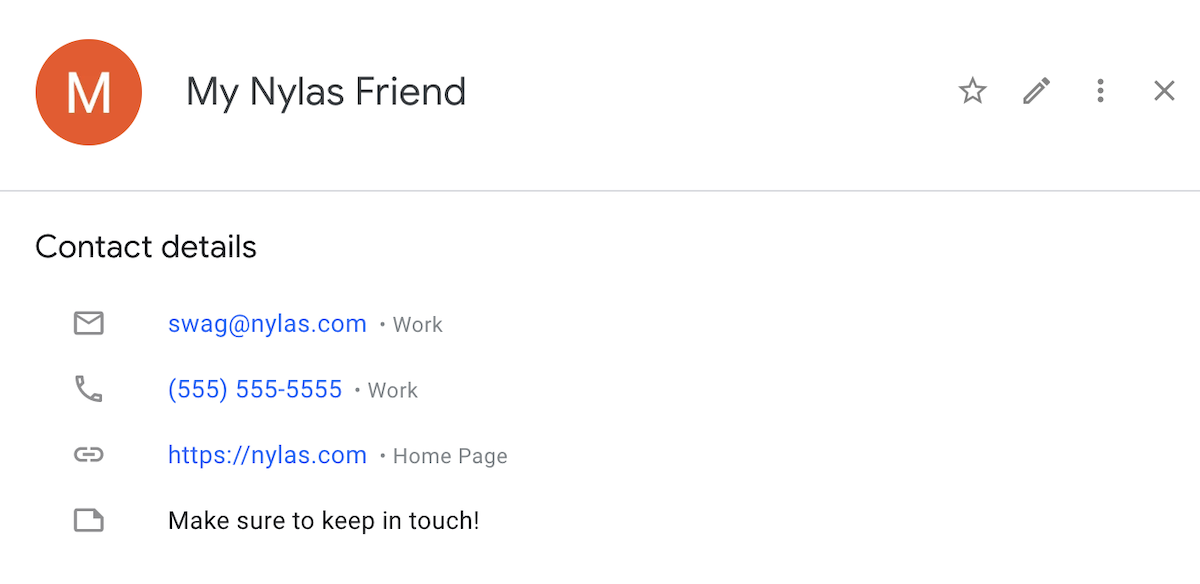
The following is the example contact created in Google:
You can create the same contact in Microsoft Outlook:
Step 5: Delete contacts
To delete a contact from Google, get the id
of the contact and pass it as an argument to the contacts.find().destroy
function. You can use the same endpoint you used earlier to Read contacts to retrieve the contact ID.
Example: Delete contacts
The following example deletes a specific contact from Google. Make sure that you want to do this before proceeding.
#!/usr/bin/env ruby
CLIENT_ID = 'your_nylas_client_id'
CLIENT_SECRET = 'your_nylas_client_secret'
ACCESS_TOKEN = 'your_account_access_token'
require 'nylas'
nylas = Nylas::API.new(
app_id: CLIENT_ID,
app_secret: CLIENT_SECRET,
access_token: ACCESS_TOKEN
)
nylas.contacts.find('{CONTACT_ID}').destroy
More resources
If you’ve made it this far, congrats! You’ve successfully learned how to manage Google and Microsoft contacts with the Nylas Contacts API! There's plenty more that you can do with Nylas. Take a look at the following resources:
- Follow our Ruby SDK tutorials.
- Learn more about the Nylas API.
- Learn more about the Nylas Contacts API.
- Learn more about how the Nylas Communications Platform works.
- Read the blog post Working with the Nylas Contacts API and Ruby SDK.