Composer Component
This feature is in Maintenance mode. Nylas will patch bugs and vulnerabilities but is not currently working on new functionality.
Use the Nylas Composer to connect to any email data and provide a custom front end for your applications. Composer provides an out of the box solution for writing and sending emails.
Without needing to write a single line of code, Composer comes with:
- To, from, cc, and bcc fields
- Subject field
- Header
- Attachment
- Sending right out the box
- Ability to format messages
- Light and dark themes
- Customization options
If you want to change the behavior of Composer, it comes with custom callback functions and custom hooks.

Quickstart
- Create a Composer component in your Nylas Dashboard.
- Add it to your application.
    <head>
      <!-- Import the script from CDN -->
      <script src="https://unpkg.com/@nylas/components-composer"></script>
    </head>
    <body>
      <!-- Place the component on the page -->
      <nylas-composer id="<PASTE_YOUR_COMPONENT_ID>"></nylas-composer>
    </body>
That’s It! Composer is ready to use!
Prerequisites
Before you use components, you must have the following prerequisites:
- A v2 Nylas application.
- The minimum required scopes:
- Agenda:
calendar - Composer:
email.modify,email.send,contacts.read_only - Contact list:
contacts.read_only - Email:
email.modify,contacts.read_only - Messages:
email.read_only,contacts.read_only
- Agenda:
- An application to add the component to.
Composer Installation Options
You can install Composer 2 ways:
npm Package
- Run
npm i @nylas/components-composeroryarn add @nylas/components-composer - Then import and render the component.
    // Import the web component
    import '@nylas/components-composer';

    // In render method
    <nylas-composer></nylas-composer>
Script Tag
Use the CDN script tag, https://unpkg.com/@nylas/components-composer.
    <head>
      <!-- Import the script from CDN -->
      <script src="https://unpkg.com/@nylas/components-composer"></script>
    </head>
    <body>
      <!-- Place the component on the page -->
      <nylas-composer></nylas-composer>
    </body>
Create the Composer Component
- Log in to your Nylas dashboard.
- Click Components.
- Click the Composer.
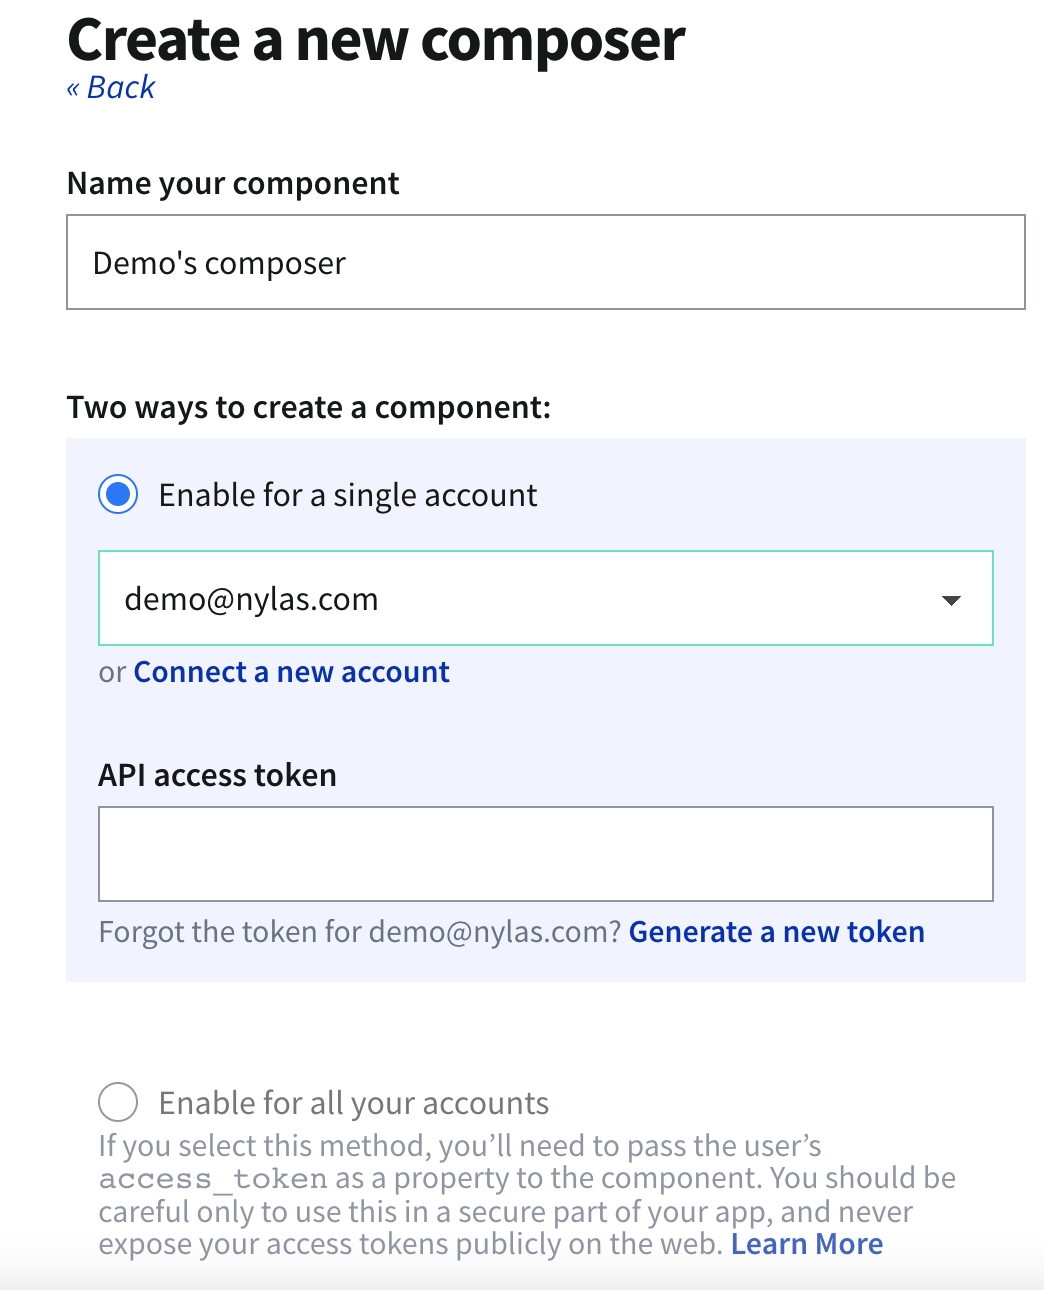
- Name your Component and select the account.
- Use an existing access token or generate a new one. To quickly start testing your Component select Enable for a single account.
- To learn how to enable components for multiple accounts see Authorizing Components
- Enter the domain the component will run on. Without the domains, the component will not run.
- Save your new Component.
- On the Edit page, you can configure your component behavior and appearance.
Generate an Access Token
Generating a new access token will not replace your existing access token; it will create a second access token with the same scopes as the previous token. You can revoke access tokens at any time.
Add the Component To Your Application
-
On the Edit page, there are instructions for installing the new Component.
-
If you haven't installed the Composer Component already, open a terminal and run
npm i @nylas/components-composer. -
Then add your Nylas component. Copy and paste your component code into your application.
<nylas-composer id="your-component-id"></nylas-composer>
-
You should refresh your application if needed. Any configuration options set on the editing page will apply to your component.
Authorizing Components
You can authorize components to work with a single account or multiple accounts.
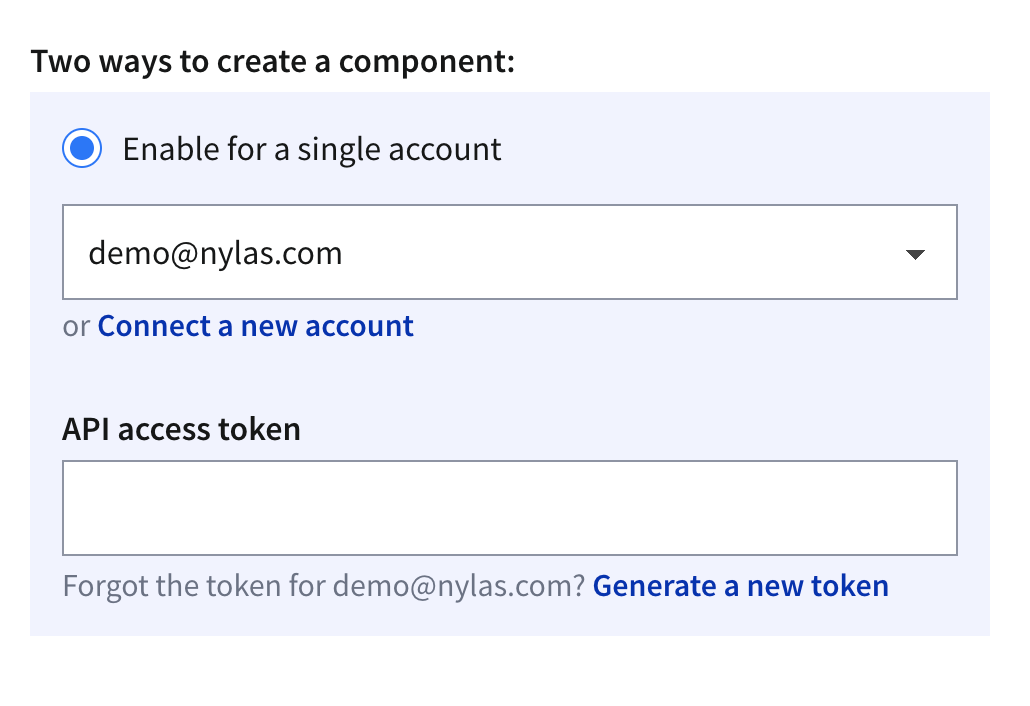
Enable for a single account
Enabling components for a single account is a good way to get started quickly. If you use this method in your production application, you must authenticate each account from the Nylas Dashboard one-by-one.
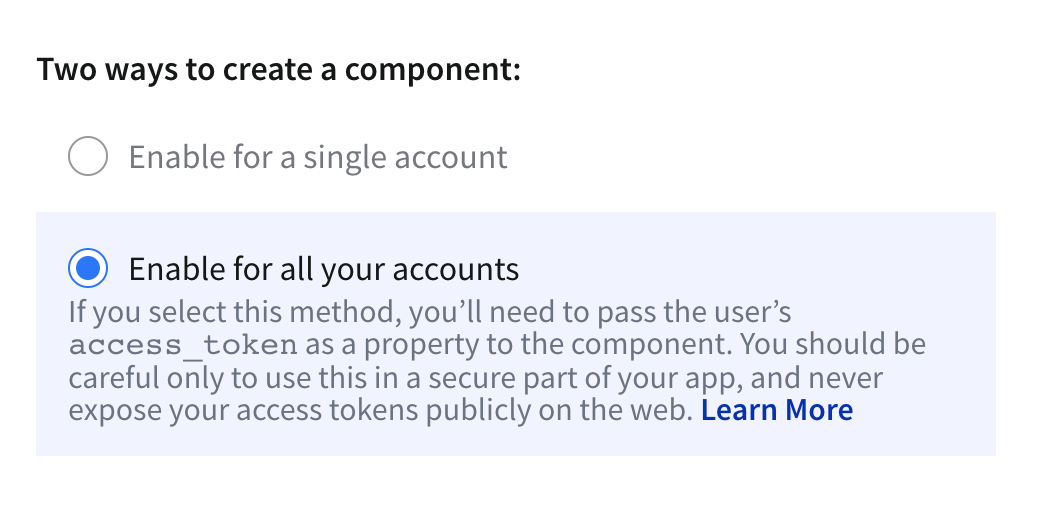
Enable for all accounts
🔍 Dashboard previews don't work when you enable components for all accounts.
To enable components for all accounts, you must pass in an end user's access token as a property of the component. One way to do this is to create a login screen, capture the access token, and pass it to the component. You can pass access_tokens directly in the component, as in the following example.
<nylas-agenda id="COMPONENT-ID" access_token="USER-ACCESS-TOKEN"/> Be sure to keep your end users' access tokens hidden, and never expose them online.
Usage
There are 2 ways to use Composer:
- You can create a Nylas Account and Composer comes ready to use without any coding needed.
- You can bring your own data.
Use a Nylas Account
Install the Composer, then add it to your application. That's it! You're ready to start sending emails. You can alter the appearance and behavior for more functionality.
Bring Your Data
After installing Composer you will need to use custom callbacks to send emails. Check out our example using callbacks to send emails.
Send Emails
Once attached to an account, you can send emails from that account. Emails can be sent directly using the Send Endpoint to ensure a high rate of deliverability.
Attachments
File attachments are limited to 4 MB.
Customization
Nylas components are flexible and can be customized for your needs. You can customize the display in 2 ways:
From Your Nylas Dashboard
Use this option if you are using the Component created from the dashboard. Customize the display by going to your application, selecting Components. Then select the Component you want to edit. If you are customizing using the dashboard, you can not edit the CSS or use custom callbacks.
Directly in the Application
No matter where you created your Component, you can use this method to edit the display options.
Pass them as component props:
    <nylas-composer
      theme="dark"
      show_header="false"
    />
Custom Properties
| Name | Type | Description | Default value |
|---|---|---|---|
| theme | string | Set the custom theme. Possible values are auto, light, dark or URL / relative path to custom CSS file. |
auto |
| show_header | boolean | Show the Composer header. If removed, the minimize, close and new message text are removed. | true |
| show_from | boolean | Display the from field. | true |
| show_to | boolean | Display the to field. | true |
| show_cc | boolean | Display the cc field. | true |
| show_bcc | boolean | Display the bcc field. | true |
| minimized | boolean | Minimize composer. | false |
| show_subject | boolean | Show the subject line. | true |
| show_close_button | boolean | Show the close icon. | true |
| show_minimize_button | boolean | Display the minimize icon. | true |
| show_cc_button | boolean | Display cc field. | true |
| show_bcc_button | boolean | Display bcc field. | true |
| show_attachment_button | boolean | Display attachment icon. | true |
| show_editor_toolbar | boolean | Display toolbar with options such as bold, lists and underline. | true |
| tracking | Nylas Tracking Object | Allows tracking for message opens, link clicks, and thread replies. | null |
Custom CSS
To customize the CSS, you can change the theme custom property to one of the provided themes by Nylas:
<nylas-composer id="your-composer-id" theme="dark"></nylas-composer> You can also easily override styles for pre-selected themes by writing your own CSS vars. The customizable CSS variables are the following and the value assigned should be a valid CSS property value:
    nylas-composer {
    --composer-background-color: #282b2b;
    --composer-background-muted-color: #454949;
    --composer-text-color: #fff;
    --composer-text-light-color: #b0b0c0;
    --composer-text-secondary-color: #ffffff;
    --composer-font: lato, sans-serif;
    --composer-font-size: 14px;
    --composer-font-size-small: 12px;

    --composer-border-color: #282828;
    --composer-primary-color: #00c1a0;
    --composer-primary-light-color: #434343;
    --composer-primary-dark-color: #00a88b;
    --composer-icons-color: #8e8e98;
    --composer-header-background-color: var(--composer-background-color);

    --composer-success-color: white;
    --composer-success-light-color: var(--composer-primary-color);

    --composer-danger-color: #ffffff;
    --composer-danger-light-color: #ff5454;

    --composer-info-color: white;
    --composer-info-light-color: var(--composer-primary-light-color);
    }
You can also provide your own stylesheet to the theme custom property. Review the dark.css theme to get the CSS variable names:
    <nylas-composer
      id="your-composer-id"
      show_header="false"
      theme="https://example.com/my-composer-theme.css"
    ></nylas-composer>
Allowed Domains
You can restrict the domains that your component works on using glob patterns, as in the following examples:
nylas.commatches onlynylas.com.subdomain.nylas.commatches onlysubdomain.nylas.com.*subdomain.nylas.commatchessubdomain.nylas.comandsub.sub.subdomain.nylas.com.*matches any domain.
Domain restriction applies only to the domain name. You cannot restrict URL paths (for example, developer.nylas.com/docs/) or protocols (for example, HTTPS).
How Properties Are Handled
Nylas Components follow an order of operations to decide if the dashboard or code takes precedence.
- If the property is passed directly to the Component, use that first.
- If the property is not passed directly in the Component use the dashboard settings.
- If there are no properties set in the Component or the dashboard, use the Component defaults.
Custom Behavior
You can attach custom callbacks to Composer. These custom callbacks let you change the behavior or use the Component completely detached from Nylas.
Composer comes with callback and hooks. Use callback to change the component behavior and hooks to change behavior or get data when certain actions are taken.
In this example, we are using the composer.send callback and composer.afterSendSuccess to control the behavior of sending a message and closing the Composer after a message is sent.
...
      // Use custom callbacks, implement send function
      el.send = async (data) => {
        return new Promise((resolve, reject) => {
          setTimeout(() => {
            return resolve({ success: true });
          }, 250);
        });
      };
      // Use after send hook
      el.afterSendSuccess = async (response) => {
        el.close(); // Hide the composer after sending
      };
Custom Callbacks
You can't pass callbacks as attributes
You must select the element, for example document.getElementById, and then attach the custom properties.
| Name | Type | Description |
|---|---|---|
composer.send(message) |
function | Function that implements sending the email |
composer.from |
function or array | Array of contacts to pre-fill the from field or function that returns array of contacts or promise. |
composer.to |
function or array | Array of contacts to pre-fill the to field or function that returns array of contacts or promise. |
composer.cc |
function or array | Array of contacts to pre-fill the cc field or function that returns array of contacts or promise. |
composer.bcc |
function or array | Array of contacts to pre-fill the bcc field or function that returns array of contacts or promise. |
composer.uploadFile |
Function | Function that has single argument (file) and returns object in format as described in Nylas file documentation |
Emitted Events
The emitted event object will include a details property that contains the event payload, if available. You can observe these events in your application by calling .addEventListener(<EVENT_NAME>, () => {}) on your composer.
| Name | Description |
|---|---|
manifestLoaded |
This event is dispatched on load when the manifest is loaded. The handler is passed the manifest argument. |
onError |
Emitted if an error occurs while fetching data in the component. The handler is passed an object with the component id as the key and the error as the value. |
composerMinimized |
Emitted whenever the minimize button is clicked from a maximized composer. |
composerMaximized |
Emitted whenever the minimize button is clicked from a minimized composer. |
composerClosed |
Emitted whenever the × button is clicked, or when the .close() custom hook is called. |
composerOpened |
Emitted whenever the .open() custom hook is called. |
Custom Hooks
| Name | Type | Description |
|---|---|---|
composer.change(message) |
function | Called every time composer data is changed. First (and only) argument contains the latest version of the message. |
composer.beforeSend |
function | Called before sending the message. |
composer.afterSendSuccess |
function | Called before after the message is sent. |
composer.afterSendError |
function | Called if error happens during sending. |
composer.beforeFileUpload |
function | Called before sending the message. |
composer.afterFileUploadSuccess |
function | Called after the message is sent. |
composer.afterFileUploadError |
function | Called if error happens during sending. |
composer.beforeFileRemove |
function | Called before attachment is removed. |
composer.afterFileRemove |
function | Called after attachment is removed. |
You can use a custom method to open and close the Composer.
<body>
  <nylas-composer id="PASTE_YOUR_COMPONENT_ID"></nylas-composer>
  <script>
  const composer = document.getElementById('PASTE_YOUR_COMPONENT_ID')

  // to show the composer
  composer.open();

  // to close the composer
  composer.close();
  </script>
</body>
Demo Apps
You can fork any of these to get started right away with Composer.
- Custom Options - How to use custom configuration with your Composer.
- Vue.js Composer - How to deploy Composer using Vue.js
- Custom Callbacks - How to use callbacks in your Composer Component.
- React Composer - How to deploy Composer using React
What's Next?
Take a look at other Components:
- Mailbox Component
- Contact List Component
- Agenda Component
- Conversation Component
- Email Component
- Composer Component
Check us out on GitHub: