# Whitelabel Hosted Authentication
Source: https://developer.nylas.com/docs/v3/auth/whitelabeling/
Users read the OAuth consent screen carefully before handing over mailbox access, and an unfamiliar logo or domain is a common drop-off point. This page covers the two things you can change in the Hosted Authentication flow: the logo on the login page, and the hostname users see in their browser.
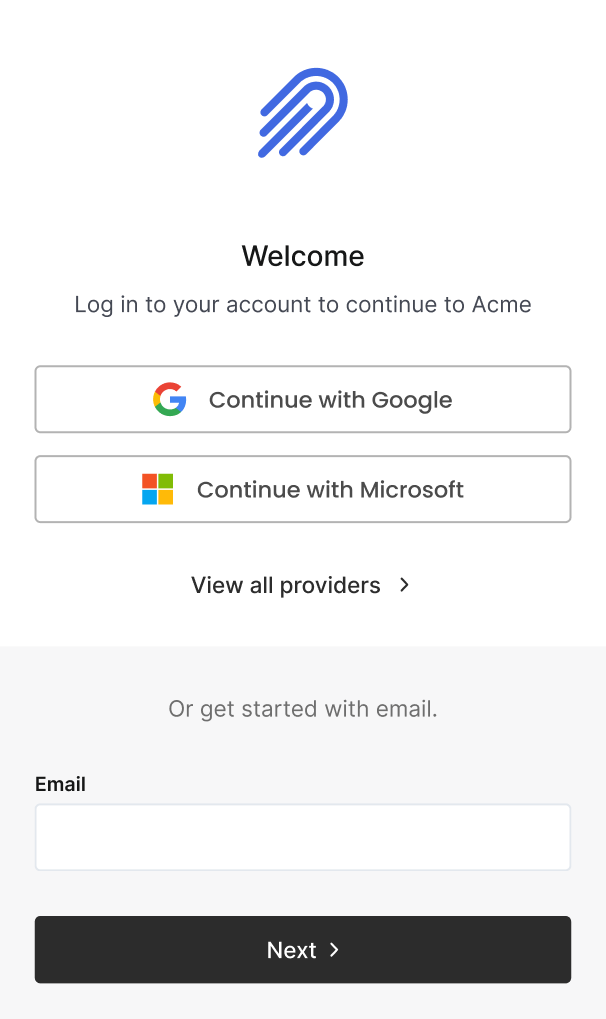 Branding is set per application and takes one API call. A custom hostname is registered once for your whole organization, then needs a matching callback URI on both your Nylas application and your provider OAuth app. Skipping either of those last two steps produces a hard error, so work through them in order.
## Set up Hosted Authentication branding
Upload your own logo to replace the default one on the Hosted Authentication login page. Nylas resizes the image to 72x72 pixels, so a square source file gives the best result. Branding settings are unique to each application, and the change applies to every grant created through that application.
> **Info:**
> **The icon must be a PNG, JPEG, or TIFF file no larger than 1 MB.**
### Add branding using Nylas Dashboard
Open your application in the [Nylas Dashboard](https://dashboard-v3.nylas.com), select **Hosted authentication** in the left navigation, and enter a link to your logo in the **Icon URL** field. The URL must be publicly reachable, because the login page fetches the image each time it renders.
### Add branding using Nylas API
Make an [Update Application request](/docs/reference/api/applications/update_application/) with the `branding.icon_url` parameter. The request updates the application identified by your API key, so you don't pass an application ID. Changes apply to the next auth request, with no cache to wait out.
```bash
curl --request PATCH \
--url 'https://api.us.nylas.com/v3/applications' \
--header 'Content-Type: application/json' \
--header 'Accept: application/json' \
--header 'Authorization: Bearer ' \
--data '{
"branding": {
"icon_url": "https://www.example.com/logo.png"
}
}'
```
## Register a custom hostname for Hosted Authentication
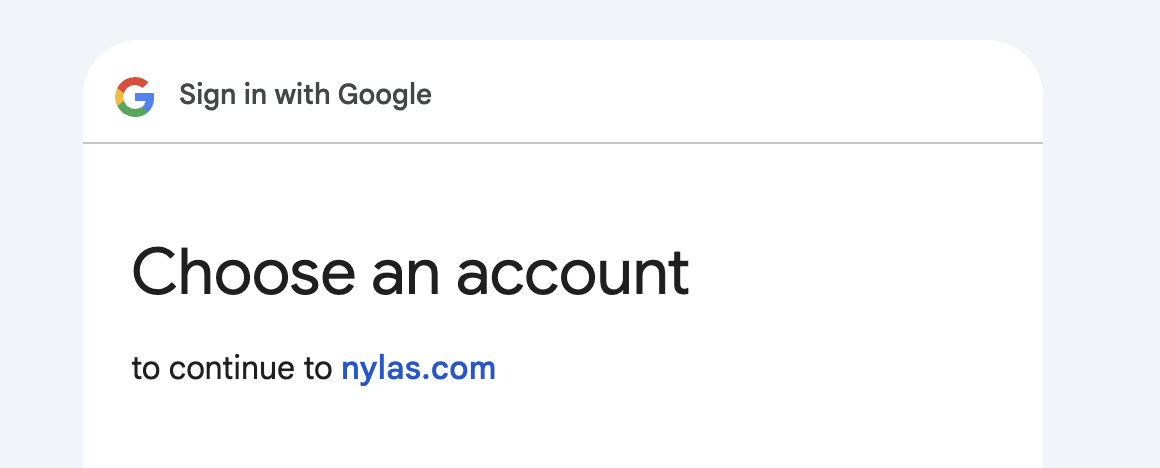
Replacing the logo doesn't change the domain, so `nylas.com` still appears in the browser and on the provider's account picker. Registering a custom hostname puts your own subdomain on every hop that Nylas controls, which removes the `Choose an account to continue to nylas.com` prompt that stops security-conscious users. Setup takes 2 DNS records and one verification click.
Branding is set per application and takes one API call. A custom hostname is registered once for your whole organization, then needs a matching callback URI on both your Nylas application and your provider OAuth app. Skipping either of those last two steps produces a hard error, so work through them in order.
## Set up Hosted Authentication branding
Upload your own logo to replace the default one on the Hosted Authentication login page. Nylas resizes the image to 72x72 pixels, so a square source file gives the best result. Branding settings are unique to each application, and the change applies to every grant created through that application.
> **Info:**
> **The icon must be a PNG, JPEG, or TIFF file no larger than 1 MB.**
### Add branding using Nylas Dashboard
Open your application in the [Nylas Dashboard](https://dashboard-v3.nylas.com), select **Hosted authentication** in the left navigation, and enter a link to your logo in the **Icon URL** field. The URL must be publicly reachable, because the login page fetches the image each time it renders.
### Add branding using Nylas API
Make an [Update Application request](/docs/reference/api/applications/update_application/) with the `branding.icon_url` parameter. The request updates the application identified by your API key, so you don't pass an application ID. Changes apply to the next auth request, with no cache to wait out.
```bash
curl --request PATCH \
--url 'https://api.us.nylas.com/v3/applications' \
--header 'Content-Type: application/json' \
--header 'Accept: application/json' \
--header 'Authorization: Bearer ' \
--data '{
"branding": {
"icon_url": "https://www.example.com/logo.png"
}
}'
```
## Register a custom hostname for Hosted Authentication
Replacing the logo doesn't change the domain, so `nylas.com` still appears in the browser and on the provider's account picker. Registering a custom hostname puts your own subdomain on every hop that Nylas controls, which removes the `Choose an account to continue to nylas.com` prompt that stops security-conscious users. Setup takes 2 DNS records and one verification click.
 Use a subdomain that reads as yours in a browser, such as `auth.example.com` or `connect.example.com`.
A custom hostname is a subdomain you own that Nylas serves under its own TLS certificate. Registration is organization-level and shared: Hosted Authentication and [message tracking](/docs/v3/email/message-tracking/#use-a-custom-tracking-hostname) use the same registry, the same DNS records, and the same certificate process. There's no purpose field, and you don't attach a hostname to an application.
Register a separate hostname for each use, because the two are seen in different places. A hostname such as `auth.example.com` appears in the browser while someone connects their mailbox, and one such as `links.example.com` appears in tracked links inside messages you send. Registering both is the same 4 steps, run twice.
1. Open **Organization > Domains > Custom Hostnames** in the [Nylas Dashboard](https://dashboard-v3.nylas.com/organization/domains?tab=hosted-auth).
2. Add the fully qualified hostname you want to use. Nylas generates the two `CNAME` records for it, one for traffic and one for Automated Certificate Management Environment (ACME) validation.
3. Publish both records the Dashboard lists under **Configure DNS Records**. Use **Copy zone file** to grab them in one step, or copy each target individually.
4. Click **Verify**. Nylas checks the records, issues the TLS certificate, and confirms when the hostname is active and ready to use.
| Dashboard label | Record name | `CNAME` target | Purpose |
| --- | --- | --- | --- |
| Traffic CNAME | `` | `.ch..nylas.com` | Routes requests for the hostname to Nylas. |
| ACME delegation CNAME | `_acme-challenge.` | `.acme..nylas.com` | Lets Nylas issue and renew the hostname's TLS certificate. |
Both targets share one certificate ID, a UUID unique to that hostname, and `` is the region your organization is in: `us` or `eu`. Copy the values from the Dashboard rather than assembling them by hand.
Verification is the only manual step. Once you click **Verify** and both records resolve, Nylas issues the certificate over ACME and it usually goes active in under a minute.
> **Warn:**
> **Deleting a custom hostname takes effect immediately.** Hosted Authentication stops working on that hostname, and tracking links and tracking images in messages you already sent break. Keep both DNS records in place while any auth flow or delivered message still depends on the hostname.
An active certificate isn't the finish line. The two steps below register the callback URI that the flow redirects to, and both are required before anyone can complete authentication on your hostname.
## Register the callback URI on your Nylas application
The callback on your custom hostname is a different URI from the default `api.us.nylas.com` callback, so it needs its own entry on your Nylas application. Add it with a [POST to the callback URIs endpoint](/docs/reference/api/applications/add_callback_uri/), or in the Dashboard under **Hosted Authentication > Callback URIs**. The `platform` field defaults to `web`.
```bash
curl --request POST \
--url 'https://api.us.nylas.com/v3/applications/redirect-uris' \
--header 'Content-Type: application/json' \
--header 'Authorization: Bearer ' \
--data '{
"url": "https://auth.example.com/v3/connect/callback",
"platform": "web"
}'
```
Without this entry, `/v3/connect/auth` rejects the request with HTTP 400 and an HTML error page before the user sees a provider screen. The body reads:
> `Status 701: invalid_query_params`
>
> `For Application '' given RedirectURI 'https://auth.example.com/v3/connect/callback' is not allowed`
## Add the callback URI to your provider OAuth app
The flow hands the provider whatever `redirect_uri` it was started with, so `https://auth.example.com/v3/connect/callback` must also be a registered redirect URI in the Google or Azure OAuth application behind your connector. This is the step that most often breaks a custom hostname, and it fails at the very end, after all 3 preceding redirects have already succeeded.
- **Google**: in the Google Cloud console, open **APIs & Services > Credentials**, select the OAuth client, and add the URI under **Authorised redirect URIs**.
- **Azure**: in the Microsoft Entra admin center, open **App registrations**, select the app, and add the URI under **Redirect URIs**.
Add the custom-hostname callback alongside the existing `api.us.nylas.com/v3/connect/callback` entry rather than replacing it. Keeping both lets you roll back to the Nylas hostname without another round of provider-side changes. If it's missing, the provider stops the flow with its own error:
> `Error 400: redirect_uri_mismatch`
> **Warn:**
> **A whitelabeled auth flow needs your own provider credentials.** On Nylas default credentials, including the [Shared GCP App](/docs/provider-guides/google/shared-gcp-app/), the OAuth client isn't yours, so there's no way to add your callback URI to it and the flow always ends in `redirect_uri_mismatch`. Create a connector with your own Google Cloud Platform project or Azure app first. See [hosted vs custom OAuth](/docs/cookbook/use-cases/build/hosted-vs-custom-oauth/) for the difference between the two paths.
## Start authentication on your custom hostname
Once the hostname and both callback URIs are registered, your custom hostname is a drop-in replacement for `api.us.nylas.com` in the authorization URL. Nothing else about the flow changes: the same query parameters apply, and the token exchange and grant IDs are identical to the default flow.
```bash
https://auth.example.com/v3/connect/auth
?client_id=
&redirect_uri=https%3A%2F%2Fauth.example.com%2Fv3%2Fconnect%2Fcallback
&response_type=code
&provider=google
&access_type=offline
```
That request produces 3 redirects, and the first 2 stay on your hostname:
```text
302 auth.example.com/v3/connect/auth
302 auth.example.com/v3/connect/login?id=
302 accounts.google.com/o/oauth2/v2/auth?…&redirect_uri=https://auth.example.com/v3/connect/callback
```
Drop the `provider` parameter and Nylas renders the provider picker on your hostname instead, titled with your application name. For the full token exchange that follows the callback, see [creating grants with Hosted Authentication and an API key](/docs/v3/auth/hosted-oauth-apikey/).
## Verify and troubleshoot a custom hostname
Test each layer separately, because a failure at any one of the 4 layers looks similar from the browser. Run these checks in order, and stop at the first one that doesn't behave as described. Working top to bottom tells you whether the problem is DNS, TLS, the Nylas application, or the provider OAuth app.
```bash
# 1. Both CNAME records resolve
dig +short auth.example.com
dig +short _acme-challenge.auth.example.com
# 2. TLS is live and Nylas is answering on the hostname
curl -sI https://auth.example.com/ | head -1
# 3. Nylas accepts the auth request (expect a 302, not a 400)
curl -s -o /dev/null -w "%{http_code} %{redirect_url}\n" \
"https://auth.example.com/v3/connect/auth?client_id=&redirect_uri=&response_type=code"
# 4. The provider accepts the callback (look for redirect_uri_mismatch)
curl -sL -o /dev/null -w "%{url_effective}\n" \
"https://auth.example.com/v3/connect/auth?client_id=&redirect_uri=&response_type=code&provider=google"
```
| Symptom | Cause |
| --- | --- |
| A `CNAME` record doesn't resolve | The record isn't published, or the certificate ID in the target is wrong |
| The certificate never becomes active | You haven't clicked **Verify**, or the `_acme-challenge` record is missing or points at the wrong target |
| `Status 701: invalid_query_params … RedirectURI … is not allowed` | The callback URI isn't registered on your Nylas application |
| `Error 400: redirect_uri_mismatch` at the provider | The callback URI isn't in your provider OAuth app, or you're on Nylas default credentials |
## What's next
- [Configure the Hosted Authentication login prompt](/docs/v3/auth/customize-login-prompt/) to control which account picker users see
- [Use a custom tracking hostname](/docs/v3/email/message-tracking/#use-a-custom-tracking-hostname) to reuse the same hostname for link and open tracking
- [Use multiple provider applications](/docs/v3/auth/using-multiple-provider-applications/) when customers bring their own Google or Azure apps
- [Troubleshoot OAuth errors](/docs/cookbook/use-cases/build/troubleshoot-oauth-errors/) for the wider set of auth failures
Use a subdomain that reads as yours in a browser, such as `auth.example.com` or `connect.example.com`.
A custom hostname is a subdomain you own that Nylas serves under its own TLS certificate. Registration is organization-level and shared: Hosted Authentication and [message tracking](/docs/v3/email/message-tracking/#use-a-custom-tracking-hostname) use the same registry, the same DNS records, and the same certificate process. There's no purpose field, and you don't attach a hostname to an application.
Register a separate hostname for each use, because the two are seen in different places. A hostname such as `auth.example.com` appears in the browser while someone connects their mailbox, and one such as `links.example.com` appears in tracked links inside messages you send. Registering both is the same 4 steps, run twice.
1. Open **Organization > Domains > Custom Hostnames** in the [Nylas Dashboard](https://dashboard-v3.nylas.com/organization/domains?tab=hosted-auth).
2. Add the fully qualified hostname you want to use. Nylas generates the two `CNAME` records for it, one for traffic and one for Automated Certificate Management Environment (ACME) validation.
3. Publish both records the Dashboard lists under **Configure DNS Records**. Use **Copy zone file** to grab them in one step, or copy each target individually.
4. Click **Verify**. Nylas checks the records, issues the TLS certificate, and confirms when the hostname is active and ready to use.
| Dashboard label | Record name | `CNAME` target | Purpose |
| --- | --- | --- | --- |
| Traffic CNAME | `` | `.ch..nylas.com` | Routes requests for the hostname to Nylas. |
| ACME delegation CNAME | `_acme-challenge.` | `.acme..nylas.com` | Lets Nylas issue and renew the hostname's TLS certificate. |
Both targets share one certificate ID, a UUID unique to that hostname, and `` is the region your organization is in: `us` or `eu`. Copy the values from the Dashboard rather than assembling them by hand.
Verification is the only manual step. Once you click **Verify** and both records resolve, Nylas issues the certificate over ACME and it usually goes active in under a minute.
> **Warn:**
> **Deleting a custom hostname takes effect immediately.** Hosted Authentication stops working on that hostname, and tracking links and tracking images in messages you already sent break. Keep both DNS records in place while any auth flow or delivered message still depends on the hostname.
An active certificate isn't the finish line. The two steps below register the callback URI that the flow redirects to, and both are required before anyone can complete authentication on your hostname.
## Register the callback URI on your Nylas application
The callback on your custom hostname is a different URI from the default `api.us.nylas.com` callback, so it needs its own entry on your Nylas application. Add it with a [POST to the callback URIs endpoint](/docs/reference/api/applications/add_callback_uri/), or in the Dashboard under **Hosted Authentication > Callback URIs**. The `platform` field defaults to `web`.
```bash
curl --request POST \
--url 'https://api.us.nylas.com/v3/applications/redirect-uris' \
--header 'Content-Type: application/json' \
--header 'Authorization: Bearer ' \
--data '{
"url": "https://auth.example.com/v3/connect/callback",
"platform": "web"
}'
```
Without this entry, `/v3/connect/auth` rejects the request with HTTP 400 and an HTML error page before the user sees a provider screen. The body reads:
> `Status 701: invalid_query_params`
>
> `For Application '' given RedirectURI 'https://auth.example.com/v3/connect/callback' is not allowed`
## Add the callback URI to your provider OAuth app
The flow hands the provider whatever `redirect_uri` it was started with, so `https://auth.example.com/v3/connect/callback` must also be a registered redirect URI in the Google or Azure OAuth application behind your connector. This is the step that most often breaks a custom hostname, and it fails at the very end, after all 3 preceding redirects have already succeeded.
- **Google**: in the Google Cloud console, open **APIs & Services > Credentials**, select the OAuth client, and add the URI under **Authorised redirect URIs**.
- **Azure**: in the Microsoft Entra admin center, open **App registrations**, select the app, and add the URI under **Redirect URIs**.
Add the custom-hostname callback alongside the existing `api.us.nylas.com/v3/connect/callback` entry rather than replacing it. Keeping both lets you roll back to the Nylas hostname without another round of provider-side changes. If it's missing, the provider stops the flow with its own error:
> `Error 400: redirect_uri_mismatch`
> **Warn:**
> **A whitelabeled auth flow needs your own provider credentials.** On Nylas default credentials, including the [Shared GCP App](/docs/provider-guides/google/shared-gcp-app/), the OAuth client isn't yours, so there's no way to add your callback URI to it and the flow always ends in `redirect_uri_mismatch`. Create a connector with your own Google Cloud Platform project or Azure app first. See [hosted vs custom OAuth](/docs/cookbook/use-cases/build/hosted-vs-custom-oauth/) for the difference between the two paths.
## Start authentication on your custom hostname
Once the hostname and both callback URIs are registered, your custom hostname is a drop-in replacement for `api.us.nylas.com` in the authorization URL. Nothing else about the flow changes: the same query parameters apply, and the token exchange and grant IDs are identical to the default flow.
```bash
https://auth.example.com/v3/connect/auth
?client_id=
&redirect_uri=https%3A%2F%2Fauth.example.com%2Fv3%2Fconnect%2Fcallback
&response_type=code
&provider=google
&access_type=offline
```
That request produces 3 redirects, and the first 2 stay on your hostname:
```text
302 auth.example.com/v3/connect/auth
302 auth.example.com/v3/connect/login?id=
302 accounts.google.com/o/oauth2/v2/auth?…&redirect_uri=https://auth.example.com/v3/connect/callback
```
Drop the `provider` parameter and Nylas renders the provider picker on your hostname instead, titled with your application name. For the full token exchange that follows the callback, see [creating grants with Hosted Authentication and an API key](/docs/v3/auth/hosted-oauth-apikey/).
## Verify and troubleshoot a custom hostname
Test each layer separately, because a failure at any one of the 4 layers looks similar from the browser. Run these checks in order, and stop at the first one that doesn't behave as described. Working top to bottom tells you whether the problem is DNS, TLS, the Nylas application, or the provider OAuth app.
```bash
# 1. Both CNAME records resolve
dig +short auth.example.com
dig +short _acme-challenge.auth.example.com
# 2. TLS is live and Nylas is answering on the hostname
curl -sI https://auth.example.com/ | head -1
# 3. Nylas accepts the auth request (expect a 302, not a 400)
curl -s -o /dev/null -w "%{http_code} %{redirect_url}\n" \
"https://auth.example.com/v3/connect/auth?client_id=&redirect_uri=&response_type=code"
# 4. The provider accepts the callback (look for redirect_uri_mismatch)
curl -sL -o /dev/null -w "%{url_effective}\n" \
"https://auth.example.com/v3/connect/auth?client_id=&redirect_uri=&response_type=code&provider=google"
```
| Symptom | Cause |
| --- | --- |
| A `CNAME` record doesn't resolve | The record isn't published, or the certificate ID in the target is wrong |
| The certificate never becomes active | You haven't clicked **Verify**, or the `_acme-challenge` record is missing or points at the wrong target |
| `Status 701: invalid_query_params … RedirectURI … is not allowed` | The callback URI isn't registered on your Nylas application |
| `Error 400: redirect_uri_mismatch` at the provider | The callback URI isn't in your provider OAuth app, or you're on Nylas default credentials |
## What's next
- [Configure the Hosted Authentication login prompt](/docs/v3/auth/customize-login-prompt/) to control which account picker users see
- [Use a custom tracking hostname](/docs/v3/email/message-tracking/#use-a-custom-tracking-hostname) to reuse the same hostname for link and open tracking
- [Use multiple provider applications](/docs/v3/auth/using-multiple-provider-applications/) when customers bring their own Google or Azure apps
- [Troubleshoot OAuth errors](/docs/cookbook/use-cases/build/troubleshoot-oauth-errors/) for the wider set of auth failures