 4. Select **Enable MFA**.
5. Scan the QR code using your preferred authenticator app and follow the steps displayed.
### Enable multi-factor authentication for organization
If you're the administrator of your organization, you can choose to require MFA at login for any users whose accounts don't use SSO.
1. Log in to the [Dashboard](https://dashboard-v3.nylas.com/login?utm_source=docs&utm_content=dashboard) as a user with Admin permissions.
2. Expand the **account** menu at the top-right of the page.
3. Click the **gear** symbol next to your organization's name.
4. Toggle **Require multi-factor authentication (MFA)** to **on**.
The next time users sign in, they'll be prompted to set up MFA for their account. Users who are logged in when you enable this setting aren't logged out immediately, and they don't receive an email notification about the new requirement.
────────────────────────────────────────────────────────────────────────────────
title: "Developing with Nylas"
description: "Get started developing a project with Nylas."
source: "https://developer.nylas.com/docs/dev-guide/develop-with-nylas/"
────────────────────────────────────────────────────────────────────────────────
Developing a project with a Nylas integration can be divided into a few phases. This guide is here to help you along the way. 🚀
1. [Set up your Nylas account and organization](#create-a-nylas-account-and-organization).
2. [Create a Nylas application for development](#create-a-nylas-application-for-development).
3. [Plan your project](#plan-your-project).
4. [Choose how to authenticate your users](#choose-how-to-authenticate-users).
5. [Create your provider auth apps](#create-provider-auth-apps).
6. [Start developing with the Nylas APIs](#start-developing-with-nylas).
7. Set up [notifications](#set-up-notifications) and [systems for handling them at scale](/docs/dev-guide/best-practices/webhook-best-practices/).
8. [Set up grant status monitoring](#set-up-grant-status-monitoring) using webhooks.
9. [Set up error monitoring and handling](#set-up-error-monitoring-and-handling).
10. Complete our [Production Checklist](#production-checklist) to get your app through provider security reviews, published, and launched!
## Create a Nylas account and organization
When you're ready to start, [create a Nylas account](https://dashboard-v3.nylas.com/register?utm_source=docs&utm_content=dev-w-nylas). If you're the first person on your team to create an account, you can make your account the "organization" and invite colleagues who're helping with development and testing. The account that hosts the organization is the one that has billing details attached to it, so decide amongst yourselves which account should "host" the organization.
An **organization** represents a company using the Nylas platform. It's a collection of Nylas applications and Dashboard accounts which are linked together and paid for in the same way. Billing, support, data usage, and feature enablement are handled at the organization level.
:::info
**When you first sign up with Nylas, your account is on an unpaid trial**. Nylas trial environments are limited to 10 grants and don't include message tracking (analytics) features, but are otherwise the same as paid environments. If you need to test message tracking, contact your Nylas sales representative.
:::
To invite teammates to a Nylas organization...
1. Log in to the [Nylas Dashboard](https://dashboard-v3.nylas.com/?utm_source=docs&utm_content=develop-with-nylas).
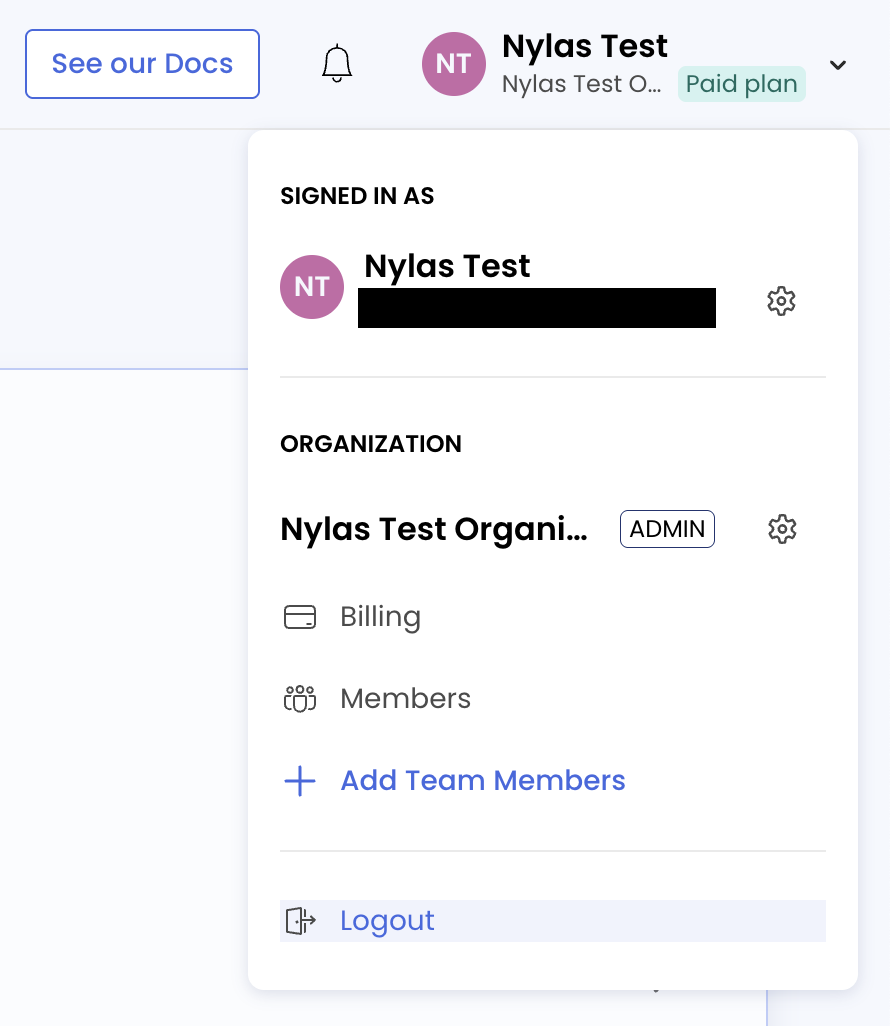
2. Expand the **account** dropdown at the top-right of the page.
3. Under **Organization**, select **Add Team Members**.
4. Enter your teammate's email address and choose a role for their account.
4. Select **Enable MFA**.
5. Scan the QR code using your preferred authenticator app and follow the steps displayed.
### Enable multi-factor authentication for organization
If you're the administrator of your organization, you can choose to require MFA at login for any users whose accounts don't use SSO.
1. Log in to the [Dashboard](https://dashboard-v3.nylas.com/login?utm_source=docs&utm_content=dashboard) as a user with Admin permissions.
2. Expand the **account** menu at the top-right of the page.
3. Click the **gear** symbol next to your organization's name.
4. Toggle **Require multi-factor authentication (MFA)** to **on**.
The next time users sign in, they'll be prompted to set up MFA for their account. Users who are logged in when you enable this setting aren't logged out immediately, and they don't receive an email notification about the new requirement.
────────────────────────────────────────────────────────────────────────────────
title: "Developing with Nylas"
description: "Get started developing a project with Nylas."
source: "https://developer.nylas.com/docs/dev-guide/develop-with-nylas/"
────────────────────────────────────────────────────────────────────────────────
Developing a project with a Nylas integration can be divided into a few phases. This guide is here to help you along the way. 🚀
1. [Set up your Nylas account and organization](#create-a-nylas-account-and-organization).
2. [Create a Nylas application for development](#create-a-nylas-application-for-development).
3. [Plan your project](#plan-your-project).
4. [Choose how to authenticate your users](#choose-how-to-authenticate-users).
5. [Create your provider auth apps](#create-provider-auth-apps).
6. [Start developing with the Nylas APIs](#start-developing-with-nylas).
7. Set up [notifications](#set-up-notifications) and [systems for handling them at scale](/docs/dev-guide/best-practices/webhook-best-practices/).
8. [Set up grant status monitoring](#set-up-grant-status-monitoring) using webhooks.
9. [Set up error monitoring and handling](#set-up-error-monitoring-and-handling).
10. Complete our [Production Checklist](#production-checklist) to get your app through provider security reviews, published, and launched!
## Create a Nylas account and organization
When you're ready to start, [create a Nylas account](https://dashboard-v3.nylas.com/register?utm_source=docs&utm_content=dev-w-nylas). If you're the first person on your team to create an account, you can make your account the "organization" and invite colleagues who're helping with development and testing. The account that hosts the organization is the one that has billing details attached to it, so decide amongst yourselves which account should "host" the organization.
An **organization** represents a company using the Nylas platform. It's a collection of Nylas applications and Dashboard accounts which are linked together and paid for in the same way. Billing, support, data usage, and feature enablement are handled at the organization level.
:::info
**When you first sign up with Nylas, your account is on an unpaid trial**. Nylas trial environments are limited to 10 grants and don't include message tracking (analytics) features, but are otherwise the same as paid environments. If you need to test message tracking, contact your Nylas sales representative.
:::
To invite teammates to a Nylas organization...
1. Log in to the [Nylas Dashboard](https://dashboard-v3.nylas.com/?utm_source=docs&utm_content=develop-with-nylas).
2. Expand the **account** dropdown at the top-right of the page.
3. Under **Organization**, select **Add Team Members**.
4. Enter your teammate's email address and choose a role for their account.
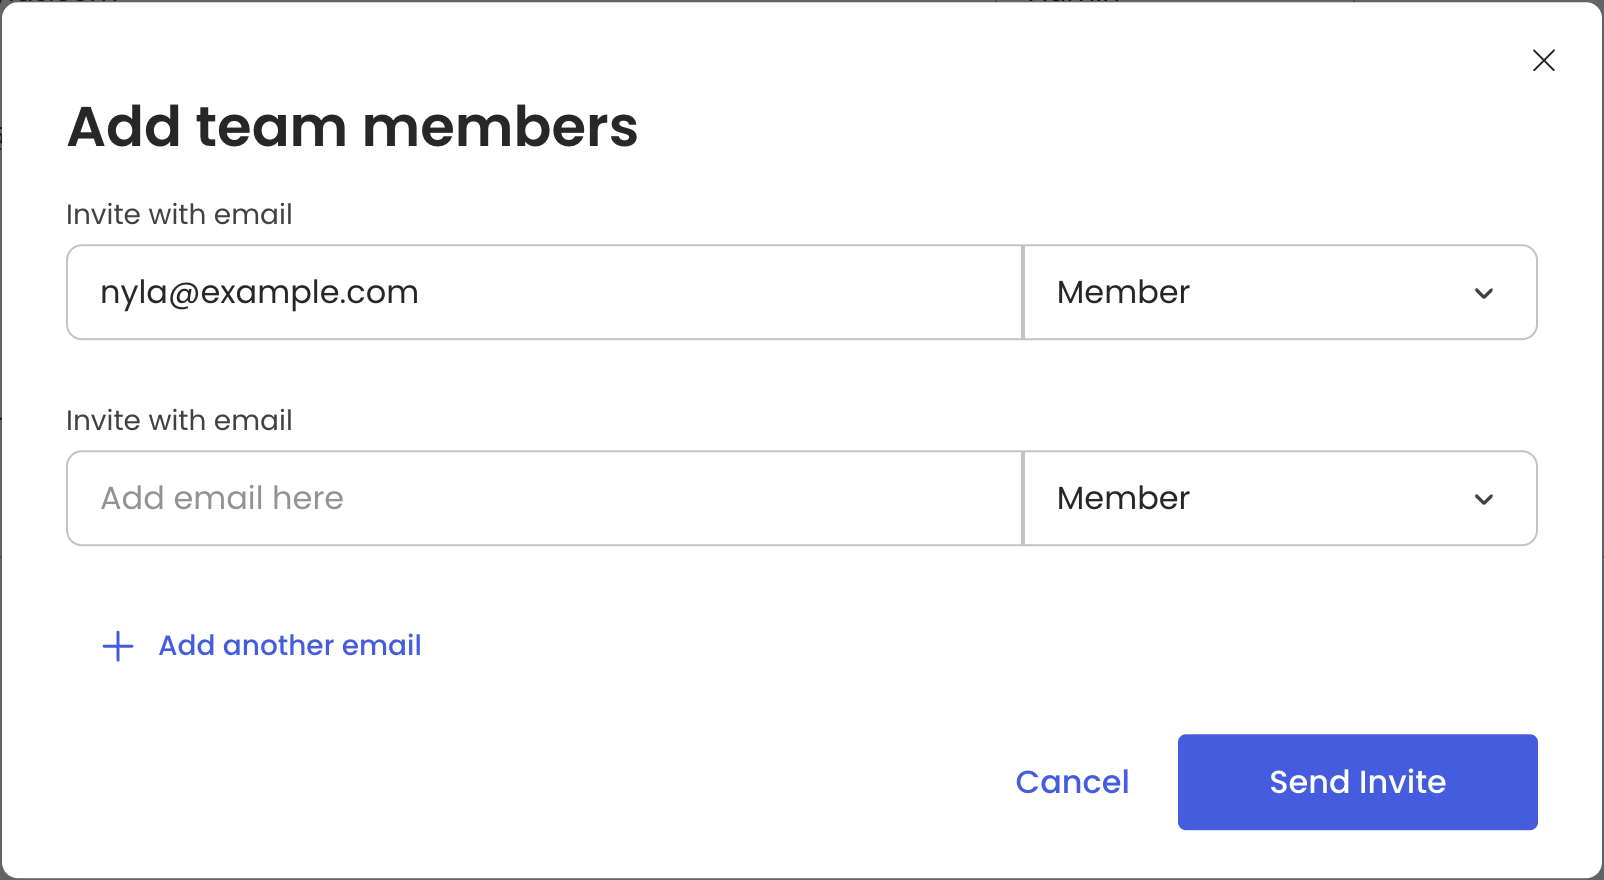 5. Click **Send Invite**.
Nylas sends an email containing an invitation link. When your teammate clicks the link, they're prompted to create their own Nylas account. Their account is automatically associated with your organization. If you or a teammate created a Nylas account without clicking an invitation link, [contact Nylas Support](https://support.nylas.com/hc/en-us/requests/new) to add the account to your organization.
## Create a Nylas application for development
Each organization can have multiple Nylas applications registered to it. When you first create your account, Nylas creates a Sandbox application for you to use to test out the services.
:::success
**We strongly recommend you set up separate Nylas applications for your development, staging, and production environments**. Each application has a unique client ID and secret which you use to manage and [authenticate](/docs/v3/auth/) your users' grants.
:::
Your application's client ID, client secret, and API key allow you to manage grants and application settings. You should treat them like any other credentials and [store them securely](/docs/dev-guide/best-practices/#store-secrets-securely).
To create a development application...
1. Expand the application list at the upper-left of the Nylas Dashboard.
2. Click **Create new application**.
3. Give the application a **name**, a brief **description**, and choose the **data residency region** and **environment**.
5. Click **Send Invite**.
Nylas sends an email containing an invitation link. When your teammate clicks the link, they're prompted to create their own Nylas account. Their account is automatically associated with your organization. If you or a teammate created a Nylas account without clicking an invitation link, [contact Nylas Support](https://support.nylas.com/hc/en-us/requests/new) to add the account to your organization.
## Create a Nylas application for development
Each organization can have multiple Nylas applications registered to it. When you first create your account, Nylas creates a Sandbox application for you to use to test out the services.
:::success
**We strongly recommend you set up separate Nylas applications for your development, staging, and production environments**. Each application has a unique client ID and secret which you use to manage and [authenticate](/docs/v3/auth/) your users' grants.
:::
Your application's client ID, client secret, and API key allow you to manage grants and application settings. You should treat them like any other credentials and [store them securely](/docs/dev-guide/best-practices/#store-secrets-securely).
To create a development application...
1. Expand the application list at the upper-left of the Nylas Dashboard.
2. Click **Create new application**.
3. Give the application a **name**, a brief **description**, and choose the **data residency region** and **environment**.
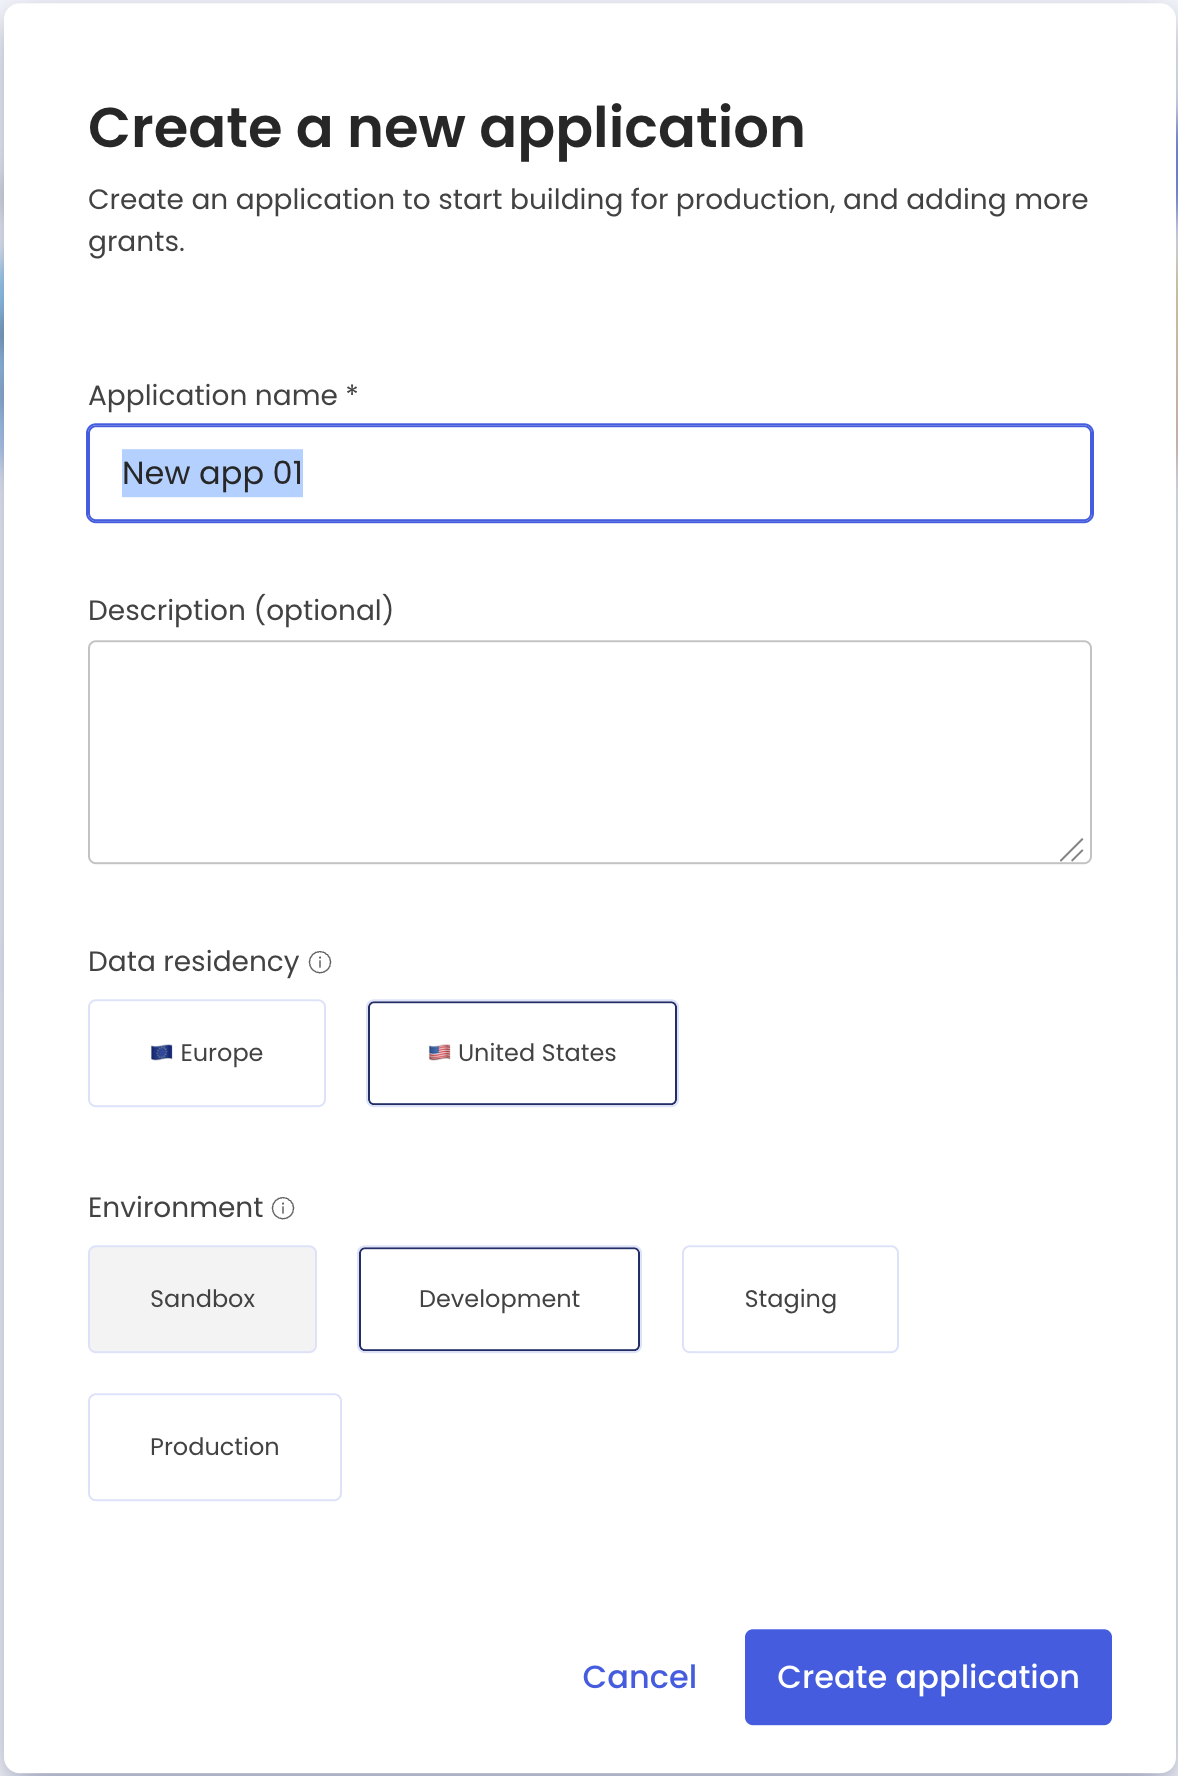 4. Click **Create application**.
## Plan your project
Your project will use the Nylas APIs to access your users' accounts on their behalf, and webhook notifications to monitor activity that your application needs to know about.
Before you start integrating with Nylas, you should list the activities that you want to do in your project that require access to the service provider, and the results and changes you want to monitor to inform how your application responds. For example, if you're building a calendaring app, you know that you'll need to _read_ a user's calendar so you can pick an available time slot. You also know you want to _write_ to the calendar so you can create events. Perhaps you also want to choose from a list of the user's contacts when inviting people to the event, which requires read access to their contacts list.
But what happens if a participant declines the event invitation? Or if the creator cancels the event from outside your application? You'll want to monitor for these changes using webhook notifications, so your application can respond appropriately.
Once you have a list of objects you want to interact with and get notifications about, you can review the [list of scopes for each provider](/docs/dev-guide/scopes/) and the [webhooks references](/docs/reference/api/webhook-notifications/).
## Choose how to authenticate users
Nylas offers [two ways to authenticate grants](/docs/v3/auth/) based on your project's requirements: [Hosted Authentication](/docs/v3/auth/hosted-oauth-apikey/) and [Custom Authentication](/docs/v3/auth/custom/).
For most projects, we recommend [**Hosted Authentication**](/docs/v3/auth/hosted-oauth-apikey/). When you use Hosted Auth, Nylas automatically detects the email provider the user is authenticating with, passes the user through the auth process with that provider, and returns them to your project. The work required to integrate Hosted Auth is minimal.
If you want to completely hide Nylas' branding and your users' provider details in the auth process, you might want to use [**Custom Authentication**](/docs/v3/auth/custom/). This can require a lot of development work, however.
You might also want to read more about the authentication requirements for individual service providers:
- [Google](/docs/provider-guides/google/)
- [Microsoft](/docs/provider-guides/microsoft/)
- [IMAP providers](/docs/provider-guides/imap/)
- [Microsoft Exchange on-premises](/docs/provider-guides/exchange-on-prem/)
- [iCloud](/docs/provider-guides/icloud/)
- [Yahoo](/docs/provider-guides/yahoo-authentication/)
- [Zoom Meetings](/docs/provider-guides/zoom-meetings/)
If you need to create a provider authentication application (for example, a Google Cloud Platform project), you should start that now.
### Store user access tokens and user data securely
During the authentication process, Nylas passes a user access token to your project. Your project needs this token so it can make requests to the Nylas APIs on the user's behalf. You'll need to store this token in your project, and you might want to cache or store other user data to avoid making unnecessary API calls. This information should be encrypted using a modern algorithm, both in transit and at rest. If at all possible, you should also use a secrets manager from your infrastructure provider.
:::warn
**Failure to follow security best practices might prevent your application from passing provider verification processes**. See our [security best practices](/docs/dev-guide/best-practices/) for more information.
:::
## Create provider auth apps
If you expect to connect to Google or Microsoft accounts, you'll need to create a provider auth app to connect to their servers.
:::info
**You can use provider auth apps with internal company accounts for development and testing with no extra steps**. You'll need to get it reviewed by the provider, however, before you can "go live" with your project. We recommend you maintain a provider auth app for each of your environments so you can make changes in your development and testing environments without affecting your production users.
:::
Creating a provider auth app is straightforward, and you can create one (or several) quickly so you can start developing. The provider review can take several weeks, however, and depends entirely on the provider's review process and which scope your project requests. Be sure to plan this into your development timeline!
### Google application review
You might need to take extra steps to comply with Google's OAuth 2.0 policies and complete their verification process before you can publish your Google auth app.
Be sure you're requesting only the most restrictive [scopes](/docs/dev-guide/scopes/) that you need for your project. If you request any of [Google's restricted scopes](/docs/provider-guides/google/google-verification-security-assessment-guide/#google-scopes), Google requires your application to complete a security assessment. This could extend your verification timeline significantly or cause Google to fail your review.
For more information, see our [Google verification and security assessment guide](/docs/provider-guides/google/google-verification-security-assessment-guide/).
## Start developing with Nylas
After you get your authentication flow set up, authenticate a test grant or two so you can work with the Nylas APIs.
:::success
**Nylas maintains SDKs in [**Node.js**](/docs/v3/sdks/node/), [**Python**](/docs/v3/sdks/python/), [**Ruby**](/docs/v3/sdks/ruby/), and [**Kotlin/Java**](/docs/v3/sdks/kotlin-java/)**. You can use any of them to interact with the Nylas APIs, or use a plain HTTP library instead.
:::
If you already know what you're going to build, or if your project is already mostly finished, you can read through the [Nylas API references](/docs/reference/api/) or our guides for working with the [Email](/docs/v3/email/), [Calendar](/docs/v3/calendar/), and [Contacts](/docs/v3/email/contacts/) APIs.
If you're just starting out and you're not sure where to begin, Nylas maintains a [repository of code samples](https://github.com/nylas-samples/) and a set of [fully functioning demo applications](https://github.com/nylas/use-cases/) you can use for inspiration. You can also use our [Postman collection](/docs/v3/api-references/postman/) to test the Nylas APIs.
## Set up notifications
After you've made a couple calls to the Nylas APIs, you should think about which events you want to know about so your project can respond to them appropriately. If you completed the [planning exercise](#plan-your-project) earlier, that's a great place to start. If you're building as you go, see our [list of notification schemas](/docs/reference/notifications/) for ideas.
Nylas allows you to subscribe to notifications using [webhooks](/docs/v3/notifications/), [Pub/Sub queues](/docs/v3/notifications/pubsub-channel/), or a mix of both. You can use notifications both to run core functionality in your project and to monitor for undesirable events (like errors!) so your application can handle them gracefully.
You should also consider the volume of notifications you're likely to get from your project and plan for scaling them appropriately. See our [best practices for webhooks](/docs/dev-guide/best-practices/webhook-best-practices/) for important tips and considerations to help your setup run smoothly and scale gracefully.
## Set up grant status monitoring
Your users are the life of your project, so it makes sense to keep a close eye on the state of their grants. After you have [authentication set up](#choose-how-to-authenticate-users), make sure you subscribe to the [grant state webhook triggers](/docs/reference/notifications/#grant-notifications) so you can get alerts when users run into problems and take appropriate action. This could be re-authenticating the user, sending them a prompt to re-authenticate or accept updated scopes, using an incremental backoff approach, or other actions specific to your project and use case.
:::success
**If you're authenticating using a Google provider auth app, make sure to [**set up Pub/Sub**](/docs/provider-guides/google/connect-google-pub-sub/)**. This ensures webhook notifications are delivered in a timely manner.
:::
You can also use the timestamps from the grant state webhook notifications to check the user's data for the period their grant was experiencing problems, after the issue is solved.
You can subscribe to these triggers either [from the Nylas Dashboard](/docs/v3/notifications/#create-a-webhook-in-the-nylas-dashboard), [using the webhooks endpoints](/docs/v3/notifications/#create-a-webhook-using-the-webhooks-api), or [using Nylas' SDKs](/docs/v3/notifications/#create-a-webhook-using-the-nylas-sdks).
### User data and authentication lifecycle management
Although Nylas access tokens don't expire, you can assume that you'll need to plan for authentication changes. These may pop up because of user actions or changes to provider policies. For example, if a user explicitly disconnects from or logs out of your application, you should revoke their Nylas access token to minimize the number of active tokens. You should also revoke any unused tokens when a user re-authenticates. See [Managing grants](/docs/dev-guide/best-practices/manage-grants/) for more information.
You should also think about how you want to handle changes in permission scopes (for example, if your project adds new functionality that needs more access). Scope changes require the user to re-authenticate and explicitly confirm that they're granting access to the new scopes.
If you choose to store your users' data in your own database, you need to [store their access tokens securely](#store-user-access-tokens-and-user-data-securely).
## Set up error monitoring and handling
Nylas has robust built-in strategies for handling provider errors and other normal network weather. Despite this, there are situations you should monitor and decide how to handle.
- **Invalid credentials**: When an account's OAuth token expires, is revoked, or their password is changed.
- **API errors**: When your project makes a request to the Nylas APIs and you get a non-`200` HTTP status code response, or a network error.
- **Account sync errors**: Persistent errors that prevent Nylas from getting the latest changes from the provider or writing new updates to the provider.
See [Monitoring and error handling](/docs/dev-guide/best-practices/error-handling/) for a list of common error states and best practices for handling them.
You might also want to [monitor your webhooks for errors](/docs/dev-guide/best-practices/webhook-best-practices/) and implement retry, backoff, and restart logic based on their status.
## Production checklist
Before you go live with your project, be sure that you've...
1. [Set up authentication](/docs/v3/auth/) and created [connectors](/docs/reference/api/connectors-integrations/) for all providers you plan to support.
2. Set up [webhook](/docs/v3/notifications/) or [Pub/Sub](/docs/v3/notifications/pubsub-channel/) notifications and [systems for handling them at scale](/docs/dev-guide/best-practices/webhook-best-practices/).
3. Set up error monitoring and handling for your systems.
4. Reviewed the [scopes](/docs/dev-guide/scopes/) your project is using to ensure you're only requesting those that you need.
5. Started a provider security review for your provider auth apps. See our [Google verification and security assessment guide](/docs/provider-guides/google/google-verification-security-assessment-guide/), [Microsoft verification guide](/docs/provider-guides/microsoft/verification-guide/), and the [general provider guides](/docs/provider-guides/) for more information.
Now it's time to go live and celebrate! 🥳
────────────────────────────────────────────────────────────────────────────────
title: "Nylas glossary"
description: "A handy list of definitions for terms used when working with Nylas."
source: "https://developer.nylas.com/docs/dev-guide/glossary/"
────────────────────────────────────────────────────────────────────────────────
This page lists some terms that you'll encounter when working with Nylas and explains what they mean.
:::success
**Have a suggestion for the glossary**? Let us know!
:::
────────────────────────────────────────────────────────────────────────────────
title: "About Nylas"
description: "Get up and running with Nylas APIs, SDKs, the Nylas CLI, MCP server, AI agent tools, and developer resources."
source: "https://developer.nylas.com/docs/dev-guide/"
────────────────────────────────────────────────────────────────────────────────
Nylas offers a set of REST-style integration APIs and tools that let you quickly add communications functionality to an application you're developing. You can use the Nylas APIs to integrate using any HTTP library that can make REST-style queries. The Nylas APIs accept and return JSON objects on every endpoint, so your interactions with the platform are predictable and straightforward.
Nylas currently supports v3.x of its APIs. For the latest information about new releases and SDK features, see the [changelog](/docs/changelogs/).
:::info
**We consider additive changes to be non-breaking**. Functionally, this means that Nylas can add fields to an API response object without releasing a new API version. Make sure you build your project to handle this possibility.
:::
You can manage your Nylas application using the [Nylas Dashboard](https://dashboard-v3.nylas.com/login), and build your integration using one of the Nylas-maintained SDKs ([Node.js](/docs/v3/sdks/node/), [Python](/docs/v3/sdks/python/), [Ruby](/docs/v3/sdks/ruby/), and [Kotlin/Java](/docs/v3/sdks/kotlin-java/)) or one of the community-maintained SDKs.
## API references
The [API reference](/docs/reference/api/) covers every REST endpoint across Email, Calendar, Contacts, Notetaker, Scheduler, ExtractAI, and administration. Other reference docs cover the rest of the platform:
- [Notification reference](/docs/reference/notifications/) for webhook and Pub/Sub triggers and payloads.
- [UI reference](/docs/reference/ui/) for the Nylas Scheduler UI components and props.
- [Nylas MCP server](/docs/dev-guide/mcp/) for connecting AI agents to email, calendar, and contacts.
- [Nylas CLI](/docs/v3/getting-started/cli/) for managing grants, webhooks, and API calls from the terminal.
You can also try the APIs in the [Nylas Postman collection](https://www.postman.com/trynylas/nylas-api/overview).
For platform-level details, see [error handling](/docs/dev-guide/best-practices/error-handling/) and [rate limits](/docs/dev-guide/best-practices/rate-limits/).
## Build with AI coding agents
If you're using an AI coding agent to build with Nylas, start with one of these:
- **[Nylas skills](/docs/v3/getting-started/ai-prompts/)** pre-load Claude Code, Cursor, Codex CLI, and 40+ other agents with Nylas API, CLI, and SDK context. Install with `npx skills add nylas/skills`.
- **[Claude Code plugin](/docs/v3/getting-started/ai-prompts/#option-1-install-the-nylas-skill-recommended)** installs the Nylas skills through the Claude Code plugin marketplace: `/plugin marketplace add nylas/skills`.
- **[Nylas MCP server](/docs/dev-guide/mcp/)** gives agents live access to email, calendar, and contacts. Works with Claude Code, Cursor, Claude Desktop, and any MCP-compatible client.
- **[AI agent guides](/docs/v3/guides/ai/mcp/claude-code/)** walk through MCP setup for Claude Code, [Codex CLI](/docs/v3/guides/ai/mcp/codex-cli/), and the [OpenClaw Nylas plugin](/docs/v3/guides/ai/openclaw/install-plugin/).
- **[AI coding agent quickstart](/docs/v3/getting-started/coding-agents/)** covers provisioning, SDK setup, and a working example.
The docs are also agent-readable. Any page returns clean markdown if you pass `Accept: text/markdown`, and [`llms.txt`](https://developer.nylas.com/llms.txt) and [`llms-full.txt`](https://developer.nylas.com/llms-full.txt) are published for retrieval.
## Guides and use cases
When you need more than an endpoint reference, look at [guides](/docs/v3/guides/) and [use cases](/docs/v3/use-cases/).
- **[Guides](/docs/v3/guides/)** cover provider-specific tasks. Each one focuses on a single task for a single provider, like [listing Microsoft messages](/docs/v3/guides/email/messages/list-messages-microsoft/) or [handling Gmail labels](/docs/v3/guides/email/messages/list-messages-google/), and calls out the folder naming, sync timing, rate limits, and auth quirks for that provider.
- **[Use cases](/docs/v3/use-cases/)** are end-to-end tutorials that combine multiple Nylas APIs, like [automating meeting follow-ups](/docs/v3/use-cases/act/automate-meeting-follow-ups/), [building an interview scheduling pipeline](/docs/v3/use-cases/build/interview-scheduling-pipeline/), or [syncing calendar events into a CRM](/docs/v3/use-cases/sync/sync-calendar-events-crm/). You can also browse them [by industry](/docs/v3/use-cases/#browse-by-industry).
## Changelogs
The [changelog](/docs/changelogs/) tracks product, SDK, CLI, and API updates. Subscribe to an RSS feed for updates:
- [Combined feed](/atom.xml)
4. Click **Create application**.
## Plan your project
Your project will use the Nylas APIs to access your users' accounts on their behalf, and webhook notifications to monitor activity that your application needs to know about.
Before you start integrating with Nylas, you should list the activities that you want to do in your project that require access to the service provider, and the results and changes you want to monitor to inform how your application responds. For example, if you're building a calendaring app, you know that you'll need to _read_ a user's calendar so you can pick an available time slot. You also know you want to _write_ to the calendar so you can create events. Perhaps you also want to choose from a list of the user's contacts when inviting people to the event, which requires read access to their contacts list.
But what happens if a participant declines the event invitation? Or if the creator cancels the event from outside your application? You'll want to monitor for these changes using webhook notifications, so your application can respond appropriately.
Once you have a list of objects you want to interact with and get notifications about, you can review the [list of scopes for each provider](/docs/dev-guide/scopes/) and the [webhooks references](/docs/reference/api/webhook-notifications/).
## Choose how to authenticate users
Nylas offers [two ways to authenticate grants](/docs/v3/auth/) based on your project's requirements: [Hosted Authentication](/docs/v3/auth/hosted-oauth-apikey/) and [Custom Authentication](/docs/v3/auth/custom/).
For most projects, we recommend [**Hosted Authentication**](/docs/v3/auth/hosted-oauth-apikey/). When you use Hosted Auth, Nylas automatically detects the email provider the user is authenticating with, passes the user through the auth process with that provider, and returns them to your project. The work required to integrate Hosted Auth is minimal.
If you want to completely hide Nylas' branding and your users' provider details in the auth process, you might want to use [**Custom Authentication**](/docs/v3/auth/custom/). This can require a lot of development work, however.
You might also want to read more about the authentication requirements for individual service providers:
- [Google](/docs/provider-guides/google/)
- [Microsoft](/docs/provider-guides/microsoft/)
- [IMAP providers](/docs/provider-guides/imap/)
- [Microsoft Exchange on-premises](/docs/provider-guides/exchange-on-prem/)
- [iCloud](/docs/provider-guides/icloud/)
- [Yahoo](/docs/provider-guides/yahoo-authentication/)
- [Zoom Meetings](/docs/provider-guides/zoom-meetings/)
If you need to create a provider authentication application (for example, a Google Cloud Platform project), you should start that now.
### Store user access tokens and user data securely
During the authentication process, Nylas passes a user access token to your project. Your project needs this token so it can make requests to the Nylas APIs on the user's behalf. You'll need to store this token in your project, and you might want to cache or store other user data to avoid making unnecessary API calls. This information should be encrypted using a modern algorithm, both in transit and at rest. If at all possible, you should also use a secrets manager from your infrastructure provider.
:::warn
**Failure to follow security best practices might prevent your application from passing provider verification processes**. See our [security best practices](/docs/dev-guide/best-practices/) for more information.
:::
## Create provider auth apps
If you expect to connect to Google or Microsoft accounts, you'll need to create a provider auth app to connect to their servers.
:::info
**You can use provider auth apps with internal company accounts for development and testing with no extra steps**. You'll need to get it reviewed by the provider, however, before you can "go live" with your project. We recommend you maintain a provider auth app for each of your environments so you can make changes in your development and testing environments without affecting your production users.
:::
Creating a provider auth app is straightforward, and you can create one (or several) quickly so you can start developing. The provider review can take several weeks, however, and depends entirely on the provider's review process and which scope your project requests. Be sure to plan this into your development timeline!
### Google application review
You might need to take extra steps to comply with Google's OAuth 2.0 policies and complete their verification process before you can publish your Google auth app.
Be sure you're requesting only the most restrictive [scopes](/docs/dev-guide/scopes/) that you need for your project. If you request any of [Google's restricted scopes](/docs/provider-guides/google/google-verification-security-assessment-guide/#google-scopes), Google requires your application to complete a security assessment. This could extend your verification timeline significantly or cause Google to fail your review.
For more information, see our [Google verification and security assessment guide](/docs/provider-guides/google/google-verification-security-assessment-guide/).
## Start developing with Nylas
After you get your authentication flow set up, authenticate a test grant or two so you can work with the Nylas APIs.
:::success
**Nylas maintains SDKs in [**Node.js**](/docs/v3/sdks/node/), [**Python**](/docs/v3/sdks/python/), [**Ruby**](/docs/v3/sdks/ruby/), and [**Kotlin/Java**](/docs/v3/sdks/kotlin-java/)**. You can use any of them to interact with the Nylas APIs, or use a plain HTTP library instead.
:::
If you already know what you're going to build, or if your project is already mostly finished, you can read through the [Nylas API references](/docs/reference/api/) or our guides for working with the [Email](/docs/v3/email/), [Calendar](/docs/v3/calendar/), and [Contacts](/docs/v3/email/contacts/) APIs.
If you're just starting out and you're not sure where to begin, Nylas maintains a [repository of code samples](https://github.com/nylas-samples/) and a set of [fully functioning demo applications](https://github.com/nylas/use-cases/) you can use for inspiration. You can also use our [Postman collection](/docs/v3/api-references/postman/) to test the Nylas APIs.
## Set up notifications
After you've made a couple calls to the Nylas APIs, you should think about which events you want to know about so your project can respond to them appropriately. If you completed the [planning exercise](#plan-your-project) earlier, that's a great place to start. If you're building as you go, see our [list of notification schemas](/docs/reference/notifications/) for ideas.
Nylas allows you to subscribe to notifications using [webhooks](/docs/v3/notifications/), [Pub/Sub queues](/docs/v3/notifications/pubsub-channel/), or a mix of both. You can use notifications both to run core functionality in your project and to monitor for undesirable events (like errors!) so your application can handle them gracefully.
You should also consider the volume of notifications you're likely to get from your project and plan for scaling them appropriately. See our [best practices for webhooks](/docs/dev-guide/best-practices/webhook-best-practices/) for important tips and considerations to help your setup run smoothly and scale gracefully.
## Set up grant status monitoring
Your users are the life of your project, so it makes sense to keep a close eye on the state of their grants. After you have [authentication set up](#choose-how-to-authenticate-users), make sure you subscribe to the [grant state webhook triggers](/docs/reference/notifications/#grant-notifications) so you can get alerts when users run into problems and take appropriate action. This could be re-authenticating the user, sending them a prompt to re-authenticate or accept updated scopes, using an incremental backoff approach, or other actions specific to your project and use case.
:::success
**If you're authenticating using a Google provider auth app, make sure to [**set up Pub/Sub**](/docs/provider-guides/google/connect-google-pub-sub/)**. This ensures webhook notifications are delivered in a timely manner.
:::
You can also use the timestamps from the grant state webhook notifications to check the user's data for the period their grant was experiencing problems, after the issue is solved.
You can subscribe to these triggers either [from the Nylas Dashboard](/docs/v3/notifications/#create-a-webhook-in-the-nylas-dashboard), [using the webhooks endpoints](/docs/v3/notifications/#create-a-webhook-using-the-webhooks-api), or [using Nylas' SDKs](/docs/v3/notifications/#create-a-webhook-using-the-nylas-sdks).
### User data and authentication lifecycle management
Although Nylas access tokens don't expire, you can assume that you'll need to plan for authentication changes. These may pop up because of user actions or changes to provider policies. For example, if a user explicitly disconnects from or logs out of your application, you should revoke their Nylas access token to minimize the number of active tokens. You should also revoke any unused tokens when a user re-authenticates. See [Managing grants](/docs/dev-guide/best-practices/manage-grants/) for more information.
You should also think about how you want to handle changes in permission scopes (for example, if your project adds new functionality that needs more access). Scope changes require the user to re-authenticate and explicitly confirm that they're granting access to the new scopes.
If you choose to store your users' data in your own database, you need to [store their access tokens securely](#store-user-access-tokens-and-user-data-securely).
## Set up error monitoring and handling
Nylas has robust built-in strategies for handling provider errors and other normal network weather. Despite this, there are situations you should monitor and decide how to handle.
- **Invalid credentials**: When an account's OAuth token expires, is revoked, or their password is changed.
- **API errors**: When your project makes a request to the Nylas APIs and you get a non-`200` HTTP status code response, or a network error.
- **Account sync errors**: Persistent errors that prevent Nylas from getting the latest changes from the provider or writing new updates to the provider.
See [Monitoring and error handling](/docs/dev-guide/best-practices/error-handling/) for a list of common error states and best practices for handling them.
You might also want to [monitor your webhooks for errors](/docs/dev-guide/best-practices/webhook-best-practices/) and implement retry, backoff, and restart logic based on their status.
## Production checklist
Before you go live with your project, be sure that you've...
1. [Set up authentication](/docs/v3/auth/) and created [connectors](/docs/reference/api/connectors-integrations/) for all providers you plan to support.
2. Set up [webhook](/docs/v3/notifications/) or [Pub/Sub](/docs/v3/notifications/pubsub-channel/) notifications and [systems for handling them at scale](/docs/dev-guide/best-practices/webhook-best-practices/).
3. Set up error monitoring and handling for your systems.
4. Reviewed the [scopes](/docs/dev-guide/scopes/) your project is using to ensure you're only requesting those that you need.
5. Started a provider security review for your provider auth apps. See our [Google verification and security assessment guide](/docs/provider-guides/google/google-verification-security-assessment-guide/), [Microsoft verification guide](/docs/provider-guides/microsoft/verification-guide/), and the [general provider guides](/docs/provider-guides/) for more information.
Now it's time to go live and celebrate! 🥳
────────────────────────────────────────────────────────────────────────────────
title: "Nylas glossary"
description: "A handy list of definitions for terms used when working with Nylas."
source: "https://developer.nylas.com/docs/dev-guide/glossary/"
────────────────────────────────────────────────────────────────────────────────
This page lists some terms that you'll encounter when working with Nylas and explains what they mean.
:::success
**Have a suggestion for the glossary**? Let us know!
:::
────────────────────────────────────────────────────────────────────────────────
title: "About Nylas"
description: "Get up and running with Nylas APIs, SDKs, the Nylas CLI, MCP server, AI agent tools, and developer resources."
source: "https://developer.nylas.com/docs/dev-guide/"
────────────────────────────────────────────────────────────────────────────────
Nylas offers a set of REST-style integration APIs and tools that let you quickly add communications functionality to an application you're developing. You can use the Nylas APIs to integrate using any HTTP library that can make REST-style queries. The Nylas APIs accept and return JSON objects on every endpoint, so your interactions with the platform are predictable and straightforward.
Nylas currently supports v3.x of its APIs. For the latest information about new releases and SDK features, see the [changelog](/docs/changelogs/).
:::info
**We consider additive changes to be non-breaking**. Functionally, this means that Nylas can add fields to an API response object without releasing a new API version. Make sure you build your project to handle this possibility.
:::
You can manage your Nylas application using the [Nylas Dashboard](https://dashboard-v3.nylas.com/login), and build your integration using one of the Nylas-maintained SDKs ([Node.js](/docs/v3/sdks/node/), [Python](/docs/v3/sdks/python/), [Ruby](/docs/v3/sdks/ruby/), and [Kotlin/Java](/docs/v3/sdks/kotlin-java/)) or one of the community-maintained SDKs.
## API references
The [API reference](/docs/reference/api/) covers every REST endpoint across Email, Calendar, Contacts, Notetaker, Scheduler, ExtractAI, and administration. Other reference docs cover the rest of the platform:
- [Notification reference](/docs/reference/notifications/) for webhook and Pub/Sub triggers and payloads.
- [UI reference](/docs/reference/ui/) for the Nylas Scheduler UI components and props.
- [Nylas MCP server](/docs/dev-guide/mcp/) for connecting AI agents to email, calendar, and contacts.
- [Nylas CLI](/docs/v3/getting-started/cli/) for managing grants, webhooks, and API calls from the terminal.
You can also try the APIs in the [Nylas Postman collection](https://www.postman.com/trynylas/nylas-api/overview).
For platform-level details, see [error handling](/docs/dev-guide/best-practices/error-handling/) and [rate limits](/docs/dev-guide/best-practices/rate-limits/).
## Build with AI coding agents
If you're using an AI coding agent to build with Nylas, start with one of these:
- **[Nylas skills](/docs/v3/getting-started/ai-prompts/)** pre-load Claude Code, Cursor, Codex CLI, and 40+ other agents with Nylas API, CLI, and SDK context. Install with `npx skills add nylas/skills`.
- **[Claude Code plugin](/docs/v3/getting-started/ai-prompts/#option-1-install-the-nylas-skill-recommended)** installs the Nylas skills through the Claude Code plugin marketplace: `/plugin marketplace add nylas/skills`.
- **[Nylas MCP server](/docs/dev-guide/mcp/)** gives agents live access to email, calendar, and contacts. Works with Claude Code, Cursor, Claude Desktop, and any MCP-compatible client.
- **[AI agent guides](/docs/v3/guides/ai/mcp/claude-code/)** walk through MCP setup for Claude Code, [Codex CLI](/docs/v3/guides/ai/mcp/codex-cli/), and the [OpenClaw Nylas plugin](/docs/v3/guides/ai/openclaw/install-plugin/).
- **[AI coding agent quickstart](/docs/v3/getting-started/coding-agents/)** covers provisioning, SDK setup, and a working example.
The docs are also agent-readable. Any page returns clean markdown if you pass `Accept: text/markdown`, and [`llms.txt`](https://developer.nylas.com/llms.txt) and [`llms-full.txt`](https://developer.nylas.com/llms-full.txt) are published for retrieval.
## Guides and use cases
When you need more than an endpoint reference, look at [guides](/docs/v3/guides/) and [use cases](/docs/v3/use-cases/).
- **[Guides](/docs/v3/guides/)** cover provider-specific tasks. Each one focuses on a single task for a single provider, like [listing Microsoft messages](/docs/v3/guides/email/messages/list-messages-microsoft/) or [handling Gmail labels](/docs/v3/guides/email/messages/list-messages-google/), and calls out the folder naming, sync timing, rate limits, and auth quirks for that provider.
- **[Use cases](/docs/v3/use-cases/)** are end-to-end tutorials that combine multiple Nylas APIs, like [automating meeting follow-ups](/docs/v3/use-cases/act/automate-meeting-follow-ups/), [building an interview scheduling pipeline](/docs/v3/use-cases/build/interview-scheduling-pipeline/), or [syncing calendar events into a CRM](/docs/v3/use-cases/sync/sync-calendar-events-crm/). You can also browse them [by industry](/docs/v3/use-cases/#browse-by-industry).
## Changelogs
The [changelog](/docs/changelogs/) tracks product, SDK, CLI, and API updates. Subscribe to an RSS feed for updates:
- [Combined feed](/atom.xml)  ## Before you begin
You need a Nylas API key and a connected account (grant). If you haven't set these up yet:
- **[Get started with the CLI](/docs/v3/getting-started/cli/)** -- run `nylas init` to create an account, generate an API key, and connect a test account in one command.
- **[Get started with the Dashboard](/docs/v3/getting-started/dashboard/)** -- do the same steps through the web UI.
## Quickstart: Nylas CLI (fastest)
If you have the [Nylas CLI](https://cli.nylas.com) installed, one command registers the MCP server with your agent:
```bash [mcpInstall-Claude Code]
nylas mcp install --assistant claude-code
```
```bash [mcpInstall-Cursor]
nylas mcp install --assistant cursor
```
```bash [mcpInstall-Windsurf]
nylas mcp install --assistant windsurf
```
```bash [mcpInstall-VS Code]
nylas mcp install --assistant vscode
```
```bash [mcpInstall-Codex CLI]
nylas mcp install --assistant codex
```
```bash [mcpInstall-All agents]
nylas mcp install --all
```
Verify it's running:
```bash
nylas mcp status
```
That's it. Your agent now has access to 16 email, calendar, and contacts tools. Skip to [available tools](#available-tools) to see what's included.
## Manual setup
If you're not using the CLI, add the Nylas MCP server config to your tool's config file. Replace `
## Before you begin
You need a Nylas API key and a connected account (grant). If you haven't set these up yet:
- **[Get started with the CLI](/docs/v3/getting-started/cli/)** -- run `nylas init` to create an account, generate an API key, and connect a test account in one command.
- **[Get started with the Dashboard](/docs/v3/getting-started/dashboard/)** -- do the same steps through the web UI.
## Quickstart: Nylas CLI (fastest)
If you have the [Nylas CLI](https://cli.nylas.com) installed, one command registers the MCP server with your agent:
```bash [mcpInstall-Claude Code]
nylas mcp install --assistant claude-code
```
```bash [mcpInstall-Cursor]
nylas mcp install --assistant cursor
```
```bash [mcpInstall-Windsurf]
nylas mcp install --assistant windsurf
```
```bash [mcpInstall-VS Code]
nylas mcp install --assistant vscode
```
```bash [mcpInstall-Codex CLI]
nylas mcp install --assistant codex
```
```bash [mcpInstall-All agents]
nylas mcp install --all
```
Verify it's running:
```bash
nylas mcp status
```
That's it. Your agent now has access to 16 email, calendar, and contacts tools. Skip to [available tools](#available-tools) to see what's included.
## Manual setup
If you're not using the CLI, add the Nylas MCP server config to your tool's config file. Replace `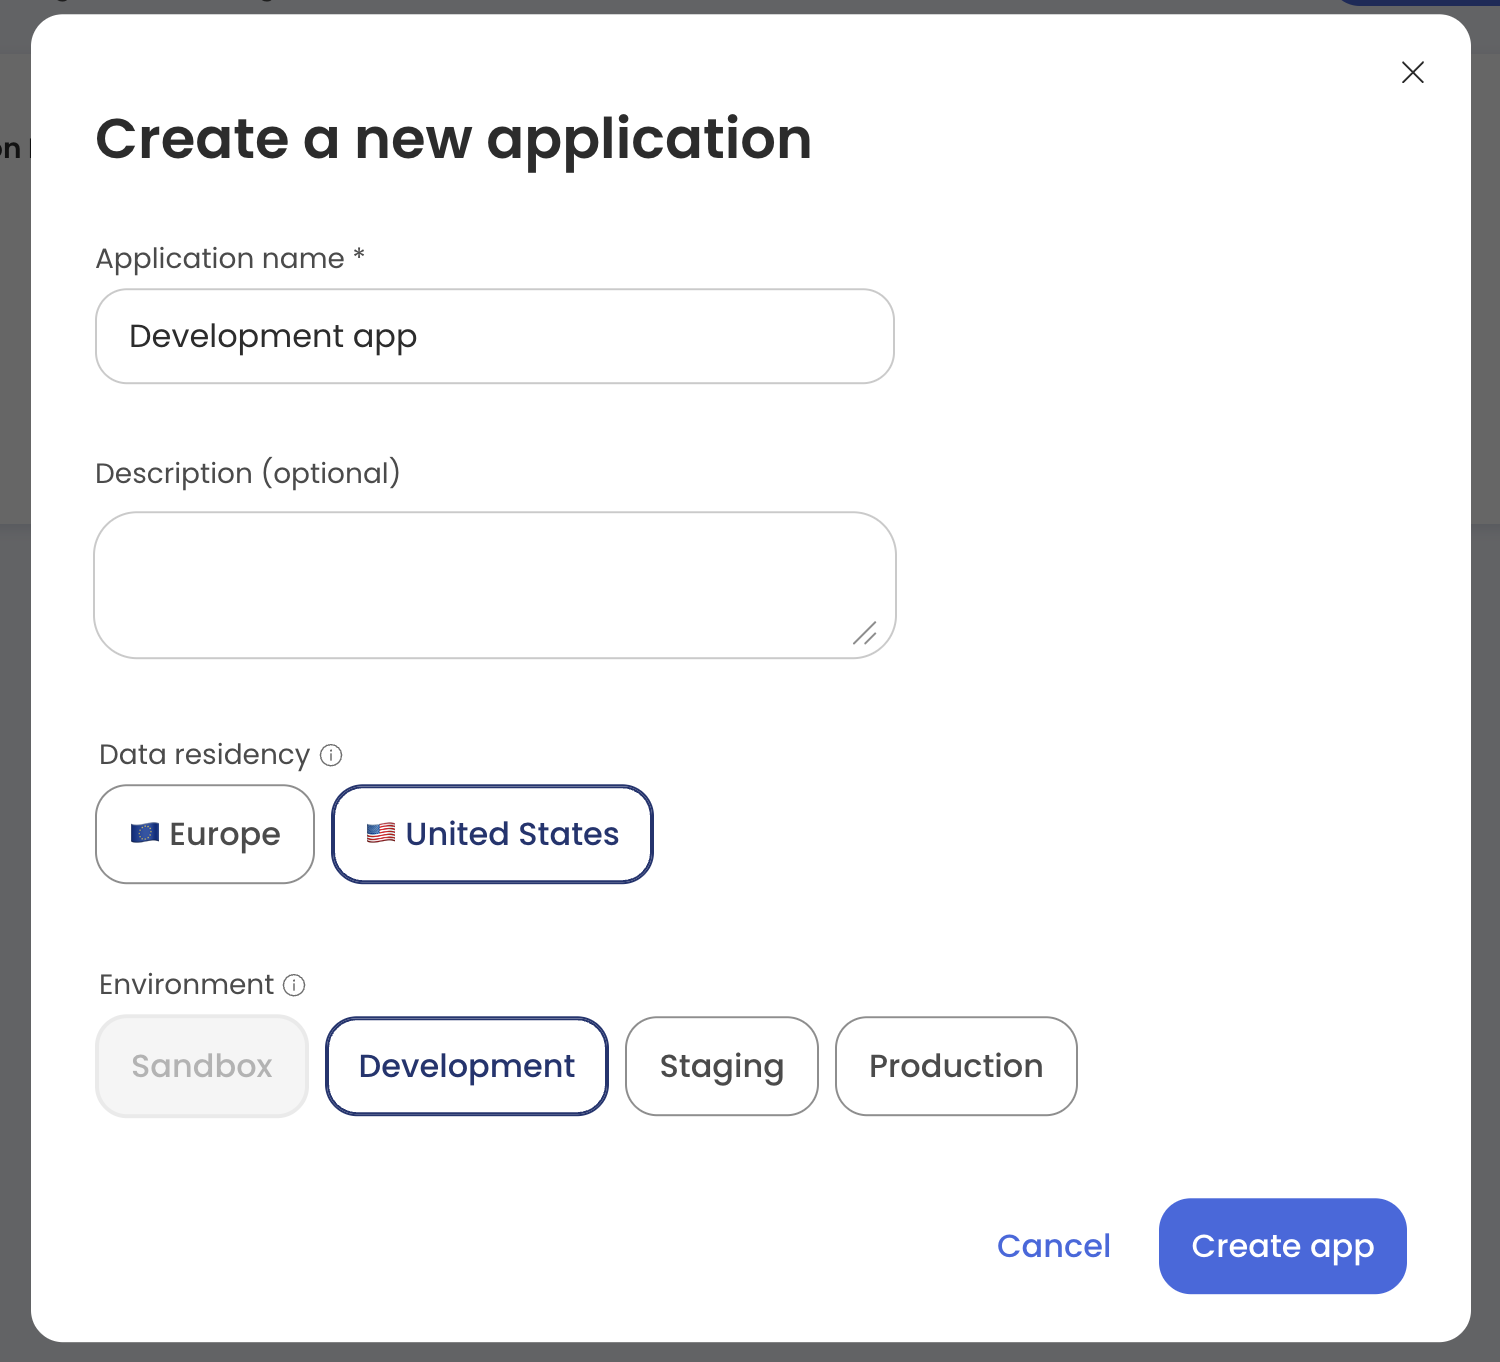 3. Click **Create app**.
## Configure base API URL in Nylas SDKs
The Nylas SDKs support changing the base API URL. Be sure to use the appropriate URL for your Nylas application's region.
```js [baseUrl-Node.js]
const NylasConfig = {
apiKey: "
3. Click **Create app**.
## Configure base API URL in Nylas SDKs
The Nylas SDKs support changing the base API URL. Be sure to use the appropriate URL for your Nylas application's region.
```js [baseUrl-Node.js]
const NylasConfig = {
apiKey: "`GET /v3/grants/
`POST /v3/grants/
`/gmail.modify` | :::info **You need to request the `/gmail.send` scope if you want to schedule messages to be sent in the future**. For more information, see [Schedule messages to send in the future](/docs/v3/email/scheduled-send/). ::: | Endpoint | Required scopes | Other scopes | | ------------------------------------------------------------------------------------------------------------------------------------ | -------------------------------- | ------------------------------------------------------------------- | | `GET /v3/grants/
`GET /v3/grants/
`Mail.Read.Shared`
`Mail.ReadWrite.Shared` | | `PUT /v3/grants/
`DELETE /v3/grants/
`POST /v3/grants/
`Mail.ReadWrite.Shared`
`Mail.Read.Shared` | | `PUT /v3/grants/
`Mail.Send` | `Mail.ReadWrite.Shared` | :::info **You need to request the `Mail.ReadWrite` and `Mail.Send` scopes if you want to schedule messages to be sent in the future**. For more information, see [Schedule messages to send in the future](/docs/v3/email/scheduled-send/). ::: | Endpoint | Scopes | | -------------------------------------------------------------------------------------------------------------------------------------------------------------------------------------------------------------------------------------------------------------------------------------------------------------------- | --------------------------------- | | `GET /v3/grants/
`GET /v3/grants/
`mail-r` | | `PUT /v3/grants/
`DELETE /v3/grants/
`POST /v3/grants/
`POST /v3/grants/
`POST /v3/grants/
`mail-r`
`mail-w` | ### Drafts API scopes All scopes must be prefixed with Google's URI path (`https://www.googleapis.com/auth/`). | Endpoint | Required scopes | Other scopes | | ------------------------------------------------------------------------------------------------------------------------------------------------------------ | ----------------- | ---------------- | | `GET /v3/grants/
`GET /v3/grants/
`PUT /v3/grants/
`DELETE /v3/grants/
`GET /v3/grants/
`Mail.Read.Shared`
`Mail.ReadWrite.Shared` | | `POST /v3/grants/
`PUT /v3/grants/
`DELETE /v3/grants/
`Mail.Send` | `Mail.ReadWrite.Shared` | | Endpoint | Scopes | | ---------------------------------------------------------------------------------------------------------------------------------------------------------------------------------------------------------------------- | --------------------------------- | | `GET /v3/grants/
`GET /v3/grants/
`mail-r` | | `POST /v3/grants/
`PUT /v3/grants/
`POST /v3/grants/
`DELETE /v3/grants/
`mail-r`
`mail-w` | ### Folders API scopes All scopes must be prefixed with Google's URI path (`https://www.googleapis.com/auth/`). | Endpoint | Required scopes | Other scopes | | ------------------------------------------------------------------------------------------------------------------------------------------------------------------------------------------------------------------------------------------------------------------------ | --------------- | --------------- | | `GET /v3/grants/
`GET /v3/grants/
`POST /v3/grants/
`PUT /v3/grants/NYLAS_GRANT_ID>/folders/
`DELETE /v3/grants/
`GET /v3/grants/
`Mail.Read.Shared`
`Mail.ReadWrite.Shared` | | `POST /v3/grants/
`PUT /v3/grants/NYLAS_GRANT_ID>/folders/
`DELETE /v3/grants/
`GET /v3/grants/
`mail-r` | | `POST /v3/grants/
`PUT /v3/grants/
`DELETE /v3/grants/
`mail-r`
`mail-w` | ### Attachments API scopes All scopes must be prefixed with Google's URI path (`https://www.googleapis.com/auth/`). | Endpoint | Required scopes | Other scopes | | ------------------------------------------------------------- | ----------------- | --------------- | | `GET /v3/grants/
`Mail.Read.Shared`
`Mail.ReadWrite.Shared` | | Endpoint | Scopes | | ------------------------------------------------------------- | -------------------- | | `GET /v3/grants/
`mail-r` | ### Contacts API scopes All scopes must be prefixed with Google's URI path (`https://www.googleapis.com/auth/`). | Endpoint | Required scopes | Other scopes | | ---------------------------------------------------------------------------------------------------------------------------------------------------------------------- | ----------------------------------------------------------------------------- | ------------ | | `GET /v3/grants/
`GET /v3/grants/
`GET /v3/grants/
`/contacts.other.readonly`
`/directory.readonly` | — | | `POST /v3/grants/
`PUT /v3/grants/
`DELETE /v3/grants/
`GET /v3/grants/
`GET /v3/grants/
`People.Read` | — | | `POST /v3/grants/
`PUT /v3/grants/
`DELETE /v3/grants/
`GET /v3/grants/
`POST /v3/grants/
`PUT /v3/grants/
`DELETE /v3/grants/
`GET /v3/grants/
`POST /v3/grants/
`PUT /v3/grants/
`DELETE /v3/grants/
`GET /v3/grants/
`/calendar`
`/calendar.readonly` | | `POST /v3/grants/
`PUT /v3/grants/
`DELETE /v3/grants/
`POST /v3/grants/
`calendar.readonly` | — | :::info **You need to request the `/calendar` scope if you want to use the `primary` keyword to reference the primary calendar associated with a grant**. For more information about the `primary` keyword, see [Find a calendar ID](/docs/reference/api/calendar/). ::: | Endpoint | Required scopes | Other scopes | | ------------------------------------------------------------------------------------------------------------------------------------------------------------------------------------------------------------------------------- | --------------------- | --------------------- | | `GET /v3/grants/
`GET /v3/grants/
`PUT /v3/grants/
`DELETE /v3/grants/
`POST /v3/grants/
`PUT /v3/grants/
`GET /v3/grants/
`PATCH /v3/grants/
`DELETE /v3/grants/
`PUT /v3/grants/
`GET /v3/grants/
`PATCH /v3/grants/
`DELETE /v3/grants/
`GET /v3/grants/
`GET /v3/grants/
`GET /v3/grants/
`GET /v3/grants/
`message.send_failed` | `/gmail.send` | — | | `message.created`
`message.updated` | `/gmail.metadata` | `gmail.readonly`
`/gmail.modify` | | `message.bounce_detected` | `/gmail.readonly`
`/gmail.send` | `/gmail.modify` | :::warn **If your account uses the `/gmail.metadata` scope, Nylas sends [**`message.*.metadata` notifications**](/docs/reference/notifications/message-metadata/message-created-metadata/) with limited information**. For more information, see [Using webhooks with Nylas](/docs/v3/notifications/#gmail-metadata-webhooks). ::: | Notification trigger | Required scopes | Other scopes | | ------------------------------------------------ | -------------------------------- | ------------------------------------------------------------------- | | `message.send_success`
`message.send_failed` | `Mail.ReadWrite`
`Mail.Send` | — | | `message.created`
`message.updated` | `Mail.Read` | `Mail.ReadWrite`
`Mail.ReadWrite.Shared`
`Mail.Read.Shared` | | `message.bounce_detected` | `Mail.Read`
`Mail.Send` | `Mail.ReadWrite` | All `message.*` notifications require the `email` and `mail-r` scopes. ### Threads notification scopes All scopes must be prefixed with Google's URI path (`https://www.googleapis.com/auth/`). | Notification trigger | Required scopes | Other scopes | | -------------------- | ----------------------------------- | --------------- | | `thread.replied` | `/gmail.readonly`
`/gmail.send` | `/gmail.modify` | | Notification trigger | Required scopes | Other scopes | | -------------------- | --------------------------- | ---------------- | | `thread.replied` | `Mail.Read`
`Mail.Send` | `Mail.ReadWrite` | All `thread.*` notifications require the `email` and `mail-r` scopes. ### Folders notification scopes All scopes must be prefixed with Google's URI path (`https://www.googleapis.com/auth/`). | Notification trigger | Required scopes | Other scopes | | ---------------------------------------------------------- | ----------------- | ------------------------------------ | | `folder.created`
`folder.updated`
`folder.deleted` | `/gmail.metadata` | `/gmail.readonly`
`gmail.modify` | :::warn **If your account uses the `/gmail.metadata` scope, Nylas sends [**`message.*.metadata` notifications**](/docs/reference/notifications/message-metadata/message-created-metadata/) with limited information**. For more information, see [Using webhooks with Nylas](/docs/v3/notifications/#gmail-metadata-webhooks). ::: | Notification trigger | Required scopes | Other scopes | | ---------------------------------------------------------- | --------------- | ------------------------------------------------------------------- | | `folder.created`
`folder.updated`
`folder.deleted` | `Mail.Read` | `Mail.ReadWrite`
`Mail.ReadWrite.Shared`
`Mail.Read.Shared` | All `folder.*` notifications require the `email` and `mail-r` scopes. ### Contacts notification scopes All scopes must be prefixed with Google's URI path (`https://www.googleapis.com/auth/`). | Notification trigger | Required scopes | Other scopes | | --------------------------------------- | ----------------------------------- | ------------ | | `contact.updated`
`contact.deleted` | `/contact.readonly`
`/contacts` | — | | Notification trigger | Required scopes | Other scopes | | --------------------------------------- | --------------- | ------------------------------------------------------------------------------- | | `contact.updated`
`contact.deleted` | `Contacts.Read` | `Contacts.Read.Shared`
`Contacts.ReadWrite`
`Contacts.ReadWrite.Shared` | ### Calendar notification scopes All scopes must be prefixed with Google's URI path (`https://www.googleapis.com/auth/`). | Notification trigger | Required scopes | Other scopes | | ---------------------------------------------------------------- | --------------------------- | ------------------ | | `calendar.created`
`calendar.updated`
`calendar.deleted` | `/calendar.events.readonly` | `/calendar.events` | | Notification trigger | Required scopes | Other scopes | | ---------------------------------------------------------------- | ---------------- | ---------------------------------------------------------------------------------- | | `calendar.created`
`calendar.updated`
`calendar.deleted` | `Calendars.Read` | `Calendars.Read.Shared`
`Calendars.ReadWrite`
`Calendars.ReadWrite.Shared` | ### Events notification scopes All scopes must be prefixed with Google's URI path (`https://www.googleapis.com/auth/`). | Notification trigger | Required scopes | Other scopes | | ------------------------------------------------------- | ---------------------------------------------------- | ------------------ | | `event.created`
`event.updated`
`event.deleted` | `/calendar.events.readonly`
`/calendar.readonly` | `/calendar.events` | | Notification trigger | Required scopes | Other scopes | | ------------------------------------------------------- | ---------------- | ---------------------------------------------------------------------------------- | | `event.created`
`event.updated`
`event.deleted` | `Calendars.Read` | `Calendars.Read.Shared`
`Calendars.ReadWrite`
`Calendars.ReadWrite.Shared` | ### ExtractAI notification scopes All scopes must be prefixed with Google's URI path (`https://www.googleapis.com/auth/`). | Notification trigger | Required scopes | Other scopes | | -------------------------------------------------------------------------------------------------- | ----------------- | ------------ | | `message.intelligence.order`
`message.intelligence.tracking`
`message.intelligence.return` | `/gmail.readonly` | — | | Notification trigger | Required scopes | Other scopes | | -------------------------------------------------------------------------------------------------- | --------------- | ------------------ | | `message.intelligence.order`
`message.intelligence.tracking`
`message.intelligence.return` | `Mail.Read` | `Mail.Read.Shared` | ## Google OAuth verification If your application accesses Google user data with the Google APIs and requests certain scopes, you might have to complete the Google verification process and a separate security assessment process. The processes that you need to complete depends on whether your application requests [_sensitive_ or _restricted_ scopes](/docs/provider-guides/google/google-verification-security-assessment-guide/#google-scopes). | Scope type | Required processes | Google policy and requirements | | ---------- | ------------------------------------------- | ------------------------------------------------------------------------------------------------------------------------------------------------------------------------------------------------------------------------------------------------------------------------------------------------------------------- | | Sensitive | Google verification | Your application must follow [Google’s API Services User Data Policy](https://developers.google.com/terms/api-services-user-data-policy). | | Restricted | Google verification and security assessment | Your application must follow [Google’s API Services User Data Policy](https://developers.google.com/terms/api-services-user-data-policy) and meet [additional requirements for specific scopes](https://developers.google.com/terms/api-services-user-data-policy#additional_requirements_for_specific_api_scopes). | For more information, see our [Google verification and security assessment guide](/docs/provider-guides/google/google-verification-security-assessment-guide/). ──────────────────────────────────────────────────────────────────────────────── title: "Customize branding in Nylas Hosted Authentication flow" description: "Use your own branding in the Nylas Hosted Authentication flow. You can replace the Nylas logo on the login page and set up a custom domain name (CNAME)." source: "https://developer.nylas.com/docs/dev-guide/whitelabeling/" ──────────────────────────────────────────────────────────────────────────────── Nylas provides a login page for Hosted Authentication that displays the Nylas logo to tell the user who is requesting access to their account. If the user isn’t expecting the Nylas logo or domain, however, they might cancel the auth process.
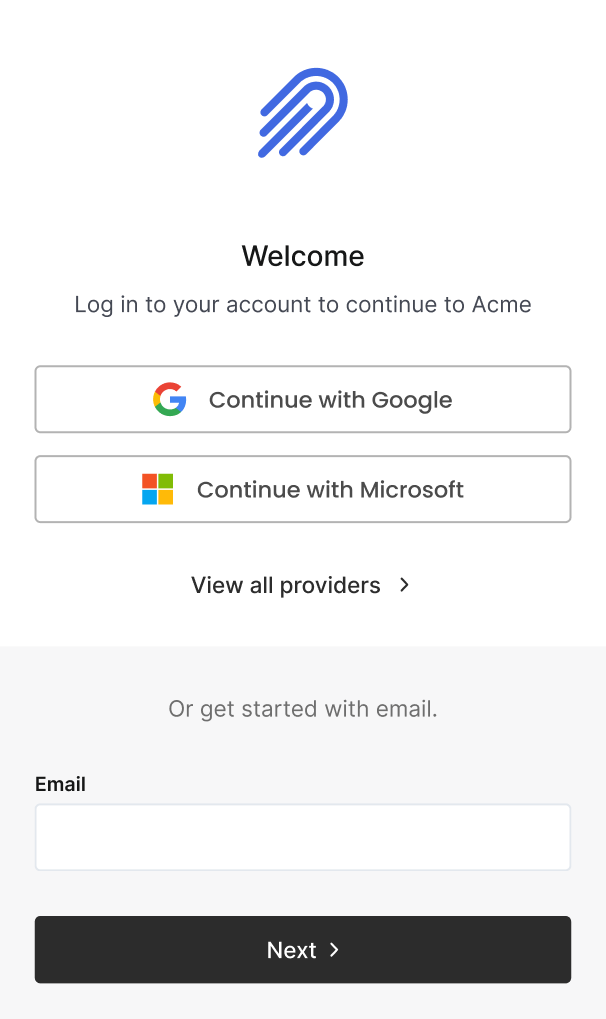 Any Nylas admin can add their brand logo to their user auth screens for each application, so users see your company’s branding instead of the Nylas logo.
The Nylas domain (`nylas.com`) might still appear during the OAuth process. More customization features are available to further customize the auth experience, and prevent the Nylas domain from appearing in the process. If you're on a paid tier that includes it, you can replace these by [customizing your Hosted OAuth domain](#customize-authentication-domain).
## Set up Hosted Authentication branding
You can upload your own brand logo or icon for the user-facing Hosted OAuth page so it replaces the Nylas logo. Branding settings are unique to each Nylas application.
You can change the logo using either the [Nylas Dashboard](#add-branding-using-nylas-dashboard) or the [Nylas APIs](#add-branding-using-nylas-api).
:::info
**The icon you use must be a PNG, JPG, or TIF file with a maximum size of 1MB**. Nylas automatically resizes the logo to 72x72 pixels, so it's recommended you use a square image.
:::
### Add branding using Nylas Dashboard
To upload a logo for the Hosted Auth login page, navigate to your application in the Nylas Dashboard and select **Hosted authentication** in the left navigation. Then, enter a link to your logo in the **Icon URL** field.
### Add branding using Nylas API
Make an [Update Application request](/docs/reference/api/applications/update_application/) that includes the `branding.icon_url` parameter.
```bash
curl --request PATCH \
--url 'https://api.us.nylas.com/v3/applications' \
--header 'Content-Type: application/json' \
--header 'Accept: application/json' \
--header 'Authorization: Bearer
Any Nylas admin can add their brand logo to their user auth screens for each application, so users see your company’s branding instead of the Nylas logo.
The Nylas domain (`nylas.com`) might still appear during the OAuth process. More customization features are available to further customize the auth experience, and prevent the Nylas domain from appearing in the process. If you're on a paid tier that includes it, you can replace these by [customizing your Hosted OAuth domain](#customize-authentication-domain).
## Set up Hosted Authentication branding
You can upload your own brand logo or icon for the user-facing Hosted OAuth page so it replaces the Nylas logo. Branding settings are unique to each Nylas application.
You can change the logo using either the [Nylas Dashboard](#add-branding-using-nylas-dashboard) or the [Nylas APIs](#add-branding-using-nylas-api).
:::info
**The icon you use must be a PNG, JPG, or TIF file with a maximum size of 1MB**. Nylas automatically resizes the logo to 72x72 pixels, so it's recommended you use a square image.
:::
### Add branding using Nylas Dashboard
To upload a logo for the Hosted Auth login page, navigate to your application in the Nylas Dashboard and select **Hosted authentication** in the left navigation. Then, enter a link to your logo in the **Icon URL** field.
### Add branding using Nylas API
Make an [Update Application request](/docs/reference/api/applications/update_application/) that includes the `branding.icon_url` parameter.
```bash
curl --request PATCH \
--url 'https://api.us.nylas.com/v3/applications' \
--header 'Content-Type: application/json' \
--header 'Accept: application/json' \
--header 'Authorization: Bearer 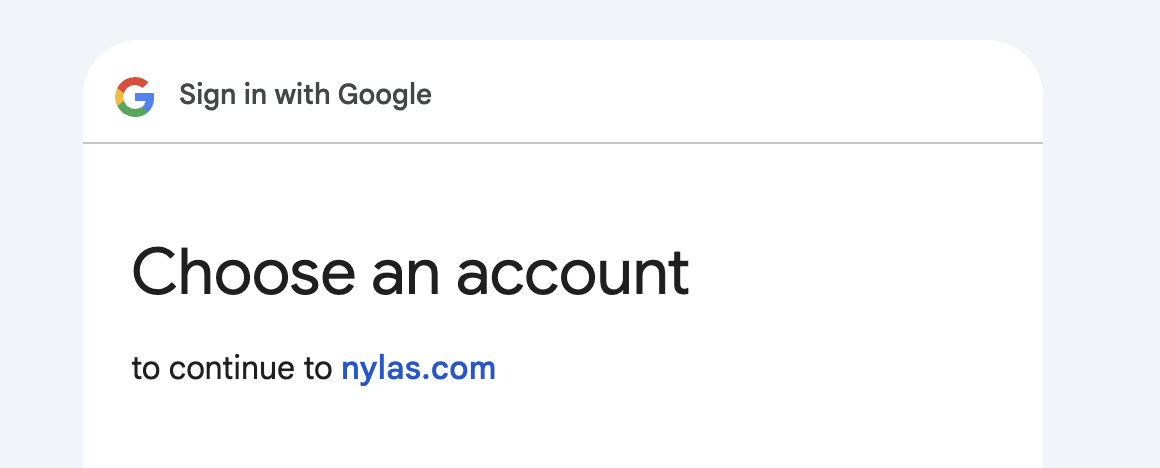 To prevent this, you can set up a CNAME so your own domain appears instead during the auth process.
1. [Subscribe to a Nylas plan](https://www.nylas.com/pricing/?utm_source=docs&utm_campaign=&utm_content=whitelabeling) that includes custom domain name support.
2. [Add your logo to the Hosted Auth page](#set-up-hosted-authentication-branding).
3. [Set up a CNAME record for authentication](#set-up-cname-record).
4. [Contact Nylas Support](/docs/support/#contact-nylas-support) to activate your domain.
5. [Update your provider auth apps](#update-provider-auth-apps) to allow authentication from your CNAME record address.
### Set up CNAME record
To enable authentication through your custom domain, you need to create a CNAME record in your DNS settings. Be sure to choose the subdomain you want to use for the auth process (for example, `auth.example.com`) and point the CNAME record to `
To prevent this, you can set up a CNAME so your own domain appears instead during the auth process.
1. [Subscribe to a Nylas plan](https://www.nylas.com/pricing/?utm_source=docs&utm_campaign=&utm_content=whitelabeling) that includes custom domain name support.
2. [Add your logo to the Hosted Auth page](#set-up-hosted-authentication-branding).
3. [Set up a CNAME record for authentication](#set-up-cname-record).
4. [Contact Nylas Support](/docs/support/#contact-nylas-support) to activate your domain.
5. [Update your provider auth apps](#update-provider-auth-apps) to allow authentication from your CNAME record address.
### Set up CNAME record
To enable authentication through your custom domain, you need to create a CNAME record in your DNS settings. Be sure to choose the subdomain you want to use for the auth process (for example, `auth.example.com`) and point the CNAME record to `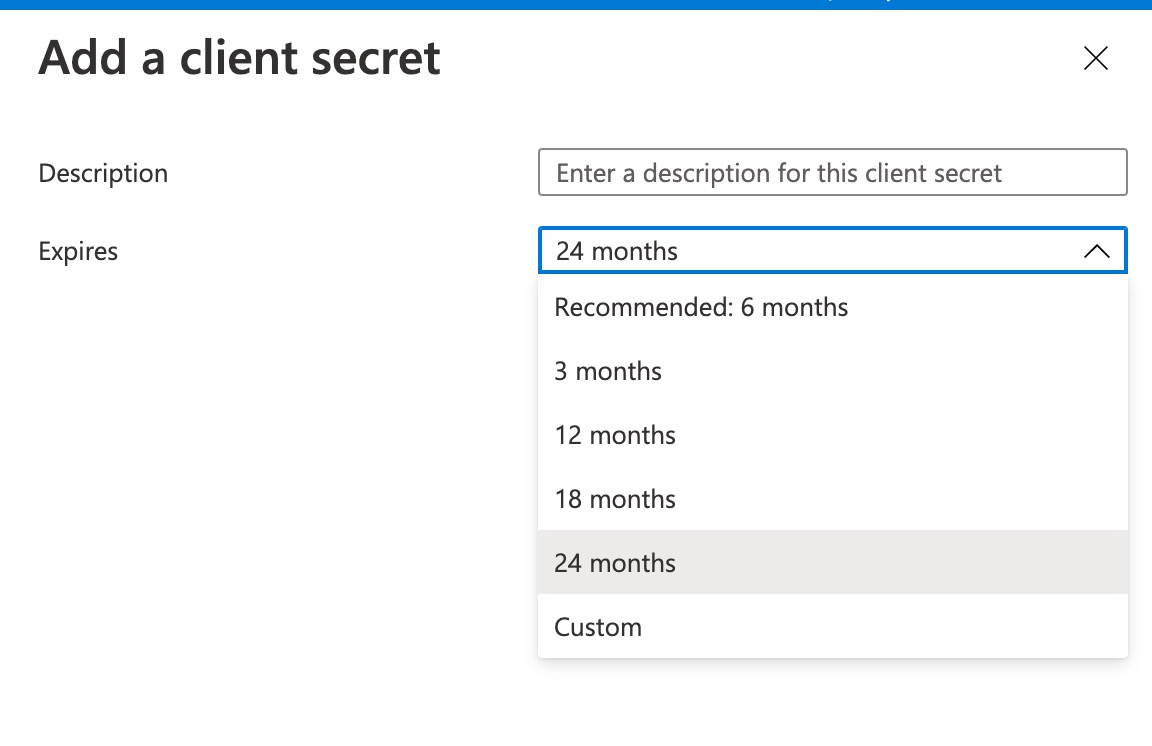 4. Click **Add**.
5. Copy the value from the Azure Client Secrets page and save it to your secrets manager.
:::warn
⚠️ **Be sure to save the client secret value somewhere secure**. Azure shows the value only once, and if you navigate away from this page you _cannot_ retrieve the key value. For best practices, see [Storing secrets securely](/docs/dev-guide/best-practices/#store-secrets-securely).
:::

6. Navigate to the **App registrations** page and copy the **Application (client) ID** for your app.
All Azure credentials include an expiration date. When they expire, you'll need to refresh or regenerate them.
## Add a Microsoft connector to Nylas
Finally, you need to add a Microsoft connector to your Nylas application. You can create a connector either [using the Nylas Dashboard](#create-connector-using-the-nylas-dashboard), or by [making an API request](#create-connector-using-the-nylas-api).
### Create connector using the Nylas Dashboard
1. Log in to the Nylas Dashboard, and navigate to the Nylas application you're creating the connector for.
1. Select **Connectors** from the left navigation.
1. In the **Microsoft** tile, click the add symbol (**+**).
1. Under **Microsoft credentials**, enter your **Azure client ID** and **Azure client secret**.
- Set the **Azure tenant** to `common` to allow authentication for accounts that are outside of your organization.
1. Under **Authenticate scopes**, select the required scopes.
1. Click **Save**.
### Create connector using the Nylas API
To add a connector using the Nylas API, make a [Create Connector request](/docs/reference/api/connectors-integrations/create_connector/). The following code sample demonstrates how to use your Azure app's client ID and secret to add the Microsoft connector to Nylas.
```bash
curl -X POST 'https://api.us.nylas.com/v3/connectors' \
--header 'Authorization: Bearer
4. Click **Add**.
5. Copy the value from the Azure Client Secrets page and save it to your secrets manager.
:::warn
⚠️ **Be sure to save the client secret value somewhere secure**. Azure shows the value only once, and if you navigate away from this page you _cannot_ retrieve the key value. For best practices, see [Storing secrets securely](/docs/dev-guide/best-practices/#store-secrets-securely).
:::

6. Navigate to the **App registrations** page and copy the **Application (client) ID** for your app.
All Azure credentials include an expiration date. When they expire, you'll need to refresh or regenerate them.
## Add a Microsoft connector to Nylas
Finally, you need to add a Microsoft connector to your Nylas application. You can create a connector either [using the Nylas Dashboard](#create-connector-using-the-nylas-dashboard), or by [making an API request](#create-connector-using-the-nylas-api).
### Create connector using the Nylas Dashboard
1. Log in to the Nylas Dashboard, and navigate to the Nylas application you're creating the connector for.
1. Select **Connectors** from the left navigation.
1. In the **Microsoft** tile, click the add symbol (**+**).
1. Under **Microsoft credentials**, enter your **Azure client ID** and **Azure client secret**.
- Set the **Azure tenant** to `common` to allow authentication for accounts that are outside of your organization.
1. Under **Authenticate scopes**, select the required scopes.
1. Click **Save**.
### Create connector using the Nylas API
To add a connector using the Nylas API, make a [Create Connector request](/docs/reference/api/connectors-integrations/create_connector/). The following code sample demonstrates how to use your Azure app's client ID and secret to add the Microsoft connector to Nylas.
```bash
curl -X POST 'https://api.us.nylas.com/v3/connectors' \
--header 'Authorization: Bearer  ────────────────────────────────────────────────────────────────────────────────
title: "Microsoft publisher verification guide"
description: "Complete Microsoft's publisher verification process."
source: "https://developer.nylas.com/docs/provider-guides/microsoft/verification-guide/"
────────────────────────────────────────────────────────────────────────────────
In this guide, you'll learn about Microsoft's publisher verification and how to complete the process.
## What is publisher verification?
Microsoft's publisher verification gives application users and organization administrators information about the authenticity of the developer's organization. When the publisher of an application has been verified, a blue badge appears in the Microsoft consent prompt for the app.
If you already meet the [requirements](https://learn.microsoft.com/en-us/entra/identity-platform/publisher-verification-overview#requirements), you can complete the verification process in minutes. Microsoft doesn't charge developers for publisher verification, and you don't need a license to become a verified publisher.
## Why is publisher verification required?
As of November 2020, if [risk-based step-up consent](https://learn.microsoft.com/en-us/entra/identity/enterprise-apps/configure-risk-based-step-up-consent) is enabled, users can't consent to most newly registered multi-tenant applications that haven't been verified. Microsoft displays a warning on the consent page informing users that the apps are risky because they're from unverified publishers.
Microsoft recommends restricting user consent to allow users to consent for applications from verified publishers only, with specific permissions. For apps that don't meet this policy, your organization's IT team is responsible for making any decisions. This means that if you don't complete the verification process, you'll likely need admin consent from Microsoft 365 organizations before users can connect their individual accounts. This can slow or block adoption.
For more information on Microsoft's publisher verification, check out [Microsoft's official documentation](https://docs.microsoft.com/en-us/azure/active-directory/develop/publisher-verification-overview).
## Publisher verification process
To complete the publisher verification process, follow these steps:
1. [Create an Azure auth app](/docs/provider-guides/microsoft/create-azure-app/) for your project.
1. [Join the Microsoft AI Cloud Partner Program](https://partner.microsoft.com/en-us/partnership).
1. [Configure your app's publisher domain](https://learn.microsoft.com/en-us/entra/identity-platform/howto-configure-publisher-domain).
1. [Mark your app as publisher verified](https://learn.microsoft.com/en-us/entra/identity-platform/mark-app-as-publisher-verified).
Your app is now verified! Make sure that you see a blue badge next to your **Publisher display name**, under **Branding & properties**.
If you run into any issues, see [Microsoft's official troubleshooting steps](https://learn.microsoft.com/en-us/entra/identity-platform/troubleshoot-publisher-verification).
────────────────────────────────────────────────────────────────────────────────
title: "Authenticating Yahoo accounts with Nylas"
description: "Connect Yahoo accounts to Nylas using Yahoo OAuth or Nylas' Hosted IMAP authentication."
source: "https://developer.nylas.com/docs/provider-guides/yahoo-authentication/"
────────────────────────────────────────────────────────────────────────────────
Nylas supports two ways to authenticate users who have Yahoo as their provider: using [Yahoo's OAuth and Nylas' Bring Your Own (BYO) Authentication](#set-up-yahoo-oauth-and-nylas-bring-your-own-authentication), or by having them [create an app password](#create-yahoo-app-password) and using that password with [Nylas' BYO or Hosted IMAP authentication](#authenticate-yahoo-grants-with-app-password)
:::info
**We strongly recommend using Yahoo's OAuth method instead of authenticating using IMAP**. This gives you more secure access to your users' data.
:::
## Set up Yahoo OAuth and Nylas Bring Your Own Authentication
Before you authenticate users with Yahoo's OAuth and Nylas' BYO Authentication, you need to set up your environment and authentication flow:
1. [Request access to Yahoo data](#request-access-to-yahoo-data).
2. [Set up an OAuth-client endpoint](#set-up-oauth-client-endpoint) that can perform an OAuth handshake.
3. [Create and configure a Yahoo auth app](#create-yahoo-auth-app).
4. [Create a Yahoo connector](#create-yahoo-connector).
5. Use information from the OAuth process to [make BYO Authentication requests to Nylas](#create-grants-with-yahoo-oauth) and create grants for your users.
### Request access to Yahoo data
1. Create a Yahoo account that only your organization's administrators can access.
2. [Submit a Yahoo Mail API Access form to Yahoo](https://senders.yahooinc.com/developer/developer-access-mail-form/). This is _required_ if you want to use OAuth to access Yahoo's IMAP and SMTP servers. Make sure you mention somewhere in the form that you're using Nylas to connect.
- **Email address**: Enter the email address that you created in step 1.
- **API required**: Select **IMAP**.
- **Your YDN account**: Enter the email address that you created in step 1.
3. Yahoo sends you a **Yahoo Mail Products Commercial Access Agreement**. Review the form, sign it, and send it back to Yahoo.
Yahoo sends you a message to notify you when they approve your data access request, or to ask for more information (if needed).
### Set up OAuth-client endpoint
After you [request access to Yahoo data](#request-access-to-yahoo-data), you need to set up an OAuth-client endpoint (also called a "redirect URI") in your project. This endpoint must be able to accept requests from Yahoo, extract information from the requests to complete an OAuth handshake process, then use the resulting refresh token to create a Nylas grant using BYO Authentication.
Take note of your OAuth-client endpoint URI. You'll need it when you [create your Yahoo auth app](#create-yahoo-auth-app).
### Create Yahoo auth app
1. Sign in to the [Yahoo Apps dashboard](https://developer.yahoo.com/apps/) using your admin Yahoo account.
2. Select **Create an app** and fill out the information.
- **Application name**: Enter a brief, descriptive name for your application.
- **Description**: Describe your application (for example, the region you'll be using it for).
- **Homepage URL**: (Optional) Enter your application's homepage URL.
- **Redirect URI(s)**: Enter your [OAuth-client endpoint URI](#set-up-oauth-client-endpoint). Registering a redirect URI might take _up to 24 hours_. You might experience inconsistencies when trying to log in to your Yahoo account during that time.
- **OAuth client type**: Select **Confidential client**.
- **API permissions**:
- Select **Mail**. If you plan to use Nylas to send or modify messages, select **Read/Write**. If you don't send or modify messages, select **Read**.
- Select **OpenID connect permissions**, then select **Email** and **Profile**.
3. Click **Create app**.
4. On the next page, Yahoo displays your app's client ID and secret. Take note of them, because you'll need them when you [create a Yahoo connector](#create-yahoo-connector).
:::warn
**Be sure to save the client secret value somewhere secure, like a secrets manager**. For best practices, see [Store secrets securely](/docs/dev-guide/best-practices/#store-secrets-securely).
:::
### Create Yahoo connector
After you [create a Yahoo auth app](#create-yahoo-auth-app), you can create a Yahoo connector for your Nylas application.
To create a connector using the Nylas API, make a [Create Connector request](/docs/reference/api/connectors-integrations/create_connector/) that specifies `"provider": "yahoo"`.
:::info
**Your `scope` array must match the scopes you request in your Yahoo auth app**. If you request Mail Read/Write in your auth app, specify `mail-w` in your request. If you request Mail Read, specify `mail-r` instead. If you try to request both `mail-w` and `mail-r`, Nylas returns an error.
:::
```bash {5,10-13} [group_1-cURL]
curl -X POST 'https://api.us.nylas.com/v3/connectors' \
--header 'Authorization: Bearer
────────────────────────────────────────────────────────────────────────────────
title: "Microsoft publisher verification guide"
description: "Complete Microsoft's publisher verification process."
source: "https://developer.nylas.com/docs/provider-guides/microsoft/verification-guide/"
────────────────────────────────────────────────────────────────────────────────
In this guide, you'll learn about Microsoft's publisher verification and how to complete the process.
## What is publisher verification?
Microsoft's publisher verification gives application users and organization administrators information about the authenticity of the developer's organization. When the publisher of an application has been verified, a blue badge appears in the Microsoft consent prompt for the app.
If you already meet the [requirements](https://learn.microsoft.com/en-us/entra/identity-platform/publisher-verification-overview#requirements), you can complete the verification process in minutes. Microsoft doesn't charge developers for publisher verification, and you don't need a license to become a verified publisher.
## Why is publisher verification required?
As of November 2020, if [risk-based step-up consent](https://learn.microsoft.com/en-us/entra/identity/enterprise-apps/configure-risk-based-step-up-consent) is enabled, users can't consent to most newly registered multi-tenant applications that haven't been verified. Microsoft displays a warning on the consent page informing users that the apps are risky because they're from unverified publishers.
Microsoft recommends restricting user consent to allow users to consent for applications from verified publishers only, with specific permissions. For apps that don't meet this policy, your organization's IT team is responsible for making any decisions. This means that if you don't complete the verification process, you'll likely need admin consent from Microsoft 365 organizations before users can connect their individual accounts. This can slow or block adoption.
For more information on Microsoft's publisher verification, check out [Microsoft's official documentation](https://docs.microsoft.com/en-us/azure/active-directory/develop/publisher-verification-overview).
## Publisher verification process
To complete the publisher verification process, follow these steps:
1. [Create an Azure auth app](/docs/provider-guides/microsoft/create-azure-app/) for your project.
1. [Join the Microsoft AI Cloud Partner Program](https://partner.microsoft.com/en-us/partnership).
1. [Configure your app's publisher domain](https://learn.microsoft.com/en-us/entra/identity-platform/howto-configure-publisher-domain).
1. [Mark your app as publisher verified](https://learn.microsoft.com/en-us/entra/identity-platform/mark-app-as-publisher-verified).
Your app is now verified! Make sure that you see a blue badge next to your **Publisher display name**, under **Branding & properties**.
If you run into any issues, see [Microsoft's official troubleshooting steps](https://learn.microsoft.com/en-us/entra/identity-platform/troubleshoot-publisher-verification).
────────────────────────────────────────────────────────────────────────────────
title: "Authenticating Yahoo accounts with Nylas"
description: "Connect Yahoo accounts to Nylas using Yahoo OAuth or Nylas' Hosted IMAP authentication."
source: "https://developer.nylas.com/docs/provider-guides/yahoo-authentication/"
────────────────────────────────────────────────────────────────────────────────
Nylas supports two ways to authenticate users who have Yahoo as their provider: using [Yahoo's OAuth and Nylas' Bring Your Own (BYO) Authentication](#set-up-yahoo-oauth-and-nylas-bring-your-own-authentication), or by having them [create an app password](#create-yahoo-app-password) and using that password with [Nylas' BYO or Hosted IMAP authentication](#authenticate-yahoo-grants-with-app-password)
:::info
**We strongly recommend using Yahoo's OAuth method instead of authenticating using IMAP**. This gives you more secure access to your users' data.
:::
## Set up Yahoo OAuth and Nylas Bring Your Own Authentication
Before you authenticate users with Yahoo's OAuth and Nylas' BYO Authentication, you need to set up your environment and authentication flow:
1. [Request access to Yahoo data](#request-access-to-yahoo-data).
2. [Set up an OAuth-client endpoint](#set-up-oauth-client-endpoint) that can perform an OAuth handshake.
3. [Create and configure a Yahoo auth app](#create-yahoo-auth-app).
4. [Create a Yahoo connector](#create-yahoo-connector).
5. Use information from the OAuth process to [make BYO Authentication requests to Nylas](#create-grants-with-yahoo-oauth) and create grants for your users.
### Request access to Yahoo data
1. Create a Yahoo account that only your organization's administrators can access.
2. [Submit a Yahoo Mail API Access form to Yahoo](https://senders.yahooinc.com/developer/developer-access-mail-form/). This is _required_ if you want to use OAuth to access Yahoo's IMAP and SMTP servers. Make sure you mention somewhere in the form that you're using Nylas to connect.
- **Email address**: Enter the email address that you created in step 1.
- **API required**: Select **IMAP**.
- **Your YDN account**: Enter the email address that you created in step 1.
3. Yahoo sends you a **Yahoo Mail Products Commercial Access Agreement**. Review the form, sign it, and send it back to Yahoo.
Yahoo sends you a message to notify you when they approve your data access request, or to ask for more information (if needed).
### Set up OAuth-client endpoint
After you [request access to Yahoo data](#request-access-to-yahoo-data), you need to set up an OAuth-client endpoint (also called a "redirect URI") in your project. This endpoint must be able to accept requests from Yahoo, extract information from the requests to complete an OAuth handshake process, then use the resulting refresh token to create a Nylas grant using BYO Authentication.
Take note of your OAuth-client endpoint URI. You'll need it when you [create your Yahoo auth app](#create-yahoo-auth-app).
### Create Yahoo auth app
1. Sign in to the [Yahoo Apps dashboard](https://developer.yahoo.com/apps/) using your admin Yahoo account.
2. Select **Create an app** and fill out the information.
- **Application name**: Enter a brief, descriptive name for your application.
- **Description**: Describe your application (for example, the region you'll be using it for).
- **Homepage URL**: (Optional) Enter your application's homepage URL.
- **Redirect URI(s)**: Enter your [OAuth-client endpoint URI](#set-up-oauth-client-endpoint). Registering a redirect URI might take _up to 24 hours_. You might experience inconsistencies when trying to log in to your Yahoo account during that time.
- **OAuth client type**: Select **Confidential client**.
- **API permissions**:
- Select **Mail**. If you plan to use Nylas to send or modify messages, select **Read/Write**. If you don't send or modify messages, select **Read**.
- Select **OpenID connect permissions**, then select **Email** and **Profile**.
3. Click **Create app**.
4. On the next page, Yahoo displays your app's client ID and secret. Take note of them, because you'll need them when you [create a Yahoo connector](#create-yahoo-connector).
:::warn
**Be sure to save the client secret value somewhere secure, like a secrets manager**. For best practices, see [Store secrets securely](/docs/dev-guide/best-practices/#store-secrets-securely).
:::
### Create Yahoo connector
After you [create a Yahoo auth app](#create-yahoo-auth-app), you can create a Yahoo connector for your Nylas application.
To create a connector using the Nylas API, make a [Create Connector request](/docs/reference/api/connectors-integrations/create_connector/) that specifies `"provider": "yahoo"`.
:::info
**Your `scope` array must match the scopes you request in your Yahoo auth app**. If you request Mail Read/Write in your auth app, specify `mail-w` in your request. If you request Mail Read, specify `mail-r` instead. If you try to request both `mail-w` and `mail-r`, Nylas returns an error.
:::
```bash {5,10-13} [group_1-cURL]
curl -X POST 'https://api.us.nylas.com/v3/connectors' \
--header 'Authorization: Bearer