Native authentication in Nylas v2
Native authentication is for developers who want to completely customize the login experience through Nylas to match their application.
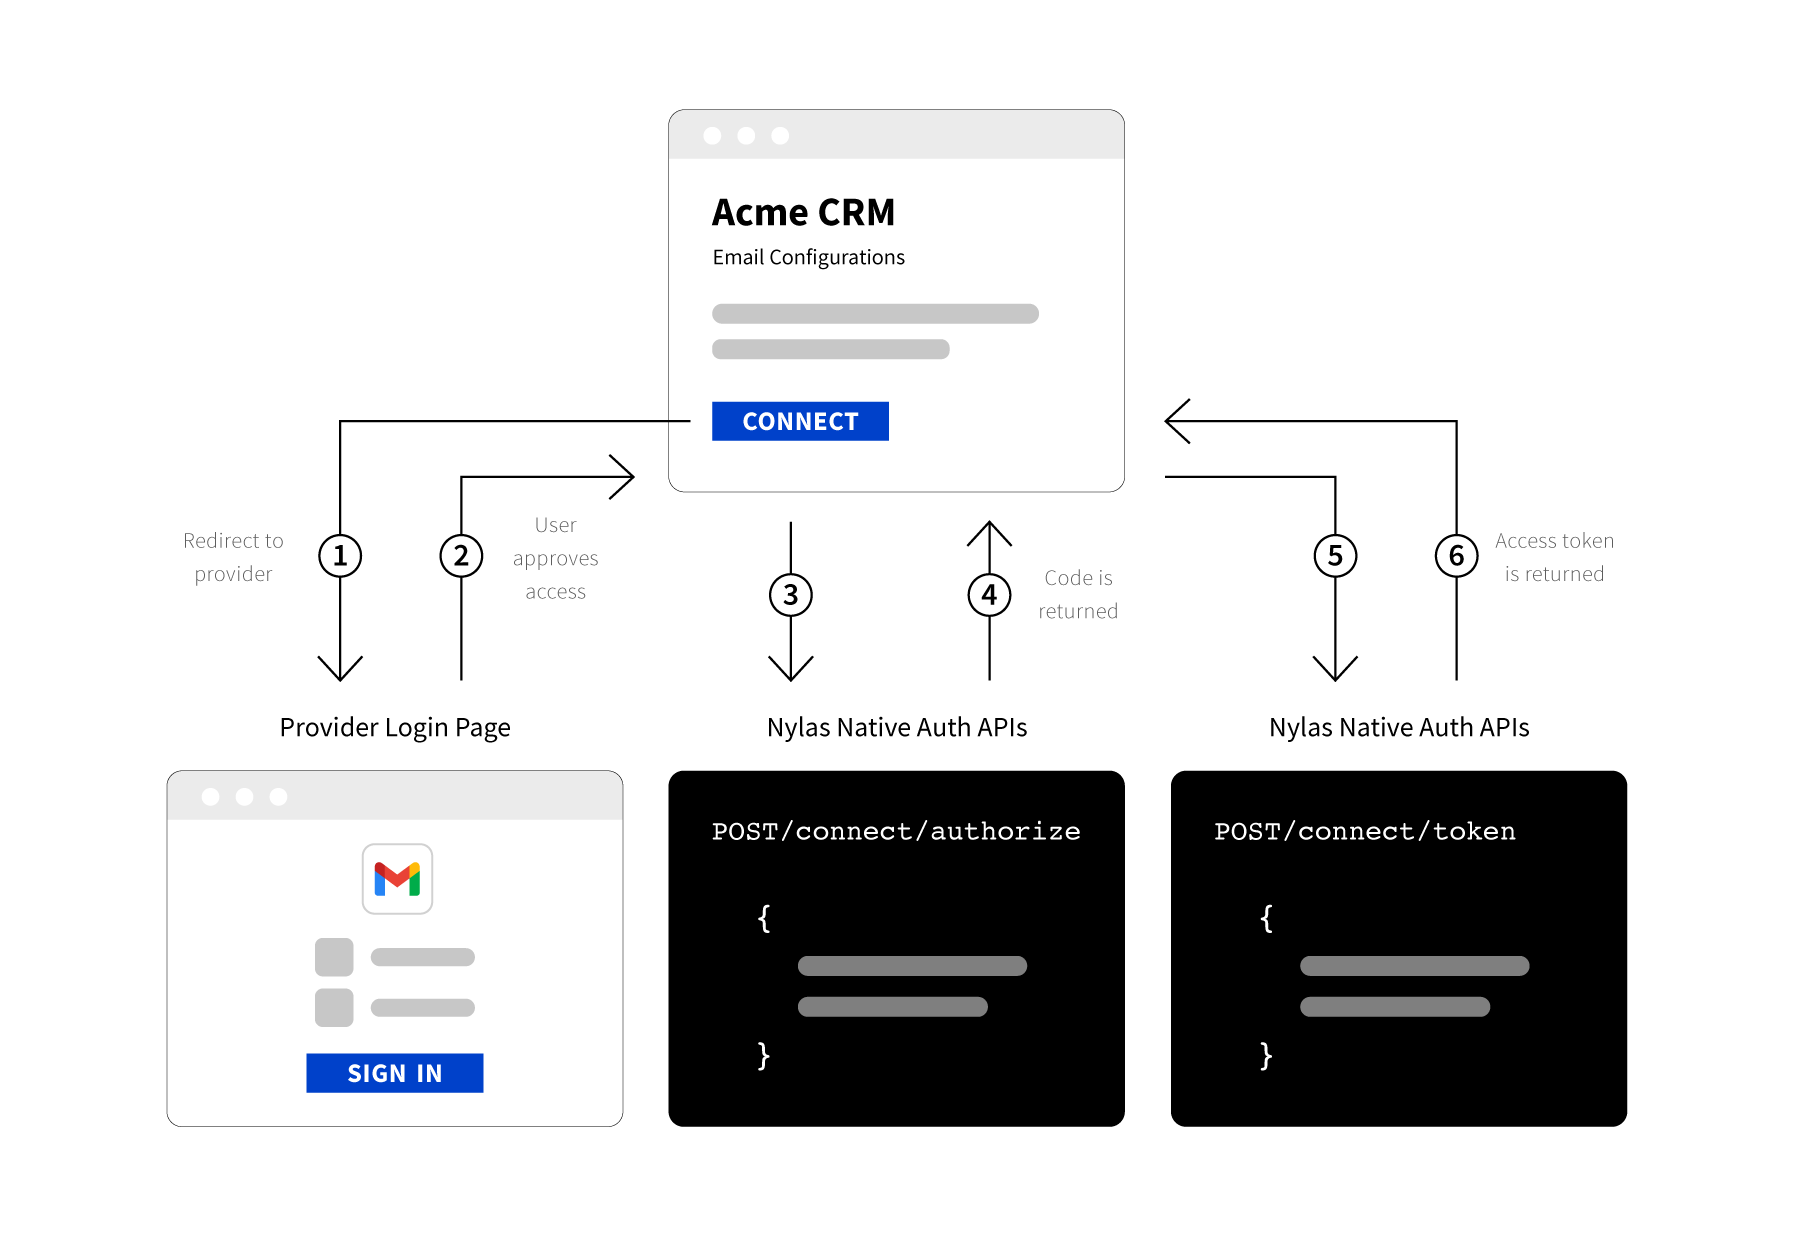
There are three steps to get an access_token for an account using Native Authentication:
- Create a branded login page, and have the user enter their information.
- Use this information to send a request to /connect/authorize with the required credentials and scopes. Nylas returns a one-time use code.
- Send the code to /connect/token to get an access token that allows you to make requests on behalf of the user.

Native authentication considerations
Use native authentication instead of hosted authentication when:
- You want to completely customize the entire authentication process.
- You don’t mind handling credentials and error handling.
Implementing native authentication can be quite time consuming. To work correctly, your app must provide error handling, detect provider and server settings, and securely handle credentials.
You should also determine the scopes your app requires. If you change scopes, your end-users must reauthenticate.
Step 1: Create a branded page
If you are using Native Authentication you must create a branded login page. The branded page is where your users enter their login credentials.
You should immediately make a request to /connect/authorize with the user-provided credentials so you do not have to store them. If you must store the credentials, make sure you do so securely.
Step 2: Make a request to /connect/authorize
Use the credentials you got from the end-user on your login page and make a request to Nylas with the correct provider settings and scopes.
The request parameters are:
client_id: Your Nylas application's client ID.name: The end user's name.email_address: The end user's email address.provider: The end user's email provider.settings: The settings object varies by provider. It usually includes information such as the username, password, SMTP,client_id, andclient_secret. Check the provider settings to learn which information you need to provide.scopes: The list of scopes (access permissions) your application requires. See Authentication scopes to learn more.- If you don't specify any scopes, Nylas requests the default scopes.
Example POST /connect/authorize request
curl -X POST https://api.nylas.com/connect/authorize -d '{
  "client_id": "<NYLAS_CLIENT_ID>",
  "name": "Nyla the Cheetah",
  "email_address": "nyla@example.com",
  "provider": "aol",
  "settings": {
    "password": "<PASSWORD>"
  },
  "scopes": "email.read_only,calendar.read_only,contacts.read_only"
}'
In the response, Nylas will return a one-time use code that you can exchange for an access_token. This code is only valid for 15 minutes. After that time, the code will expire.
Learn More
A full list of parameters can be found at /connect/authorize.
Step 3: Exchange the access code for a token
When you have your one-time use code, send a request to /connect/token to exchange it for an access token.
Example POST /connect/token request
curl -X POST "https://api.nylas.com/connect/token" -d '{
  "client_id": "<NYLAS_CLIENT_ID>",
  "client_secret": "<NYLAS_CLIENT_SECRET>",
  "code": "<AUTH_EXCHANGE_CODE>"
}'
In response, Nylas returns the account information.
You can find a full list of parameters can be found at /connect/authorize.
More resources
Each provider has their own additional requirements. See the documentation for each one you want to use.