As of November 20, 2020, Microsoft requires you to be a verified publisher, otherwise your users are presented with an error. You must complete the verification process before you change your user settings. For more information, see Microsoft’s official Publisher verification guide and Nylas’ Microsoft verification guide. Keep in mind that a verified publisher is not the same as a verified domain — you’ll need to go through both steps.
Microsoft allows you to adjust your user settings and API permissions to control how users authenticate against your application. This page describes the settings and Nylas’ recommended configuration.
Require admin approval to authenticate
You can control whether users can authenticate themselves against your Nylas application, or an administrator needs to approve their authentication attempt.
- From the Microsoft Entra admin center, search for User consent settings and navigate to the resulting page.
- Select Allow user consent for apps from verified publishers, for selected permissions.
- Save your changes.
Grant admin approval to authenticate
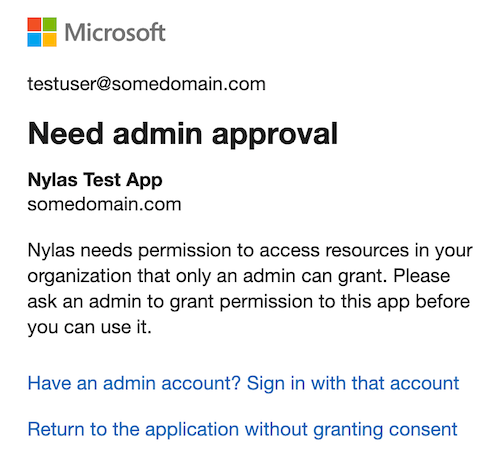
Some Microsoft applications require administrator approval before users authenticate against them. If a user tries to auth with an application and its admin hasn’t granted their consent, Microsoft displays a notification that prompts them to either continue without permission, or log in as an admin and grant permission.

There are two ways administrators can grant permissions:
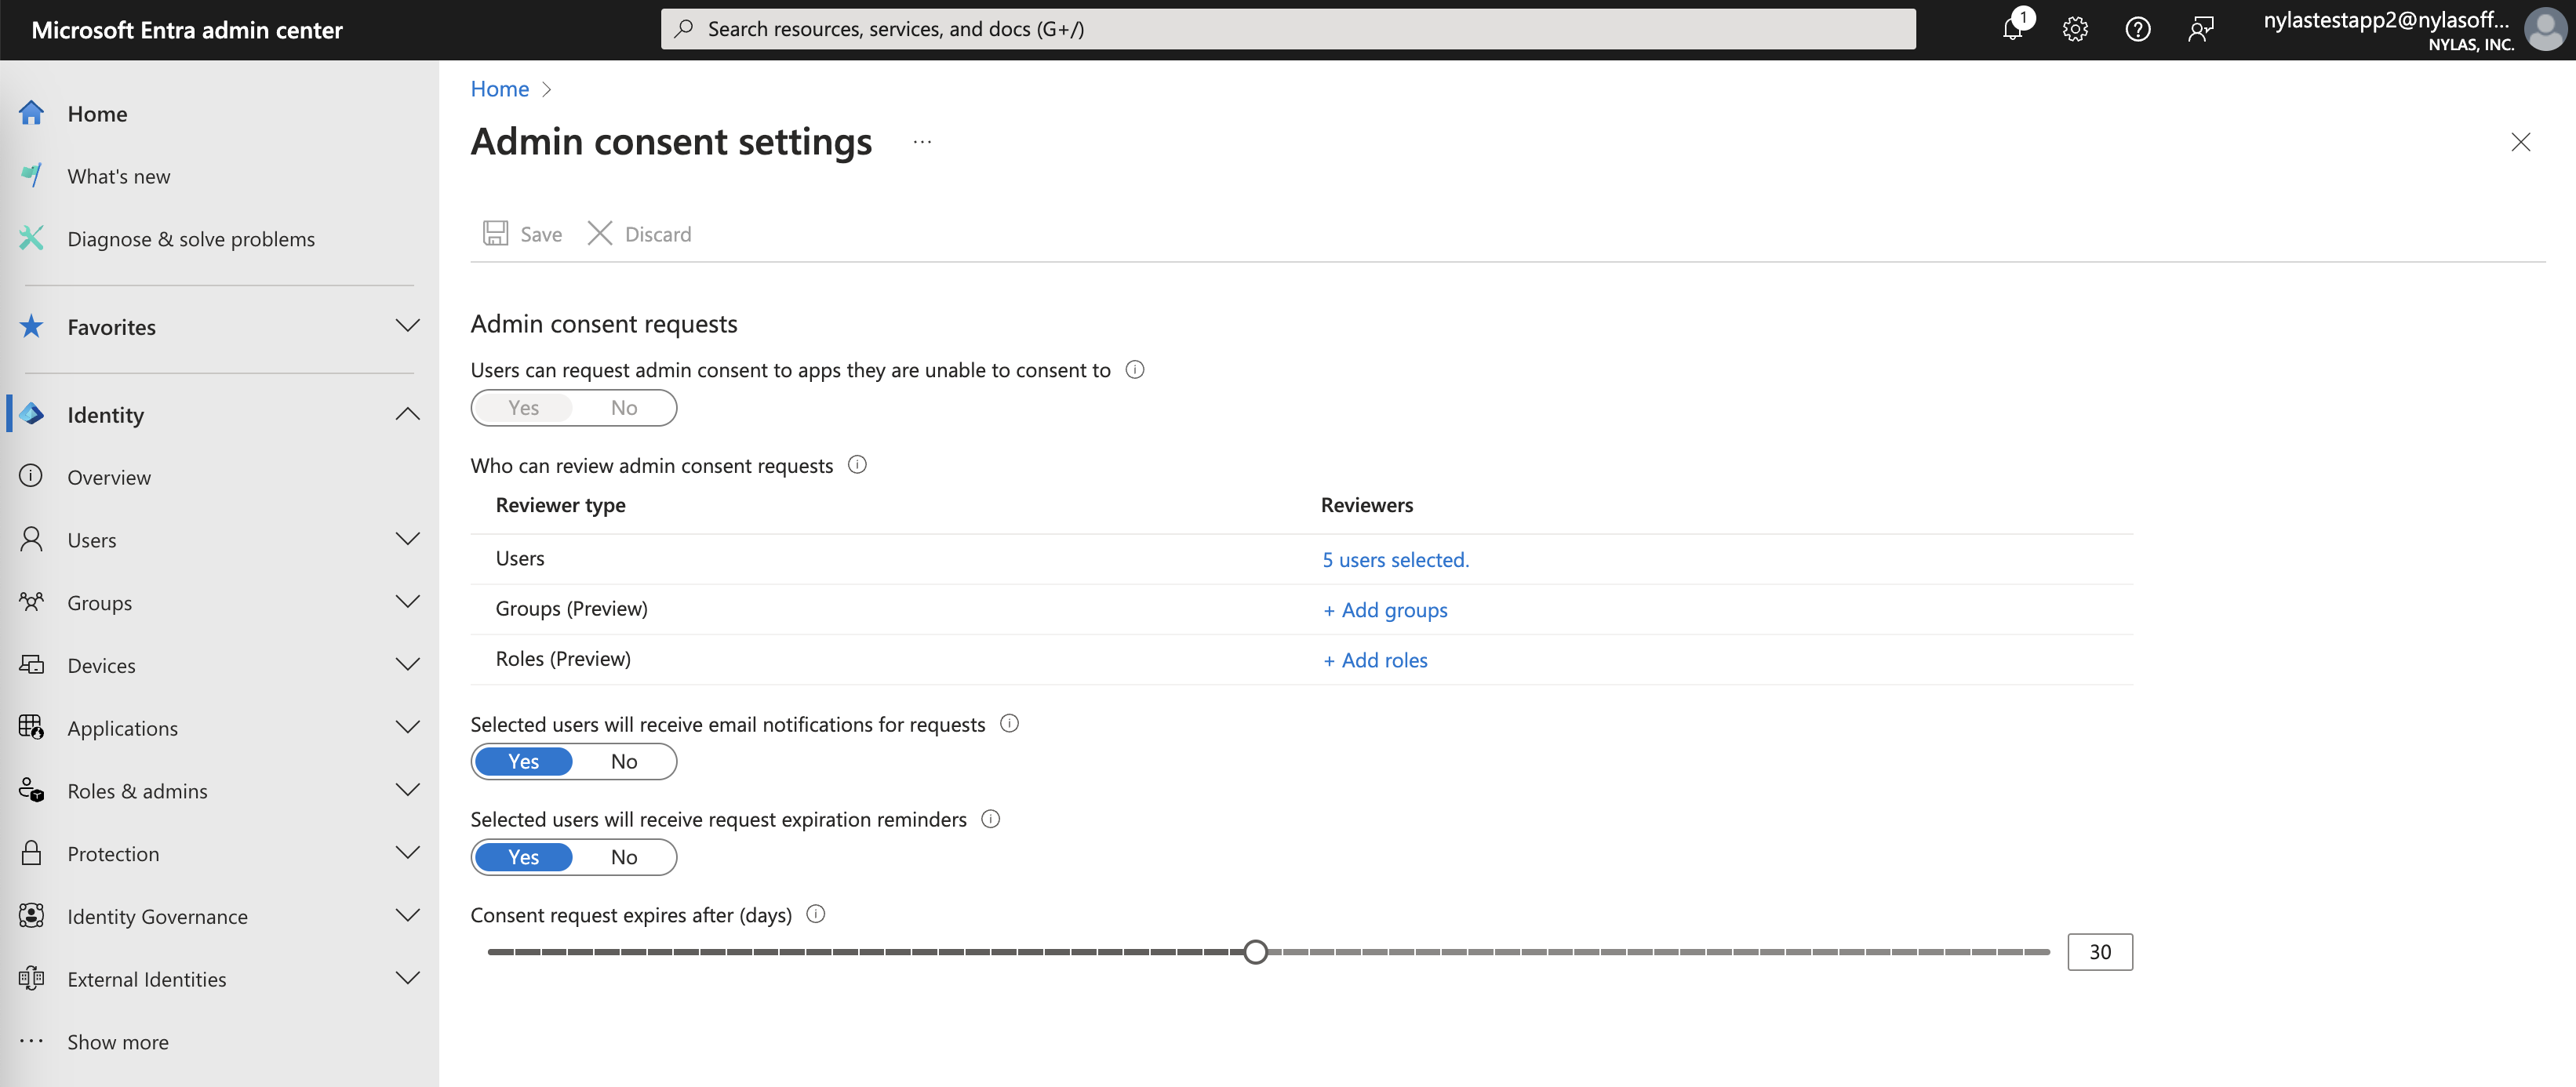
- Log in to the Microsoft Entra admin center and update the Admin consent requests settings.
- Set Users can request admin consent to apps they are unable to consent to to Yes.
- Configure the Consent request expires after time.

- Create a session and sign in to the application as an admin to grant permission.
Authorize an application as an administrator
As an administrator, you can authenticate users to your application on their behalf. In some cases, users might not be able to authenticate without permission from an administrator or the company. When this happens, users can submit approval requests from the “Approval required” notification:
- The user enters their reason for requesting access and clicks Request approval.
- Microsoft emails the administrator to notify them that a user has requested approval.
- The administrator logs in to the Microsoft Entra admin center and navigates to their Admin consent requests.
- The administrator reviews their pending requests and either grants or denies access.
After the email administrator approves their request, the user can restart the authentication process and connect their account to Nylas.
Grant admin approval for API permissions
For certain Nylas features, the Microsoft API permissions that Nylas requires need approval from an administrator. For example, the Place.Read.All permission required an administrator to grant their approval.
To grant admin consent for API permissions, follow these steps:
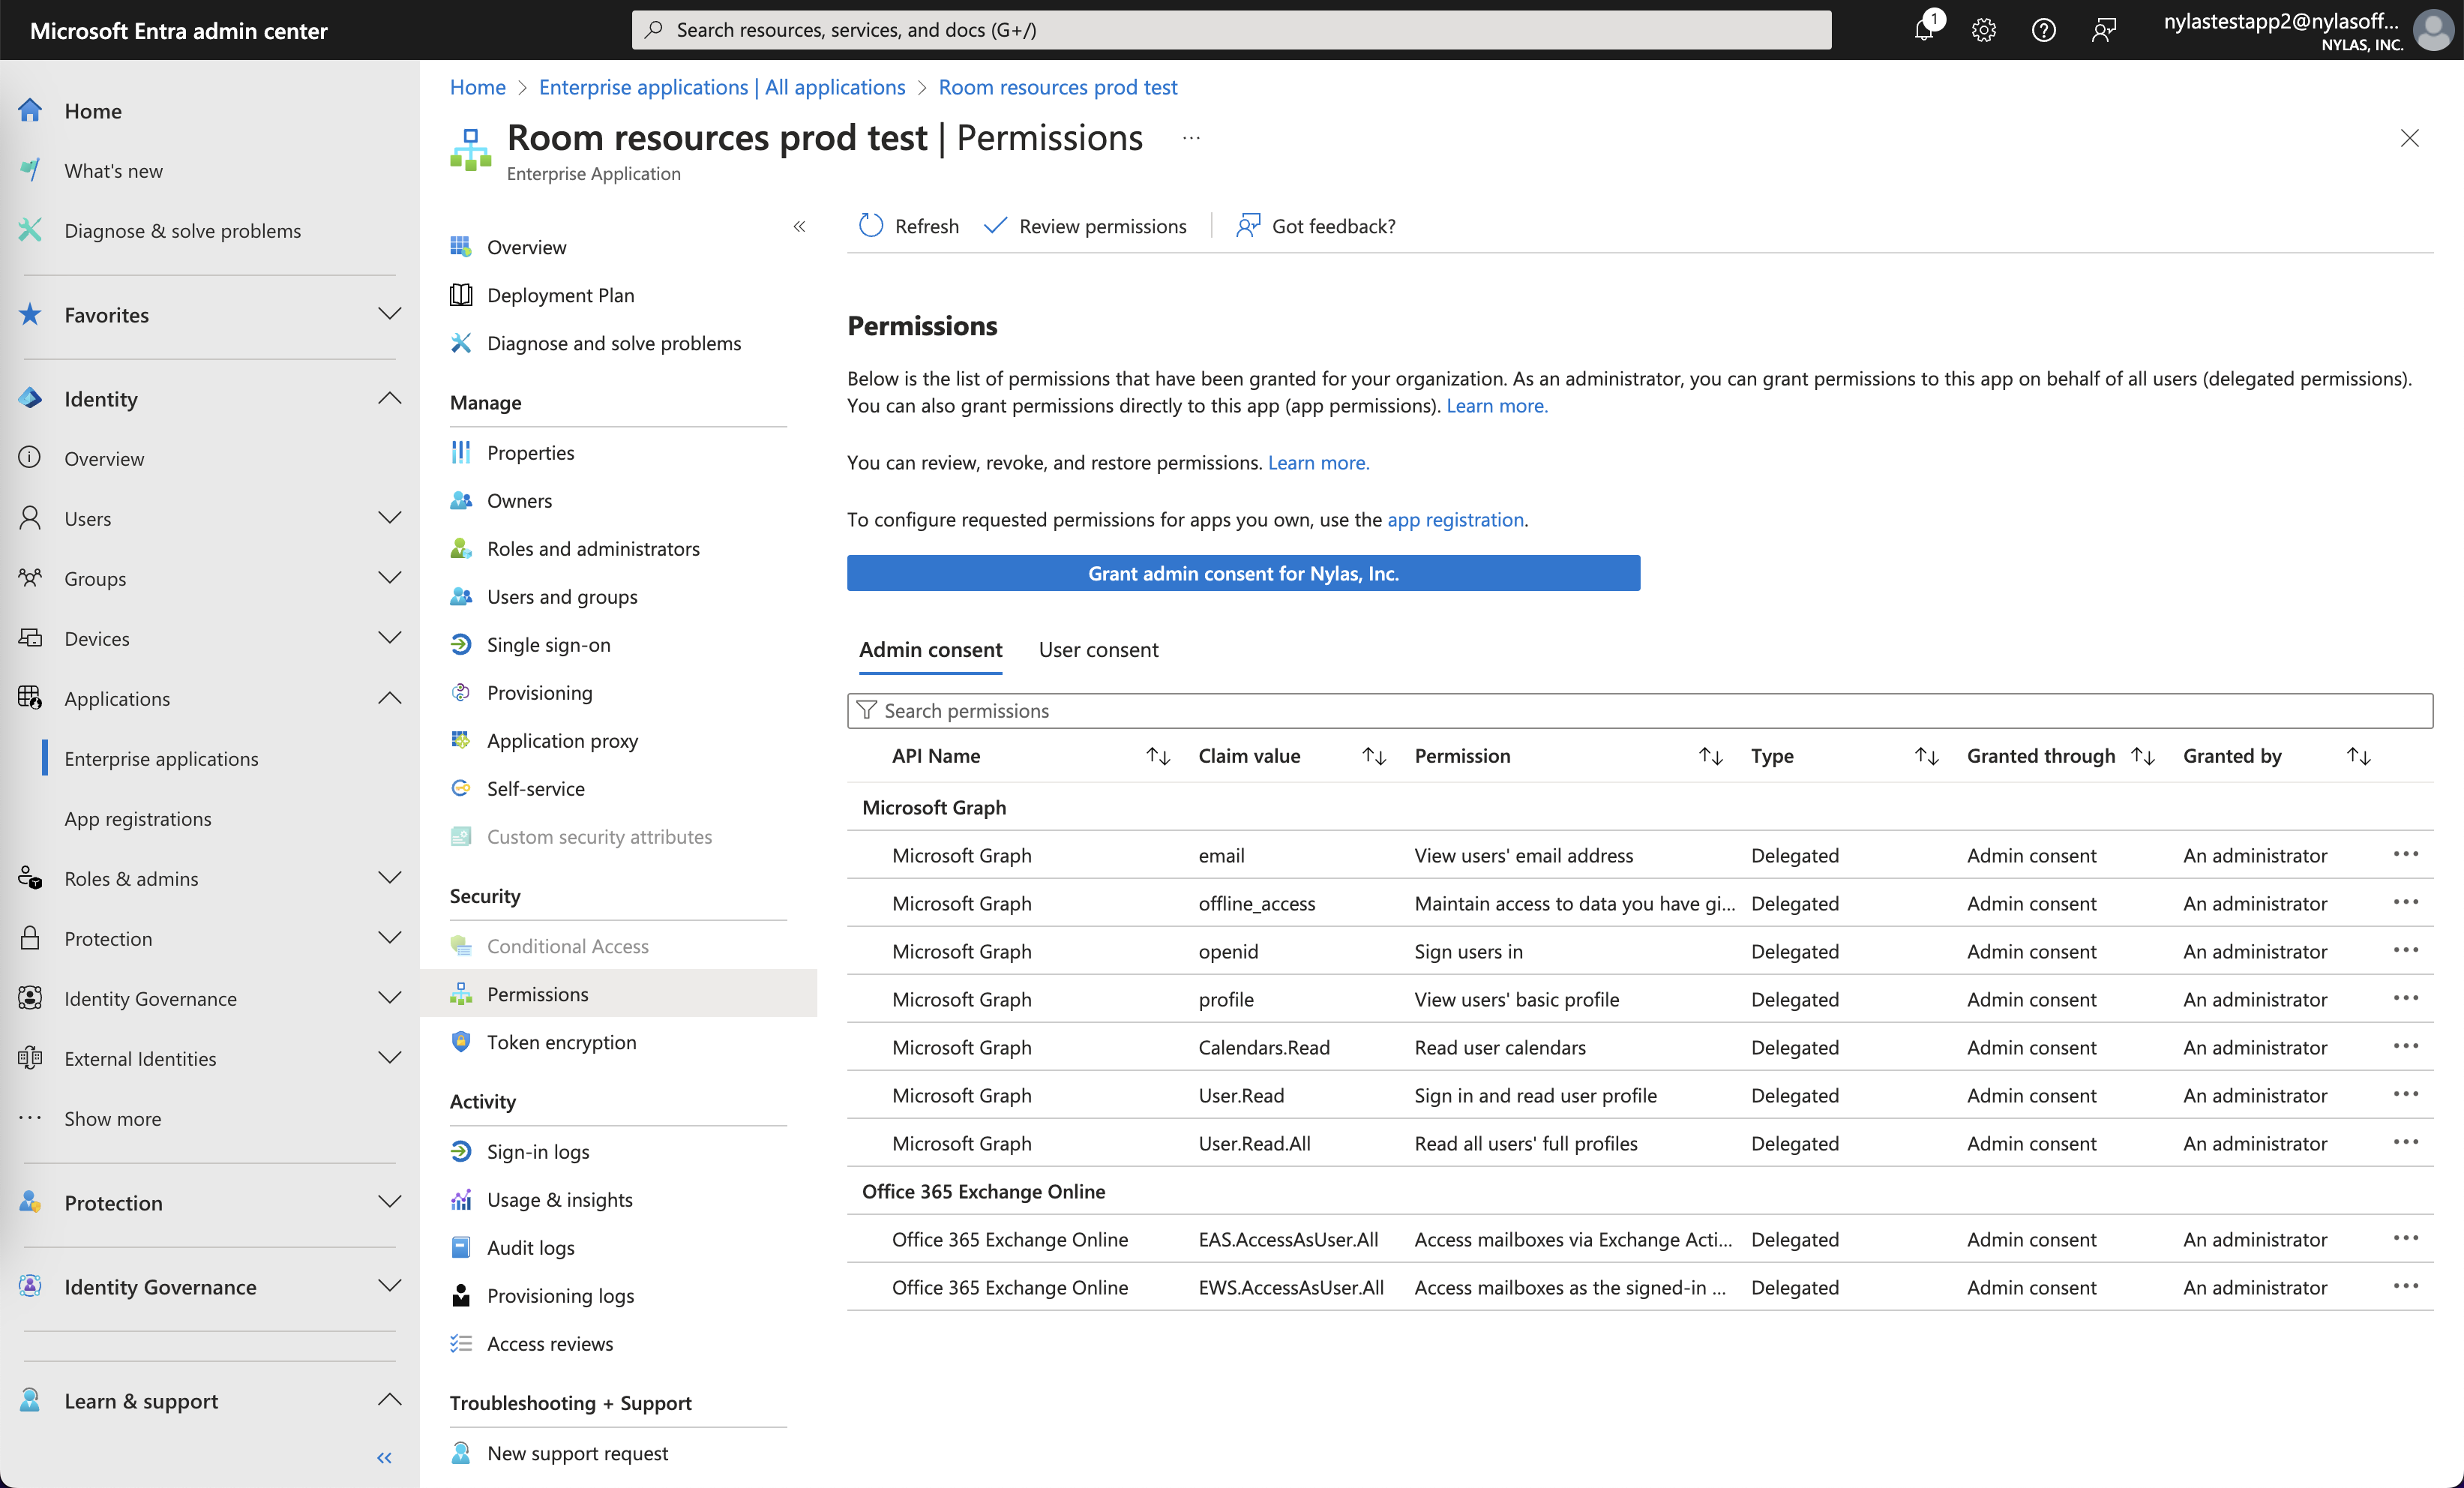
- Log in to the Microsoft Entra admin center and select Applications > Enterprise applications in the left navigation.
- Select the application you want to work with.
- Choose Permissions in the left navigation.
- Follow the steps on the page to grant admin consent.
