This page explains how to create and configure a Microsoft Azure OAuth application to use with Nylas.
Calculating scopes
Section titled “Calculating scopes”If you’re authenticating with Microsoft, you must use Microsoft Graph scopes (also sometimes called “feature permissions” or “API permissions”).
If you’re starting a new project, Nylas recommends you make a list of the APIs your project uses, then compile a list of the scopes you need using the scopes documentation. It’s a security best practice to only request scopes that you actually use, however for development purposes, you might choose broader scopes than your production app needs.
You’ll add these scopes to your Azure auth app’s Entra ID system (previously “Azure ID”) in the Enable required APIs step below. For more information, see Microsoft’s official Configure Azure AD Graph permissions for an app registration guide.
As you work with Nylas, you might need to update your scopes for specific APIs (for example, you might want Write permissions for your users’ messages). You can find API-specific scope information throughout this documentation:
Create an Azure OAuth application
Section titled “Create an Azure OAuth application”First, you need to create an Azure OAuth app:
- In the Microsoft Azure Portal, search for and click App registrations, then New registration.
- Give your application a name. This name will be visible to your users.
- Set the audience for the app to Accounts in my organizational directory and personal Microsoft accounts. This allows your user to log in using any Microsoft account. If you’re building an internal application (used only by members of your organization), you can restrict access to internal accounts only by setting the audience to Accounts in this organizational directory only.
- Set the Redirect URI platform to Web and enter your project’s redirect URI.
- Hosted Auth:
https://api.us.nylas.com/v3/connect/callback(U.S. region) orhttps://api.eu.nylas.com/v3/connect/callback. (E.U. region). - Bring Your Own Authentication: Your project’s callback URI.
- Hosted Auth:
- Review Microsoft’s Platform Policies, then click Register.

Enable required APIs
Section titled “Enable required APIs”After you create your OAuth app, you must add the required permissions to your Azure app. This enables the APIs that your application requires.
- In the Microsoft Azure Portal, go to Home > App registrations and select your application.
- From the left navigation menu, select API permissions.
- Click Add a permission.
- Select Microsoft Graph from the list of APIs.
- Select Delegated permissions.
- If you plan to use bulk authentication, select Application permissions and add all Microsoft Graph scopes that your project needs access to. For more information, see Use a Microsoft bulk authentication grant.
- Enable the following permissions:
offline_access: Read and update user data, even when the user is offline.openid: Sign users in to the app.profile: View users’ basic profiles.User.Read: Allow users to sign in to the app, and allow the app to read their profiles.- At least one feature permission: These permissions, also known as “scopes”, allow Nylas to read data from the provider.
- Click Add permissions.
If your Azure app was previously registered with a manifest, you might get the following error message:
One or more of the following permission(s) are currently not supported: EWS.AccessAsUser.All. Please remove these permission(s) and retry your request.
If this happens, you can either enable the required APIs with a manifest or create a new Azure auth app.
For more information, see Microsoft’s official permissions reference.
(Optional) Enable required APIs with manifest
Section titled “(Optional) Enable required APIs with manifest”If you use the application manifest, you can update an Azure app directly by editing its JSON. For more information, see Microsoft’s official AD Manifest documentation.
To enable the required APIs using the application manifest, follow these steps:
- In the Microsoft Azure Portal, select Manifest from the left navigation menu.
- Find
requiredResourceAccessin the code panel. - Update
requiredResourceAccessto include the following permissions:offline_accessopenidprofileUser.Read- At least one feature permission
- Click Save.
Create OAuth credentials
Section titled “Create OAuth credentials”Next, create your OAuth credentials:
- In the Microsoft Azure Portal, search for and click App registrations and select your application.
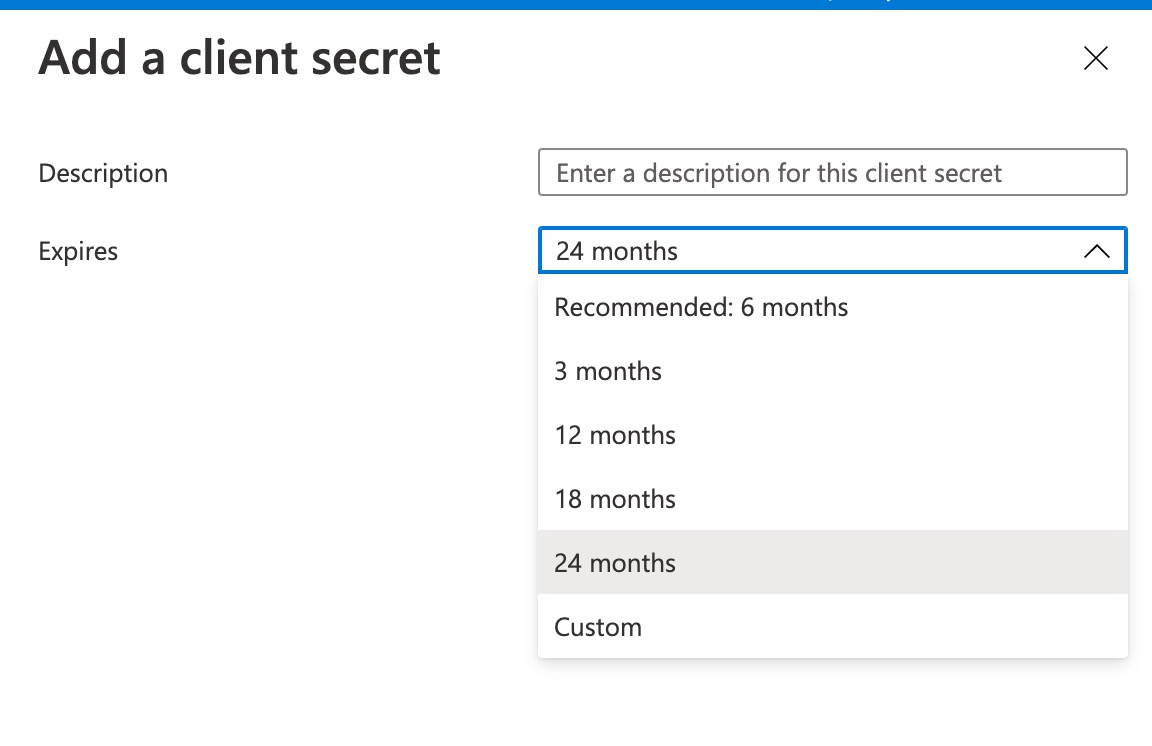
- Select Certificates & secrets from the left navigation.
- Click New client secret, enter a short description, and set the expiration date to 730 days (24 months).
- Click Add.
- Copy the value from the Azure Client Secrets page and save it to your secrets manager.

- Navigate to the App registrations page and copy the Application (client) ID for your app.
All Azure credentials include an expiration date. When they expire, you’ll need to refresh or regenerate them.
Add a Microsoft connector to Nylas
Section titled “Add a Microsoft connector to Nylas”Finally, you need to add a Microsoft connector to your Nylas application. You can create a connector either using the Nylas Dashboard, or by making an API request.
Create connector using the Nylas Dashboard
Section titled “Create connector using the Nylas Dashboard”- Log in to the Nylas Dashboard, and navigate to the Nylas application you’re creating the connector for.
- Select Connectors from the left navigation.
- In the Microsoft tile, click the add symbol (+).
- Under Microsoft credentials, enter your Azure client ID and Azure client secret.
- Set the Azure tenant to
commonto allow authentication for accounts that are outside of your organization.
- Set the Azure tenant to
- Under Authenticate scopes, select the required scopes.
- Click Save.
Create connector using the Nylas API
Section titled “Create connector using the Nylas API”To add a connector using the Nylas API, make a Create Connector request. The following code sample demonstrates how to use your Azure app’s client ID and secret to add the Microsoft connector to Nylas.
curl -X POST 'https://api.us.nylas.com/v3/connectors' \ --header 'Authorization: Bearer <NYLAS_API_KEY>' \ --header 'Content-Type: application/json' \ --data '{ "name": "microsoft example", "provider": "microsoft", "settings": { "client_id": "<AZURE_CLIENT_ID>", "client_secret": "<AZURE_CLIENT_SECRET>", "tenant": "common" }, "scope": [ "offline_access", "openid", "profile", "User.Read", "Calendars.Read", "Calendars.ReadWrite", "Mail.ReadWrite", "Mail.Send" ] }'Update your Azure client secret
Section titled “Update your Azure client secret”Microsoft’s Azure client secrets expire after two years. When a secret expires, it invalidates the associated Nylas grants. For best practices on updating your Azure client secret, see How to renew Microsoft Azure client secret for your Nylas application.