Create an Azure auth app for Nylas v2
💡 If you're using Nylas v3, you should set up an Azure application for v3 instead. This page covers instructions specific to Azure apps for Nylas v2.
This page explains how to create and configure a Microsoft Azure OAuth application to use with Nylas v2.
Before you begin
If you don't already have one, create your free Microsoft Azure account. You'll use this account to create the Microsoft developer application that is used for authenticating end users using OAuth with Nylas.
Create an Azure OAuth application
⛔️ Do not authenticate end users to your production application before you've tested OAuth on your staging application. You cannot delete OAuth settings once you add them to Nylas.
Follow these steps to create an Azure app for authenticating your end users to Microsoft 365:
- Log in to the Microsoft Azure Portal.
- Click App registrations.
- Click New registration.
- Give your application a name. This name will be visible to your end users.
- Set the audience for the app to Accounts in any organizational directory. This allows end users to log in using any Microsoft account.
- If you're building an internal app (used only by members of your organization), you can restrict access to internal accounts only by setting the audience to Accounts in this organizational directory only.
- Set the Redirect URI platform to Web and enter your redirect URI.
- If you're using Hosted auth, enter
https://api.nylas.com/oauth/callback(U.S. region) orhttps://ireland.api.nylas.com/oauth/callback(E.U. region). - If you're using Native auth, enter your Nylas application's callback URI.
- If you're using Hosted auth, enter
- Review Microsoft's Platform Policies, then click Register.

Enable required APIs with manifest
The application manifest lets you update an Azure app directly by editing its JSON. For more information, see Microsoft's official AD Manifest documentation.
To enable the required APIs using an Azure manifest, follow these steps:
- In the Microsoft Azure Portal, select Manifest from the left navigation menu.
- Find the
requiredResourceAccessin the code panel.

- Update
requiredResourceAccessto include the following Microsoft Graph permissions:offline_access: Allows the Azure app to maintain access to the data you've given it access to.openid: Sign end users in with their Microsoft account.profile: View end users' basic profiles.User.Read: Sign in and read user profiles.EAS.AccessAsUser.All: Access mailboxes via Exchange ActiveSync (EAS).EWS.AccessAsUser.All: Access mailboxes as the signed-in user via Exchange Web Services (EWS).
- Click Save.
You've added all the required permissions to your Azure app. If you want to check the API permissions in the future, select API permissions from the left navigation menu.

Sample Azure Manifest
The following JSON includes the permissions that Nylas requires when creating an Azure application.
"requiredResourceAccess": [
  {
    "resourceAppId": "00000003-0000-0000-c000-000000000000",
    "resourceAccess": [
      {
        "id": "cb8f45a0-5c2e-4ea1-b803-84b870a7d7ec",
        "type": "Scope"
      },
      {
        "id": "7427e0e9-2fba-42fe-b0c0-848c9e6a8182",
        "type": "Scope"
      },
      {
        "id": "e1fe6dd8-ba31-4d61-89e7-88639da4683d",
        "type": "Scope"
      },
      {
        "id": "37f7f235-527c-4136-accd-4a02d197296e",
        "type": "Scope"
      },
      {
        "id": "14dad69e-099b-42c9-810b-d002981feec1",
        "type": "Scope"
      }
    ]
  },
  {
    "resourceAppId": "00000002-0000-0000-c000-000000000000",
    "resourceAccess": [{
      "id": "311a71cc-e848-46a1-bdf8-97ff7156d8e6",
      "type": "Scope"
    }]
  },
  {
    "resourceAppId": "00000002-0000-0ff1-ce00-000000000000",
    "resourceAccess": [
      {
        "id": "266d2589-20b5-4f91-9a03-89247d1be8da",
        "type": "Scope"
      },
      {
        "id": "3b5f3d61-589b-4a3c-a359-5dd4b5ee5bd5",
        "type": "Scope"
      }
    ]
  }
],
...
Create OAuth credentials
Next, you need to create your OAuth credentials:
-
In the Microsoft Azure Portal, navigate to Home > App registrations and select your application.
-
From the left navigation menu, select Certificates & secrets.
-
Click New client secret.
-
Enter a Description of the client secret, and set an expiration date of 730 days (24 months).
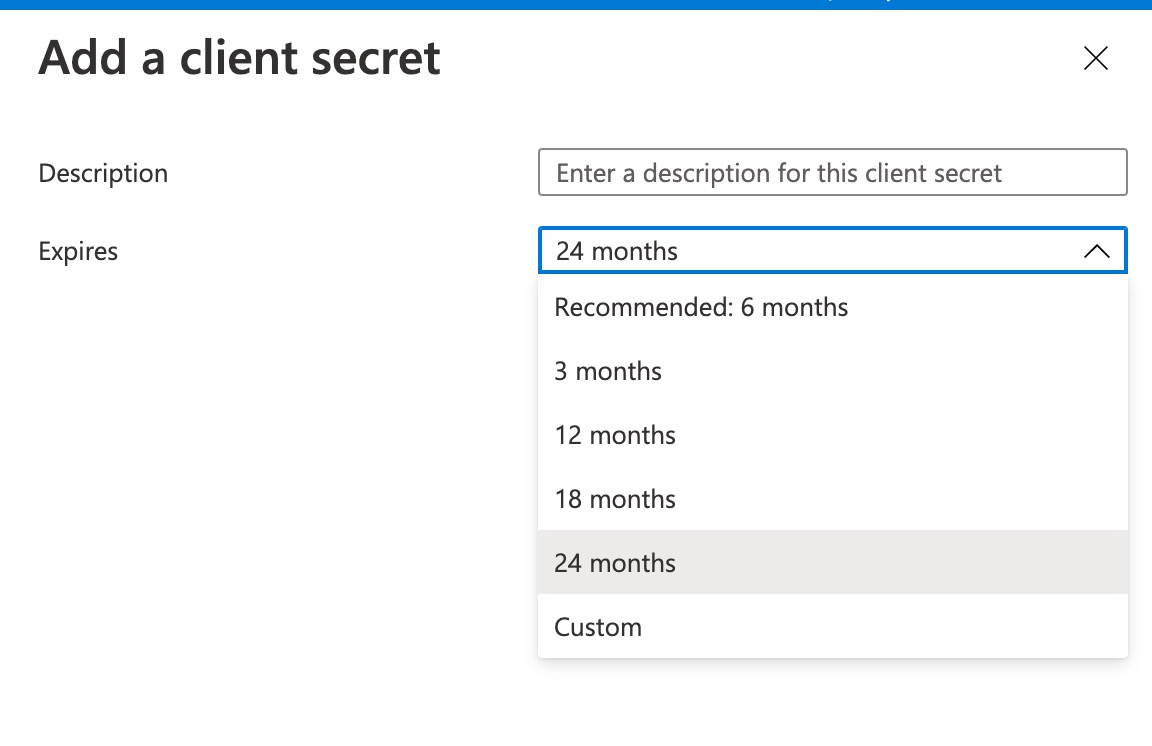
-
Click Add.
-
Copy the value from the Azure Client secrets page and save it to your secrets manager.
⚠️ Be sure to save the client secret value somewhere secure. Azure shows the value only once, and if you navigate away from this page you cannot retrieve the key value. For best practices, see Storing secrets securely.

-
Navigate to the App registrations page and copy the Application (client) ID for your app.

Azure credentials include an expiration date. When these credentials expire you must refresh or regenerate them.
Add client ID and secret to Nylas
Finally, you need to add your Azure app's credentials to your Nylas application:
- Log in to the v2 Nylas Dashboard.
- Navigate to App settings > Authentication.
- Add your Azure app's client ID and secret to Office365 Auth.

- Click Save Office365 settings.
Get ready for production
You're all set up! 🎉 Now, it's time to get your Azure app ready for production.
Microsoft requires applications that access end user data go through a domain verification process. If you need help with the process, contact Nylas Support.
What's next?
- Read the Nylas How to Create an Azure App blog post.
Video walkthrough
Prefer video? You can watch the Coding with Nylas live stream.