Amazon SNS
Amazon Simple Notification Service (Amazon SNS) is a managed messaging service that supports pub/sub messaging and mobile push notifications.
You’ll learn how to add Amazon SNS as a Nylas Stream.
Prerequisites
Before you begin, you must create grants and an integration. Nylas recommends you review the following documentation, based on your data needs:
- Read the Google application documentation if you want to stream messages or grants from your connected Google accounts.
- Read the Azure application documentation if you want to stream messages or grants from your connected Microsoft accounts.
- Read the Zoom application documentation if you want to stream meeting transcripts from your connected Zoom accounts.
Create a New Connector
Set up tip
Keep your dashboard open because you'll be frequently referring to the information there.
- Go to the Nylas dashboard and select Streams.
- Select Amazon SNS.
- Choose your data source.
- Keep your dashboard open, we'll move onto the next steps and let you know when you need to refer to the dashboard and when to enter information.
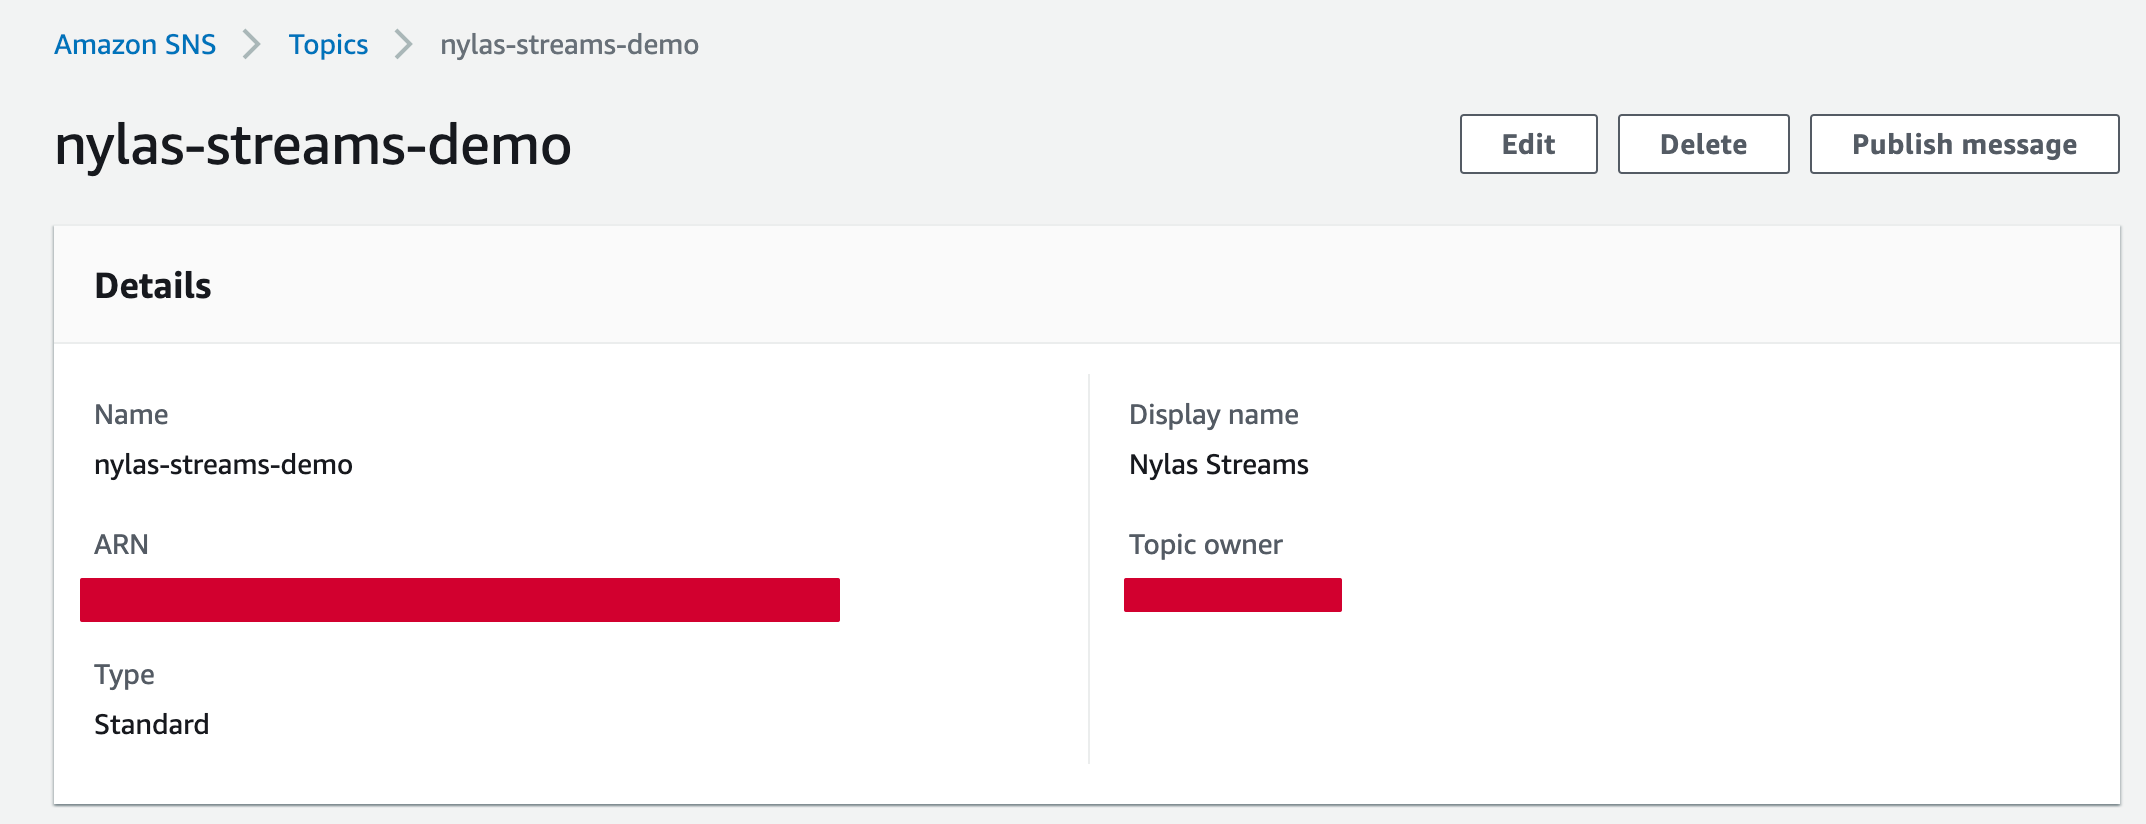
Create SNS Topic
- Go through the steps in Creating an Amazon SNS topic.
- We recommend topic type to be Standard.
- Keep your Topic ARN ready, you’ll need this in Create IAM Role.
- Copy the Topic ARN into your dashboard into Destination ARN.

Create an S3 Bucket (Optional)
Create an S3 bucket to stream data that is larger than 256 KB. By default, the AWS SNS Connector will skip publishing data objects larger than 256 KB.
- Go to Amazon S3 and create a new bucket.
- Select the bucket and click Copy ARN.
- Copy the ARN into the dashboard and save the S3 ARN for Create IAM Role.

Create IAM Role
You’ll need to create an IAM Role that gives Nylas access to write to your SNS topic and your S3 bucket. You’ll be creating a new role and policy.
-
Go to IAM.
-
Go to Access management > Roles.
-
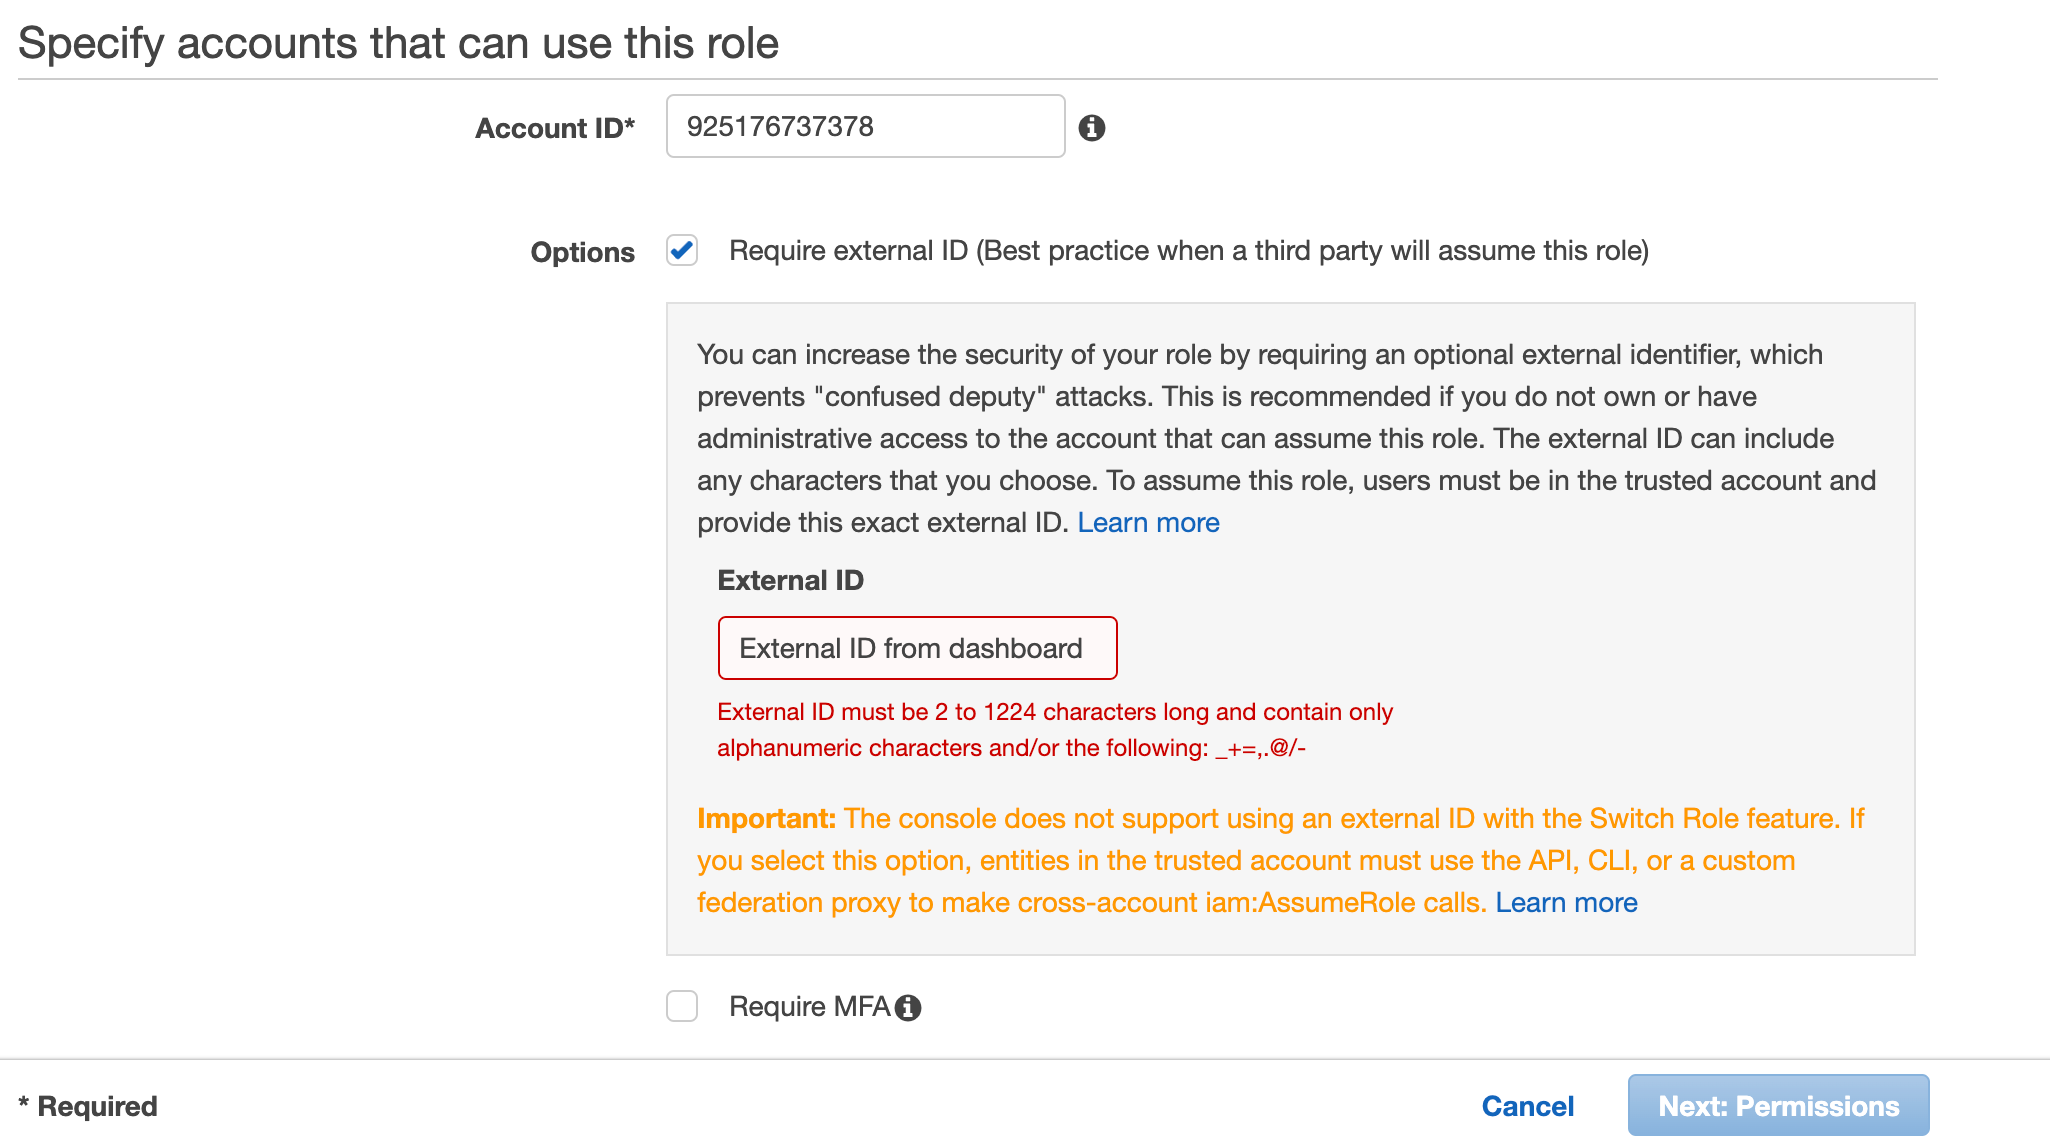
Select Another AWS account.
- Account ID - 925176737378
- Select Require external ID (Best practice when a third party will assume this role)
- In your dashboard, copy the External ID and add it as the External ID into AWS console.

-
On the next screen, click Create policy. This will open a new window or tab. You’ll need to keep both the Create role and Create policy windows open.
-
Select JSON. Depending on if you are using S3 or not, copy the JSON for your policy. Modify the highlighted items with
<YOUR-TOPIC-ARN>and<YOUR-S3-BUCKET-ARN>.
{
"Version": "2012-10-17",
"Statement": [
{
"Sid": "VisualEditor0",
"Effect": "Allow",
"Action": "sns:Publish","Resource": "<YOUR-TOPIC-ARN>"
}
]
}{
"Version": "2012-10-17",
"Statement": [{
"Sid": "VisualEditor0",
"Effect": "Allow",
"Action": [
"s3:*Object*",
"sns:Publish"
],
"Resource": ["<YOUR-S3-BUCKET-ARN>/*","<YOUR-TOPIC-ARN>"
]
}]
} -
Name the policy nylas-streams-write-policy and save.
-
Go back to the Create role window and click refresh.
-
Search for nylas-streams-write-policy and select the policy.
-
Name the role nylas-streams-write-role and create the role.
-
Copy the role ARN, and add it your dashboard in IAM Role ARN.
-
You can save your Nylas Stream.
-
It will take a few minutes for the Stream to activate.
Test Your Stream
To test for receiving data, setup a subscription in AWS that's listening to the configured SNS topic. View the link below for more about the Amazon configuration.
The sections below detail pulling new messages using SQS.
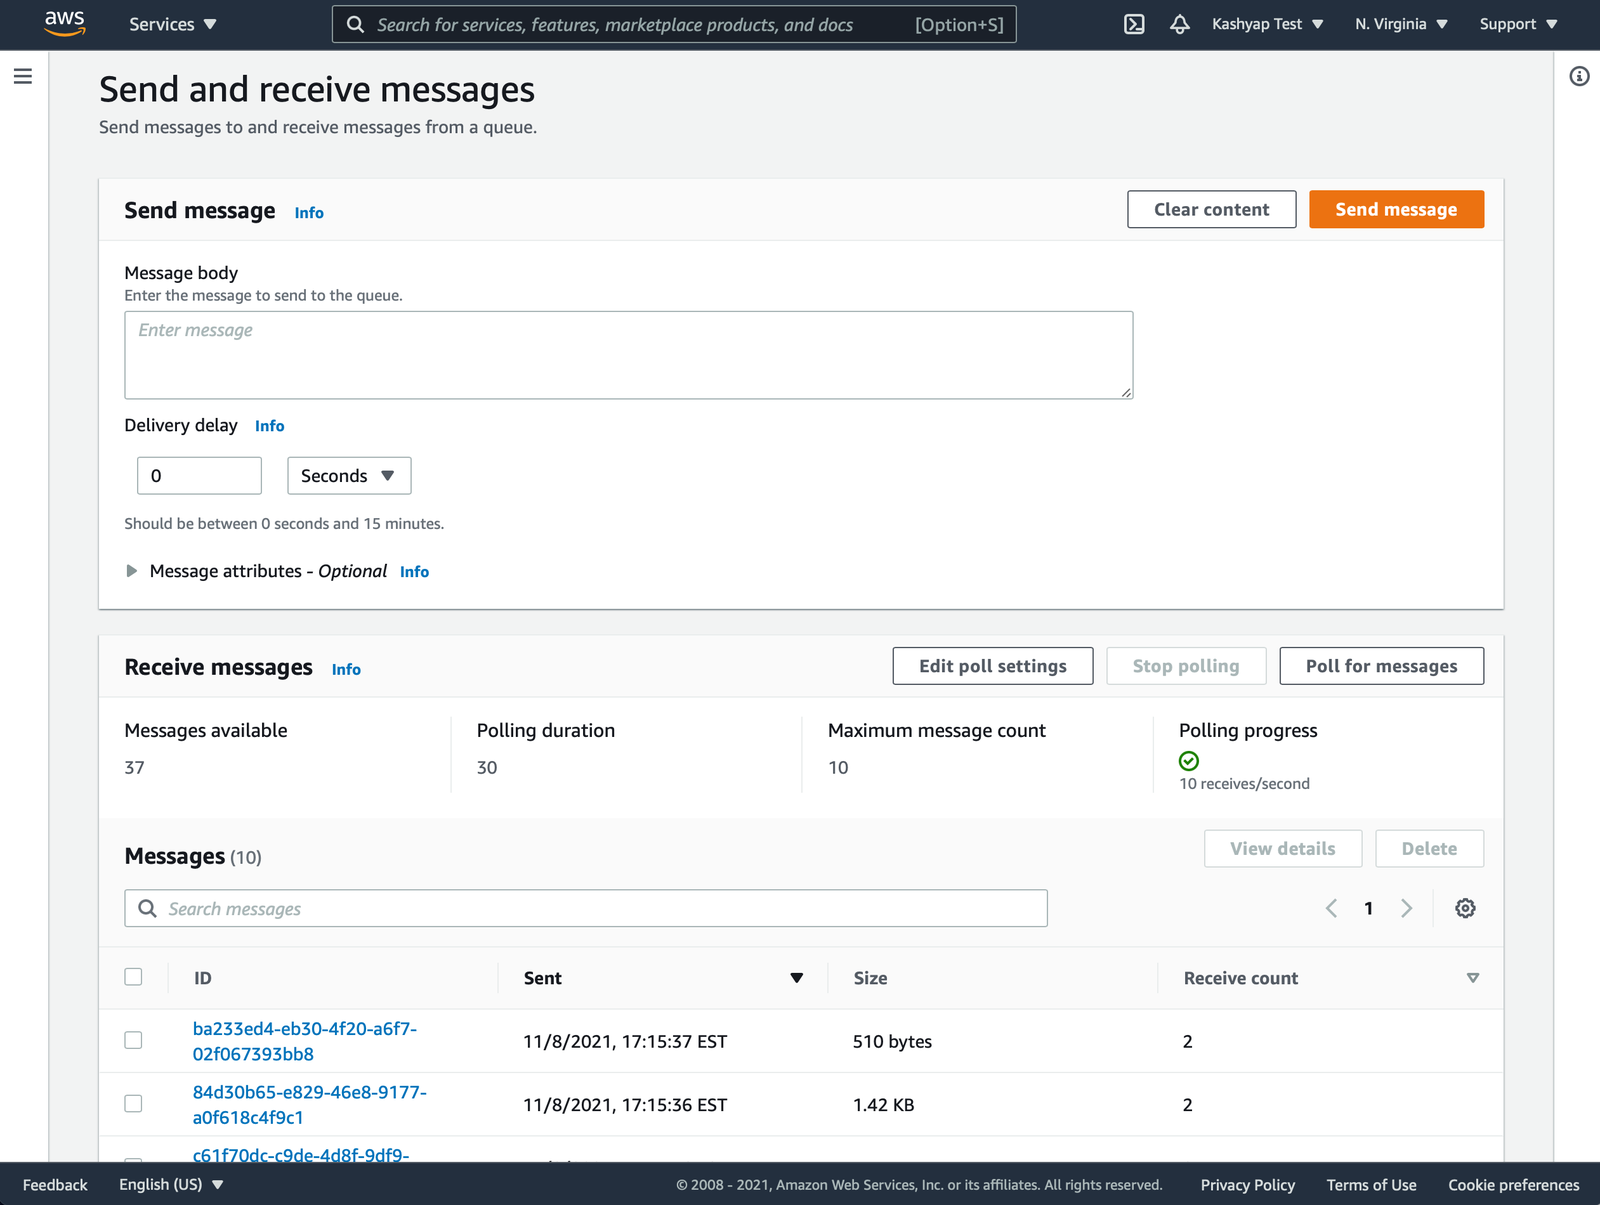
Poll for New Messages
- Go to SQS and select the queue you created for your Stream.
- Click Poll for messages

Message
If you selected message.create as your data source, create a new email message.
Grants
If you selected grants as your data source, you’ll get notifications when a grant expires or when an account is granted access to an Integration.