Wondering if there is safer way to handle external URLs in your application? Maybe, you are tired of constant redirect to browser and prompt to open your app before actually navigating to the application? Is there a solution? Yes - App Links. Does OAuth 2.0 possible with App Links? Yes. This article is about how to deal with all the above struggles.
Overview

Android App Links, available on Android 6.0 (API level 23) and higher, are web links that use the HTTP and HTTPS schemes and contain the autoVerify attribute. This attribute allows your app to designate itself as the default handler of a given type of link. So when the user clicks on an Android App Link, your app opens immediately if it’s installed—the disambiguation dialog doesn’t appear.
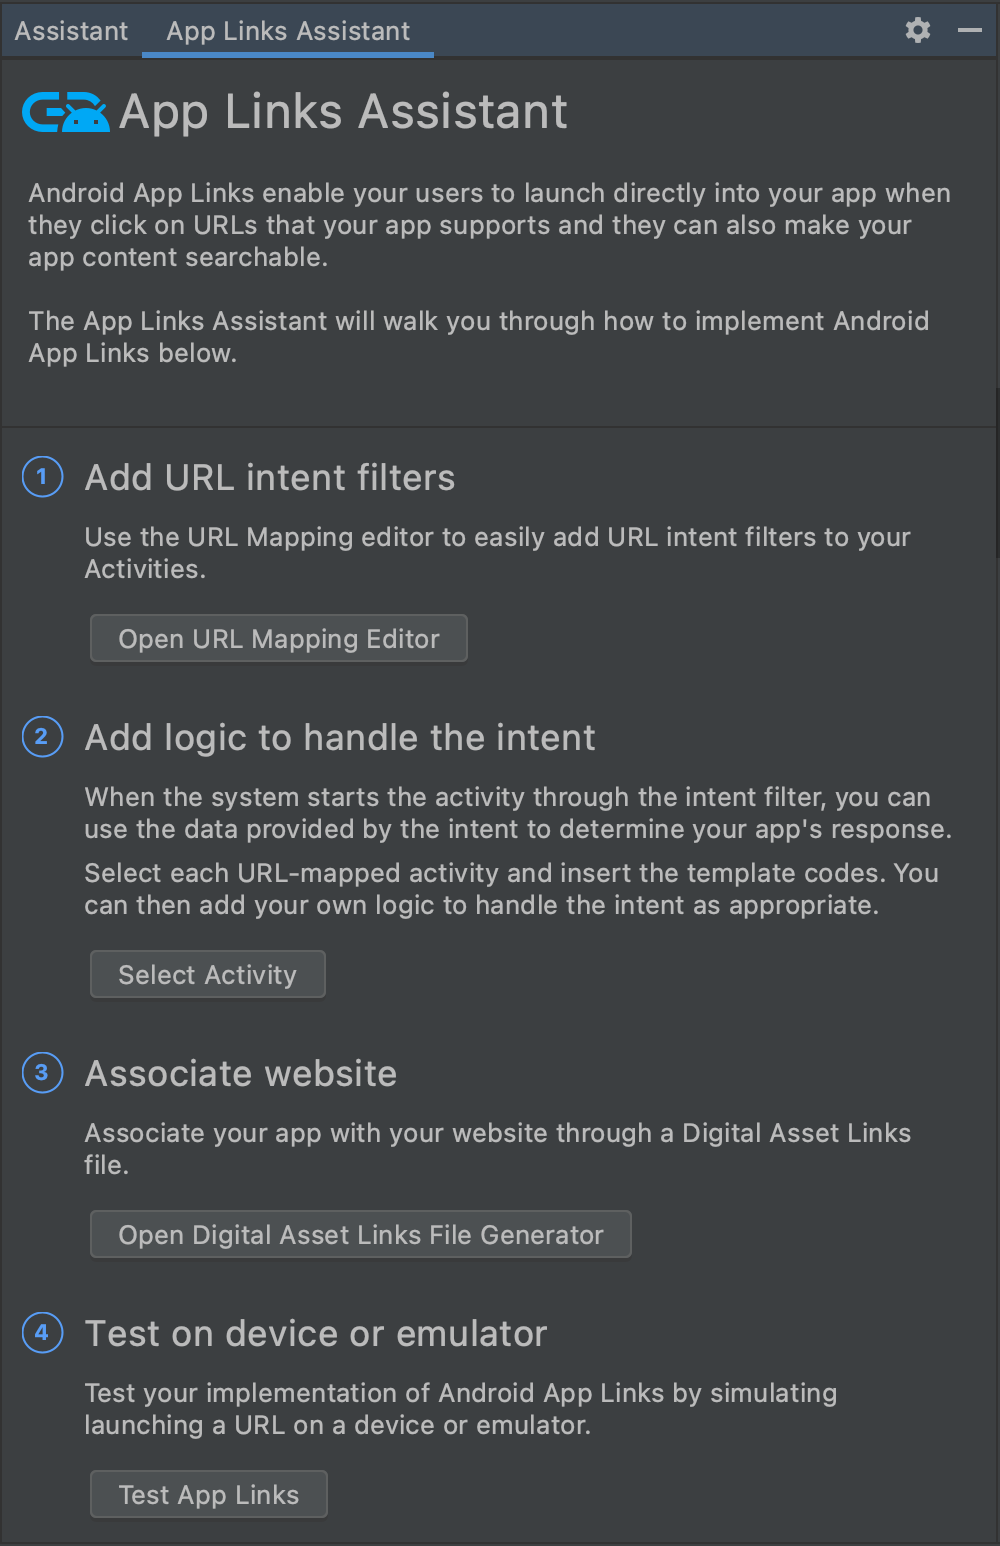
All setup is performed using App Links Assistant from Android Studio. App Links Assistant can be found in Tools → App Links Assistant.
Before You Begin
In order to use regular HTTPS links as redirect URI you need to update your previously created integration made in Step 1: Create an Integration from Hosted Auth on Android article.
To update existing integration you can use PATCH to connect/integrations/google endpoint with following payload:
{ "name": "Mobile Auth Demo", "provider": "google", "settings": { "client_id": "{provider_client_id}", "client_secret": "{provider_client_secret}" }, "redirect_uris": [ "application-url-scheme-placeholder://auth-callback" ], "scope": [ "https://www.googleapis.com/auth/gmail.readonly", "https://www.googleapis.com/auth/userinfo.email" ]}If you are migrating from custom URL schemes usage to Universal Links, make sure you delete your custom URL scheme from info.plist
Step 1: Add Intent Filter
App Links as well as default Deep Links use intent filters. Click Open URL Mapping Editor button in App Links Assistant window, then hit plus at the bottom of the list(usually empty list if you don’t have intent filters. Might have items in case you do).
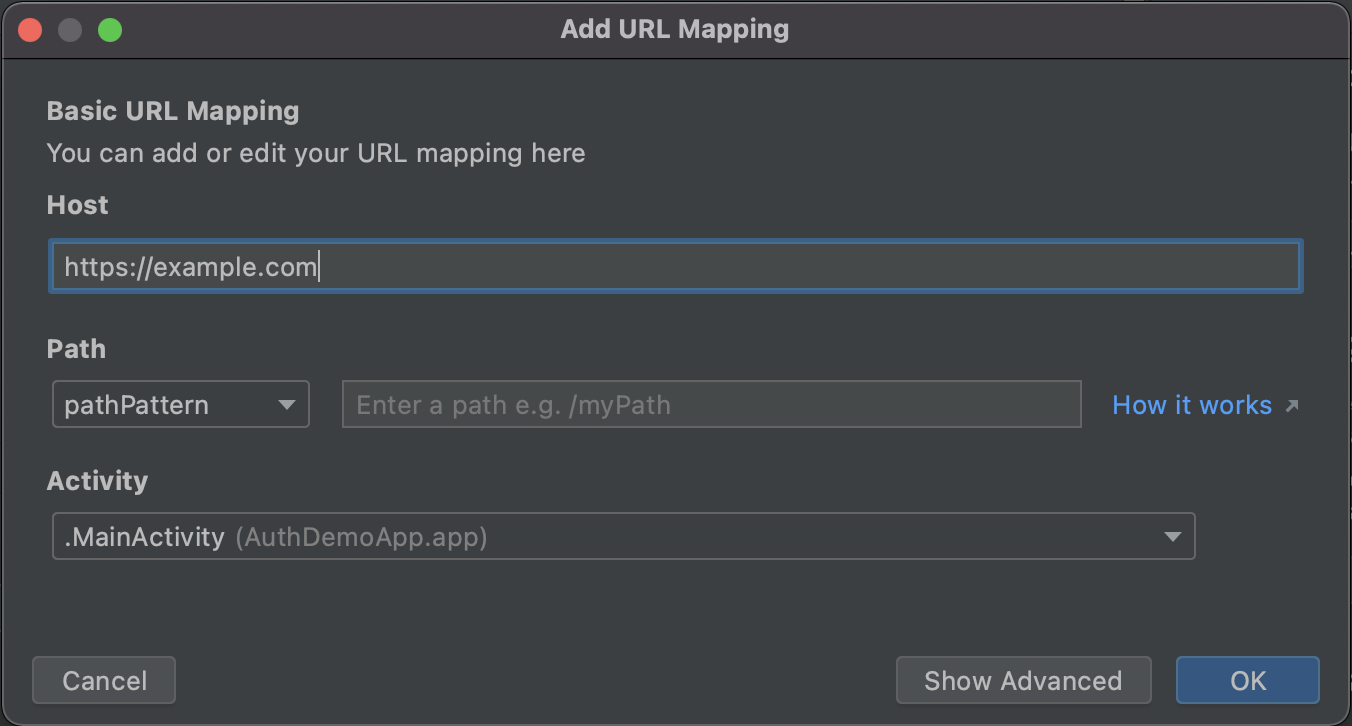
Specify host of the website. This can be HTTP or HTTPS URLs. Path is optional, but make sure to fill all the fields that is required to match our redirect URI from integration you’ve made or updated.
Lastly select activity to be opened after link is clicked outside of the application.
Step 2: Handle Incoming Links
Without project open, go to MainActivity.kt file and add following method:
private fun handleIntent(intent: Intent) { val appLinkAction = intent.action val appLinkData: Uri? = intent.data if (Intent.ACTION_VIEW == appLinkAction) { appLinkData?.getQueryParameter("code")?.let { val fragment = supportFragmentManager.findFragmentById(R.id.container) as MainFragment fragment.viewModel.performTokenExchange(it) } }}This method parses the incoming intent checking this for correct action and pushing code parameter into view model for token exchange.
Update your onNewIntent() method to call only super method and new handleIntent() method like this:
override fun onNewIntent(intent: Intent?) { super.onNewIntent(intent) intent?.let { handleIntent(it) }}Lastly add following code at the end of the onCreate() method like this:
override fun onCreate(savedInstanceState: Bundle?) {    super.onCreate(savedInstanceState)
    ...
    if (intent != null) {        handleIntent(intent)    }}
This will handle the intent in case activity is not running after activity is actually created and ready to perform any actions.
Step 3: Associate Your App With Your Website
After defining mapping and handling preparation it is time for App Links Assistant to generate assetlinks file. Click Open Digital Asset Links File Generator as an item 3 in App Links Assistant.

There are few required fields to be filled in before generator can finish without error:
- Site domain: it is the domain where
assetlinks.jsonfile will be hosted. Make sure you are specifying domain that has no redirects and is listed as redirect URI in your Integration. - Application ID: usually filled by default with your package name. In case this field is empty, go to
AndroidManifest.xmlfile and look forpackageattribute onmanifesttag. - Signing config: debug signing config is specified by default. Alternatively you can use keystore file for release APKs or default debug keystore file that could be found in your default
.androidfolder.
Press Generate Asset Links file button and preview will pop up below in case everything finished successfully. Example of assetlinks.josn file below:
[{ "relation": ["delegate_permission/common.handle_all_urls"], "target": { "namespace": "android_app", "package_name": "com.example.app.id", "sha256_cert_fingerprints": ["14:...:E5"] }}]sha256_cert_fingerprints can hold multiple values. You can add debug and release values within the same file for testing.
Hit Save File button. Upload the assetlinks.json file to your site, with read-access for everyone, at https://yoursite/.well-known/assetlinks.json. If you want to learn more about Asset Links file, please visit following guide.
::info
The system verifies the Digital Asset Links file through the encrypted HTTPS protocol. Make sure that the assetlinks.json file is accessible over an HTTPS connection, regardless of whether your app’s intent filter includes HTTPS.
:::
Step 4: Test Your Links
Android Studio provides handy way to test your App Link using App Links Assistant. In order to test proper URL handling do:
- Start OAuth flow in browser.
- Continue till the redirect and copy URL.
- Past URL into App Links Assistant form.
- Press Run Test.

Android Studio will launch the app or open correct activity with intent in case activity was previously running. This is a nice way to test URL handling, however we recommend to test entire OAuth 2.0 flow with redirect.