Google App for Streams
In this guide, you'll setup a Google app, create your Integration, and Grant an account access to your Integration.
Before you create your application with Google there are a few things to keep in mind.
Internal or External Application
Decide if you want your application available to anyone or only users part of your organization.
Internal Application
Use internal users for Google account access for development or production applications that are internal only. Only users who have an account within your organization, @your-organization.com, can access the application.
When users from your organization authorize against your application they will not see the unverified application warning.
Use internal applications to skip the App Verification and Security Review process. If anyone outside your organization needs to verify against your application at any time, you will need to go through the Google security review.
Learn More
Learn more about Unverified apps at Google.
External Application
Use external users if you are creating a production app and will need to go through Google security verification. This option will allow users who are not in your organization to authenticate against your application.
When users from your organization authorize against your application they will see the unverified application warning.
External apps are limited to 100 accounts before verification.
Learn More
Learn more about Unverified apps at Google.
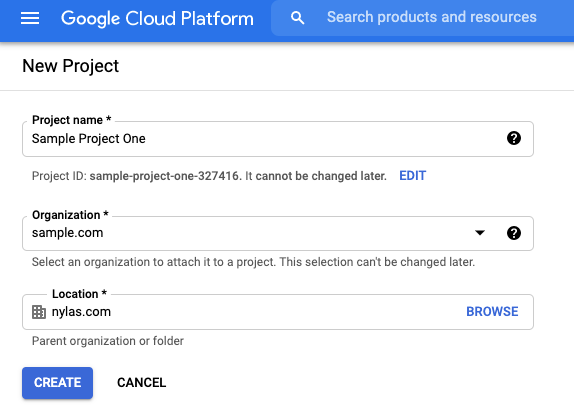
Create a Google App
-
Give your project a name.
-
Select your project Organization and Location.
-
It can take several minutes for the project to be created. Once complete, you'll return to the dashboard with Create Project notifications.

Enable your APIs
-
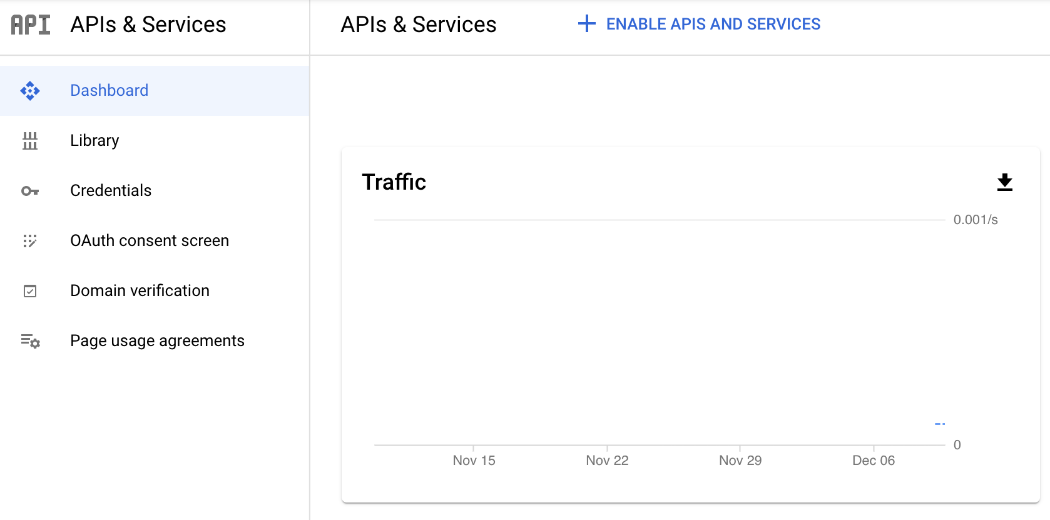
Click Enable APIs and Services or Library.
-
Enable the Gmail API. You can find the APIs using the search.
Configure your OAuth screen
You can configure your application's OAuth screen. This is the page users will see when they authenticate your application.
- From the Google APIs dashboard, click OAuth consent screen.
- Choose your user type, either Internal or External.
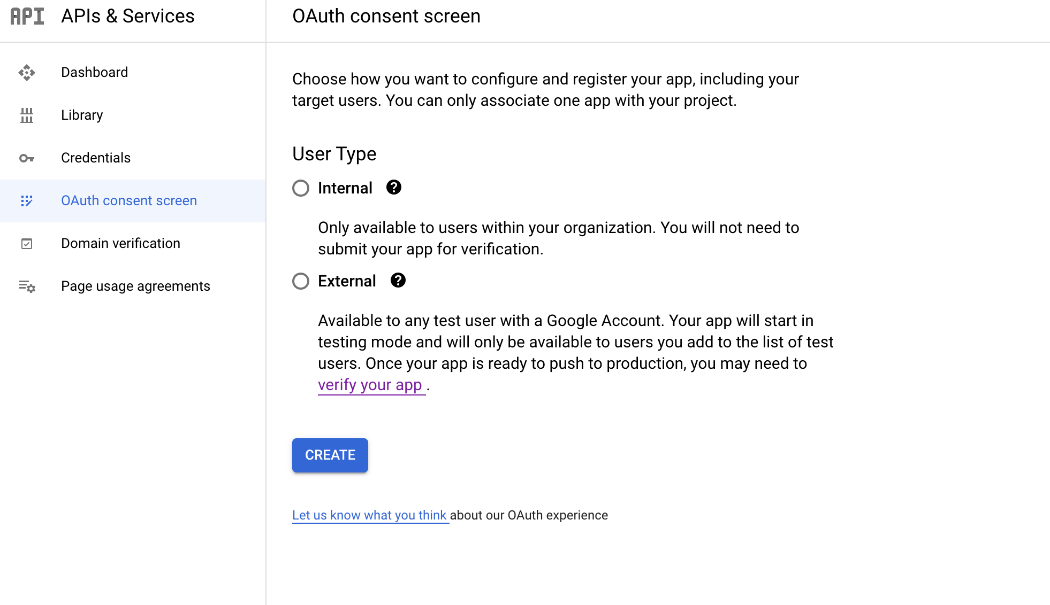
Internal OAuth Screen
- Next, fill out the required OAuth consent information. For the Authorized domains use
nylas.com. - Save and Continue.
- Click Add or Remove Scopes. Select
.../auth/userinfo.email.../auth/userinfo.profileopenidgmail.readonly
- Review the Summary and make sure the information is correct for your application.
External OAuth Screen
- Next, fill out the required OAuth consent information. For the Authorized domains use
nylas.com. - Save and Continue.
- Click Add or Remove Scopes. Select
.../auth/userinfo.email.../auth/userinfo.profileopenidgmail.readonly
- At step 3, Test Users, you can skip this for now. We’ll go back and change the app to Production.
- Review the Summary and make sure the information is correct for your application.
- Click Back to Dashboard.
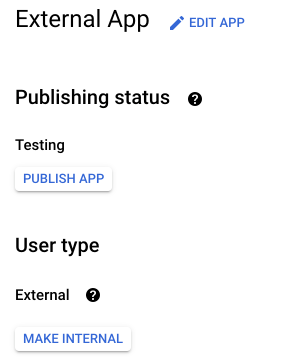
- Under the heading Publishing status, click Publish App. Publishing your app makes it so that you authorize users using the Nylas API instead of needing to add them one at a time to the Google test users. The app will show as unverified until you go through the Google Security Review.
Create credentials
-
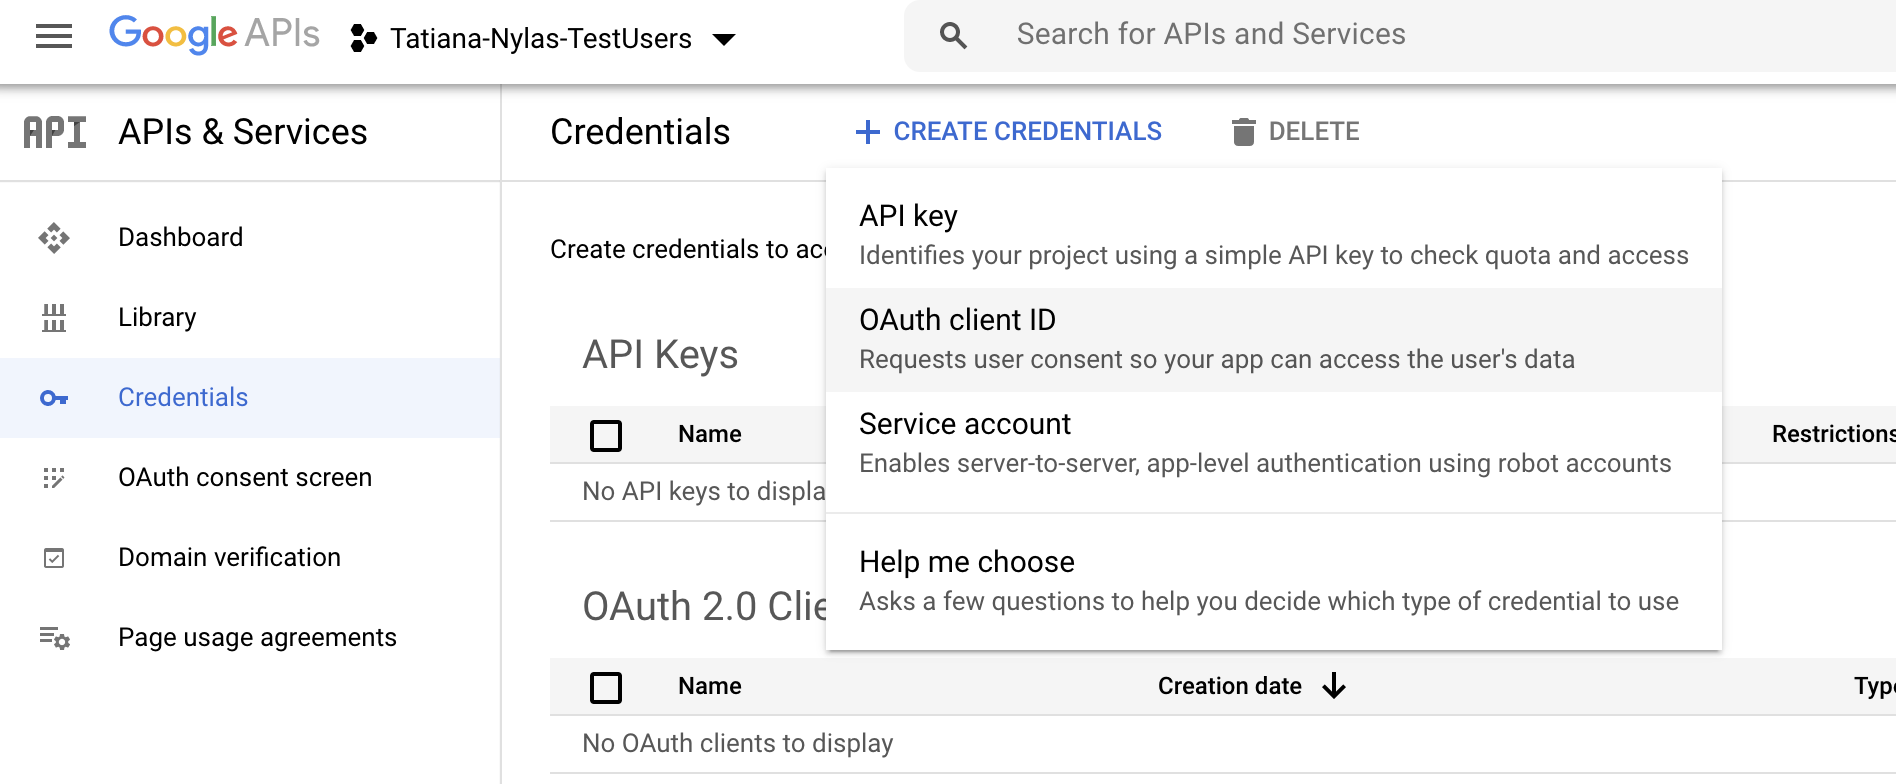
Click Create Credentials or Credentials.
-
Select OAuth client ID.
-
Select Web Application as the Application Type.
-
Give the application a name.
-
Update Authorized redirect URIs to use:
<https://datastreams.us.nylas.com/connect/callback>- For EU regions,
<https://datastreams.eu.nylas.com/connect/callback>
-
Click Create.
-
You’ll see your client ID and secret displayed in OAuth client created. Save this someplace safe. You’ll need these for your Nylas application.
Create a Google Integration
💡 Tip: You can skip this step if you've already created an integration.
Before you begin, make sure you've added the redirect URI to your new application:
- U.S. region:
https://datastreams.us.nylas.com/v3/connect/callback - E.U. region:
https://datastreams.eu.nylas.com/v3/connect/callback
After you set your redirect URI, you can create your integration:
- Go to the Nylas Dashboard and select Integration.
- Choose the integration you want to create.
- Enter your client ID, client secret, and redirect URI.

Create a Grant
First, you need to grant the email account access to your integration:
- Go to the Nylas Dashboard and select Grants.
- Click Add Grant.
- Enter the email address that you want to create a grant for.
- Repeat steps 2 and 3 for each email address you want to get data for.

What's Next
Choose which provider you want to stream data to:
You can also read about the supported data types and connectors Nylas offers.
