Create a Google Cloud project and an OAuth client so your users can connect their Google accounts to your Nylas application. The setup has six parts: create a project, enable the APIs, configure Google Auth Platform, add scopes, create an OAuth client, and add a Google connector.
Before you begin
Section titled “Before you begin”Make two decisions before you create the project.
Choose an authentication method
Section titled “Choose an authentication method”- Hosted OAuth is the fastest way to get started. Use it if you don’t need to customize the auth flow, or to test with a few users.
- Bring Your Own (BYO) Authentication lets you customize the auth flow. Your users see your company name instead of “Nylas” on the OAuth screen. It requires an existing Nylas application and a callback URI.
Choose an internal or external audience
Section titled “Choose an internal or external audience”The audience controls which Google accounts can authenticate with your app.
| Internal | External | |
|---|---|---|
| Who can authenticate | Users in your organization, such as @example.com | Any Google account |
| Starting status | Available to your organization immediately | Testing. Only test users that you add can authenticate until you publish the app |
| Google verification | Not required | Required before more than 100 users can authenticate. Users see an unverified app warning until then |
For more information about the 100-user limit, see Google’s Unverified apps documentation. For the verification steps, see the Google verification and security assessment guide.
Create a Google Cloud project
Section titled “Create a Google Cloud project”A Google Cloud project holds the APIs, OAuth settings, and credentials for your Google auth app.
- Go to the New Project page in the Google Cloud console.
- Enter a Project name.
- Select your Organization and Parent resource.
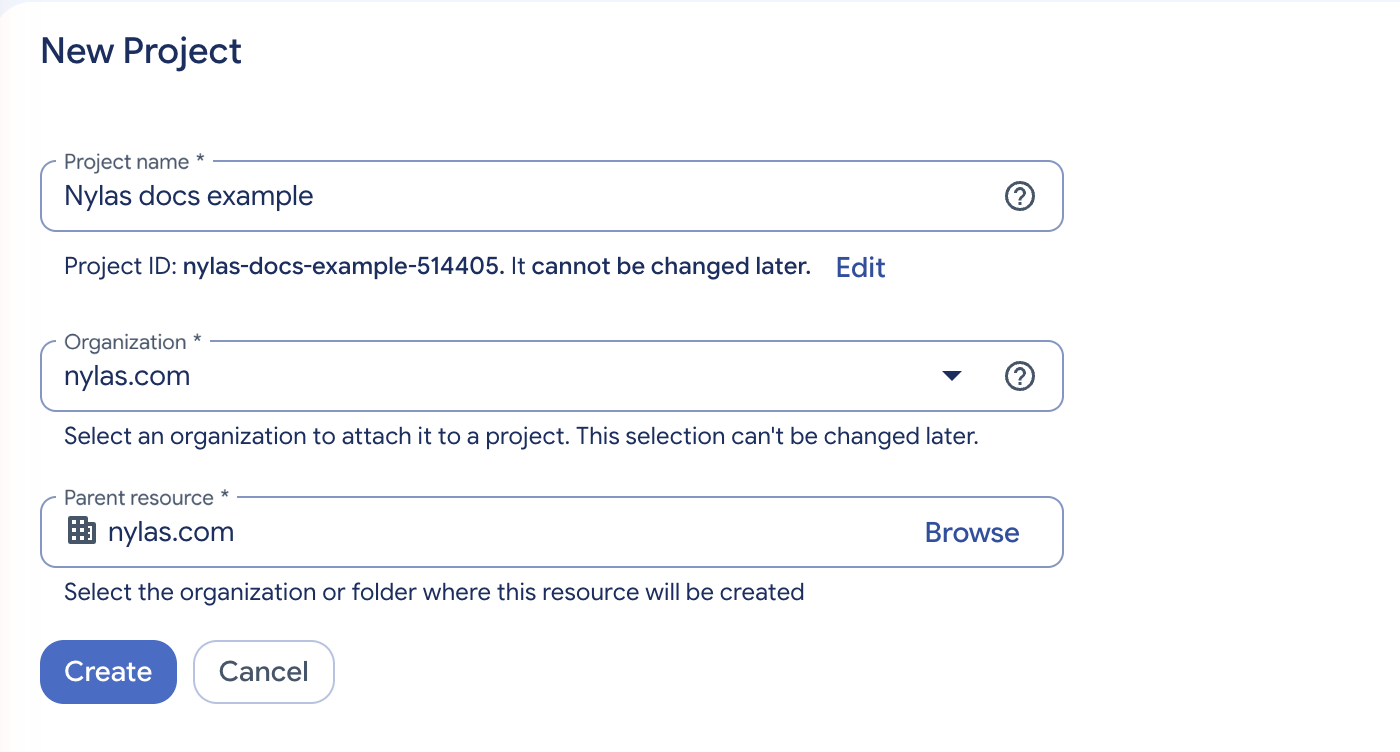
- Click Create.
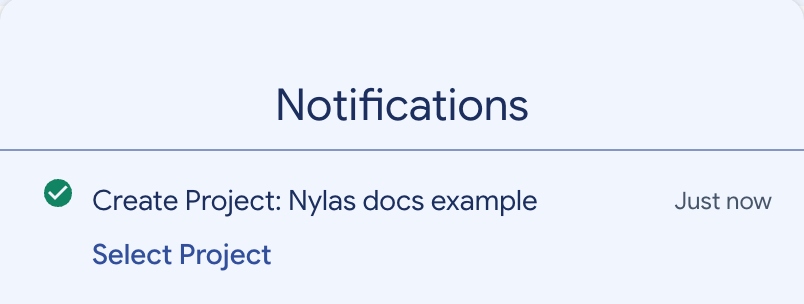
- In the Notifications panel, click Select Project under the new project.
Enable required APIs
Section titled “Enable required APIs”Enable three Google APIs in the project. Add the Admin SDK API if you need room resources.
- From the navigation menu, select APIs & Services, then click Enable APIs and services.
- Search for an API from the following table, select it, and click Enable.
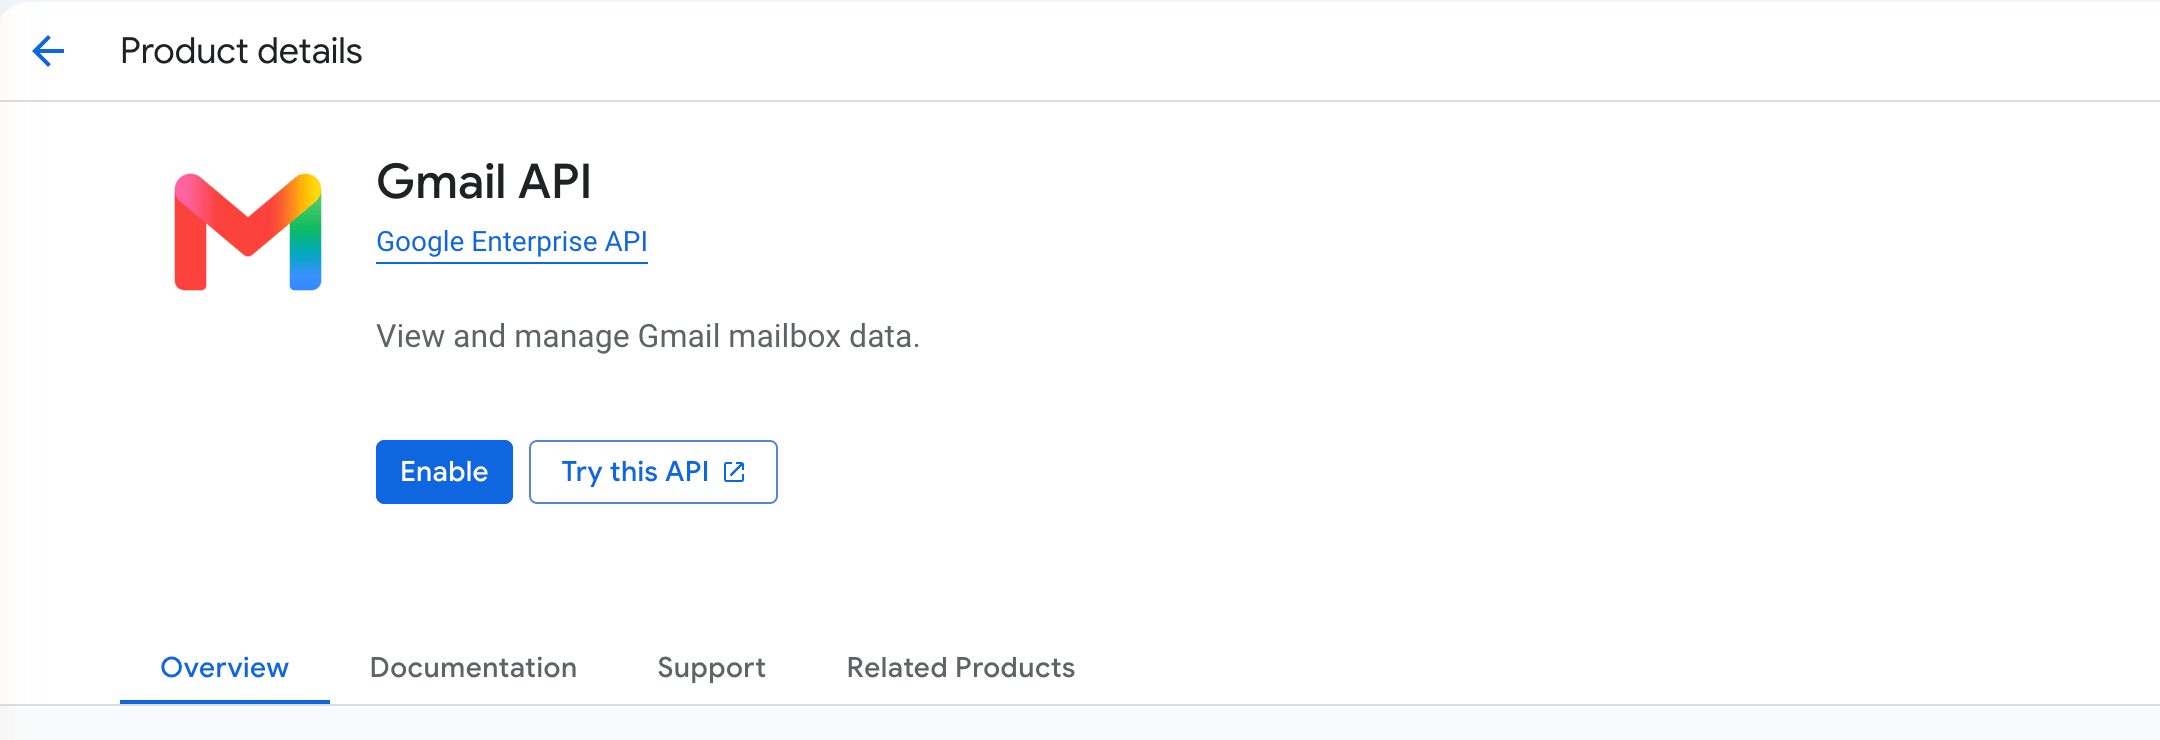
- Repeat step 2 for each API you need.
| API | Required for |
|---|---|
| Gmail API | Messages, Threads, Drafts, Folders, and Attachments endpoints |
| Google Calendar API | Calendars, Events, and Availability endpoints |
| People API | Contacts endpoints |
| Admin SDK API | Optional. Room resources for calendar events |
Configure Google Auth Platform
Section titled “Configure Google Auth Platform”Google Auth Platform holds the app name, audience, and contact details that Google shows on the OAuth consent screen. The first-time setup has four steps.
- From the navigation menu, select Google Auth Platform, then click Get started.
- Under App Information, enter an App name, select a User support email, and click Next.
- Under Audience, select Internal or External and click Next.
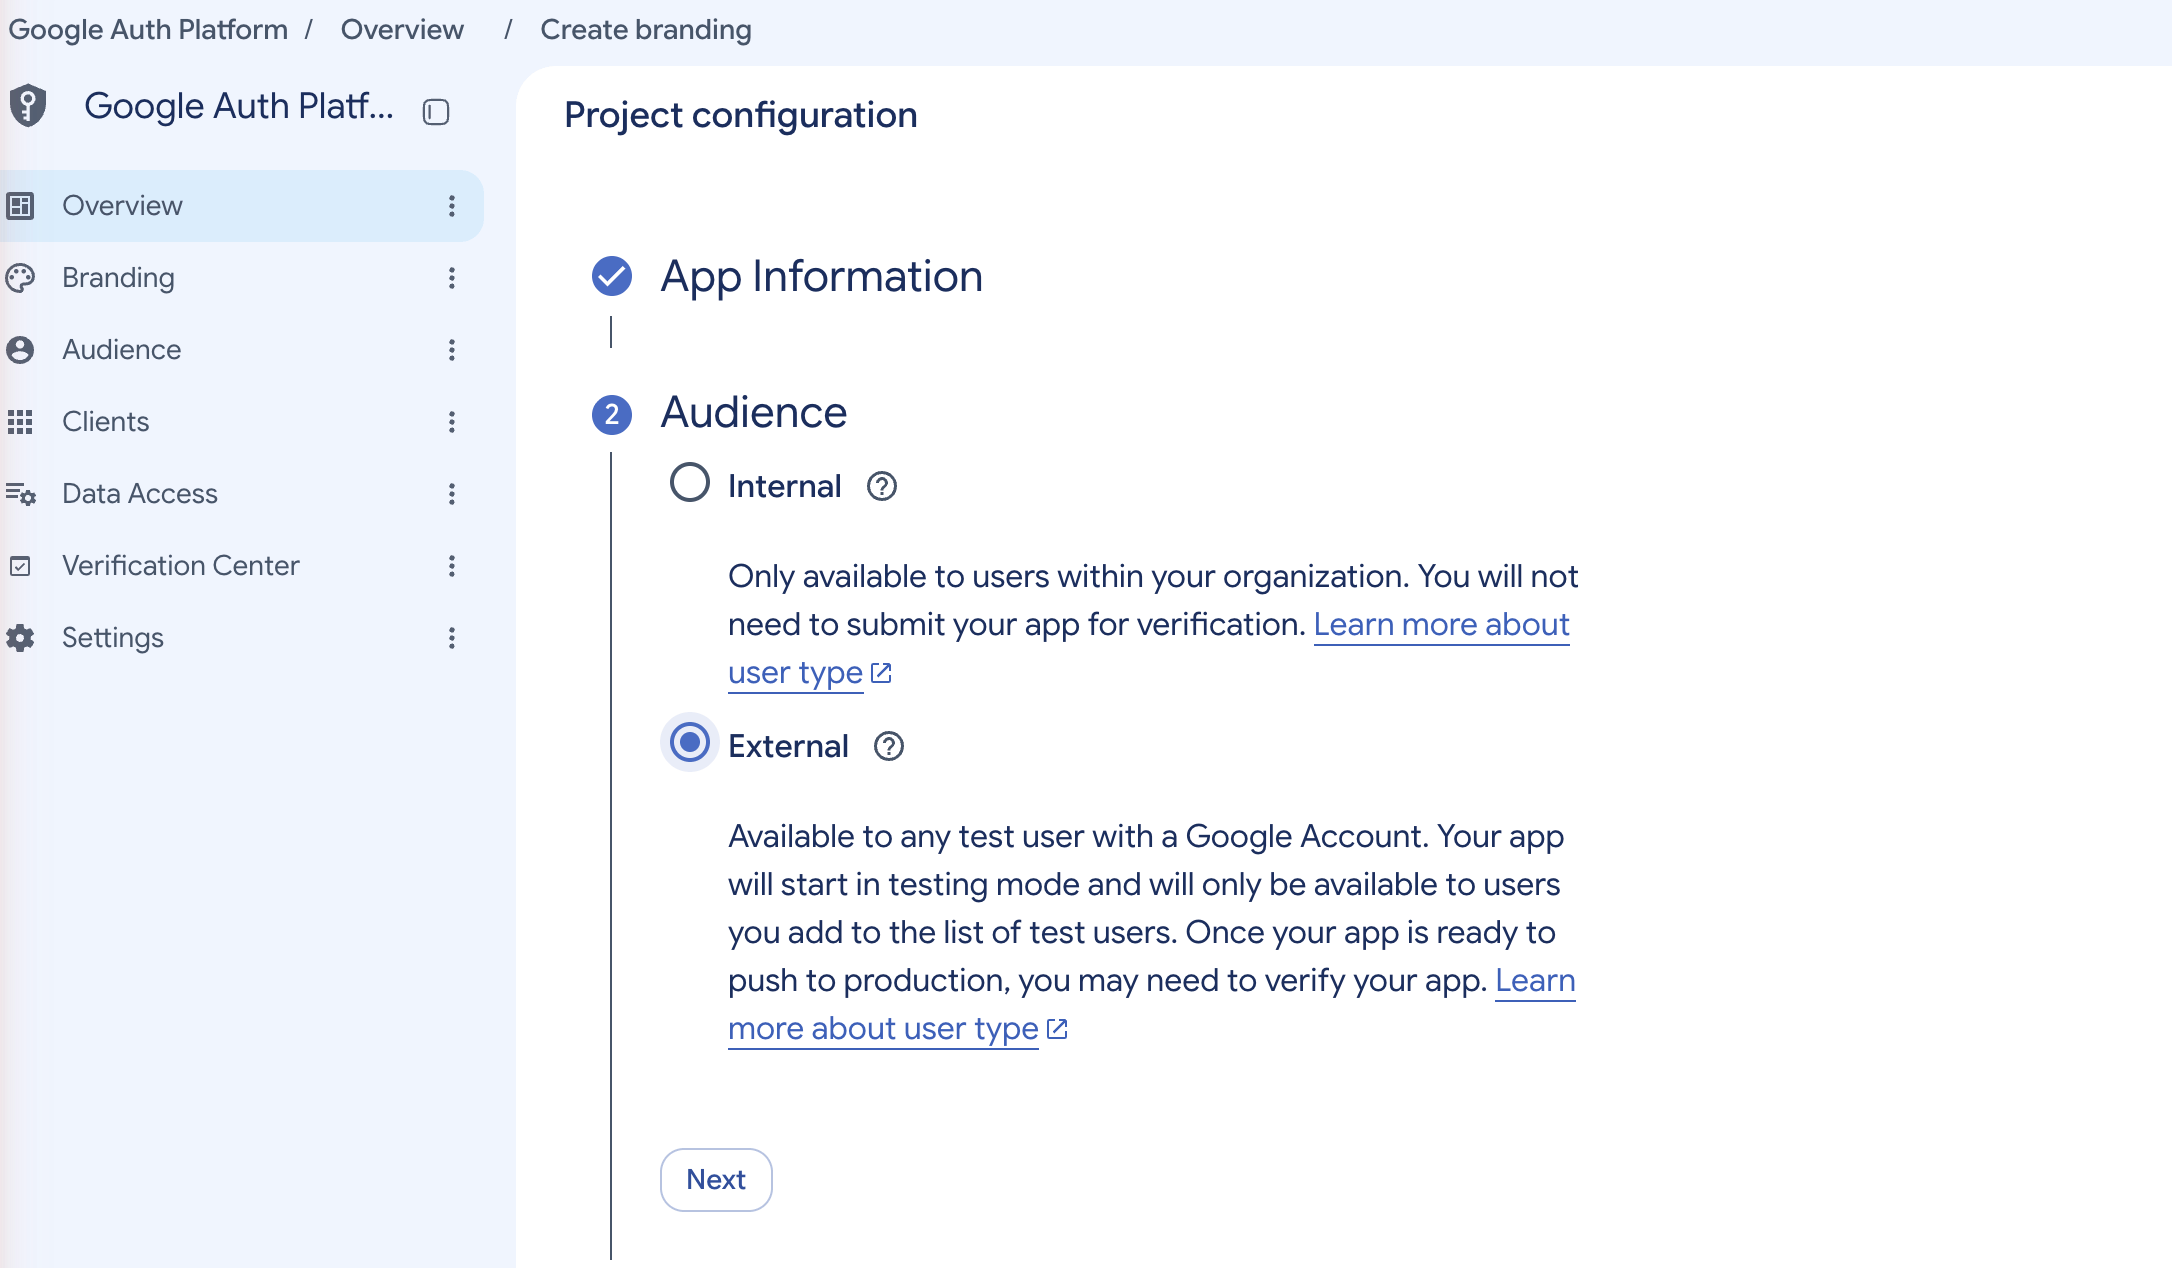
- Under Contact Information, enter the email addresses that Google notifies about changes to your project, and click Next.
- Under Finish, review the Google API Services: User Data Policy, select the agreement checkbox, and click Continue.
- Click Create.
To change these settings later, use the Branding and Audience pages.
Google authentication scopes
Section titled “Google authentication scopes”You might need to take extra steps to comply with Google’s OAuth 2.0 policies and complete their verification process before you can publish your Google Cloud project.
Be sure to request the most restrictive scopes that you need for your project. If you request any of Google’s restricted scopes, Google will require your application to complete a security assessment. This could extend your verification timeline significantly, or cause Google to fail your review.
For more information, see Nylas’ Google verification and security assessment guide.
Add every scope your application uses to the Data Access page, and always include the three marked as required in the following table. Nylas requests openid, userinfo.email, and userinfo.profile on every Google auth request whether or not your connector lists them. Your connector or auth request then names only the feature scopes, in the full URI form.
| Google scope URI | Description |
|---|---|
https://www.googleapis.com/auth/userinfo.email | Required Google scope. |
https://www.googleapis.com/auth/userinfo.profile | Required Google scope. |
openid | Required Google scope. |
https://www.googleapis.com/auth/gmail.modify | Read, compose, and send messages from a Gmail account. |
https://www.googleapis.com/auth/gmail.readonly | View messages. |
https://www.googleapis.com/auth/gmail.labels | View and edit Gmail labels. |
https://www.googleapis.com/auth/gmail.compose | Create drafts and send messages. |
https://www.googleapis.com/auth/gmail.send | Send messages. |
https://www.googleapis.com/auth/gmail.metadata | Get message metadata. |
https://www.googleapis.com/auth/calendar | View, create, edit, and delete calendars and events. |
https://www.googleapis.com/auth/calendar.readonly | View calendars and events. |
https://www.googleapis.com/auth/calendar.events | View and edit events on all calendars. |
https://www.googleapis.com/auth/calendar.events.readonly | View events on all calendars. |
Add scopes to your Google auth app
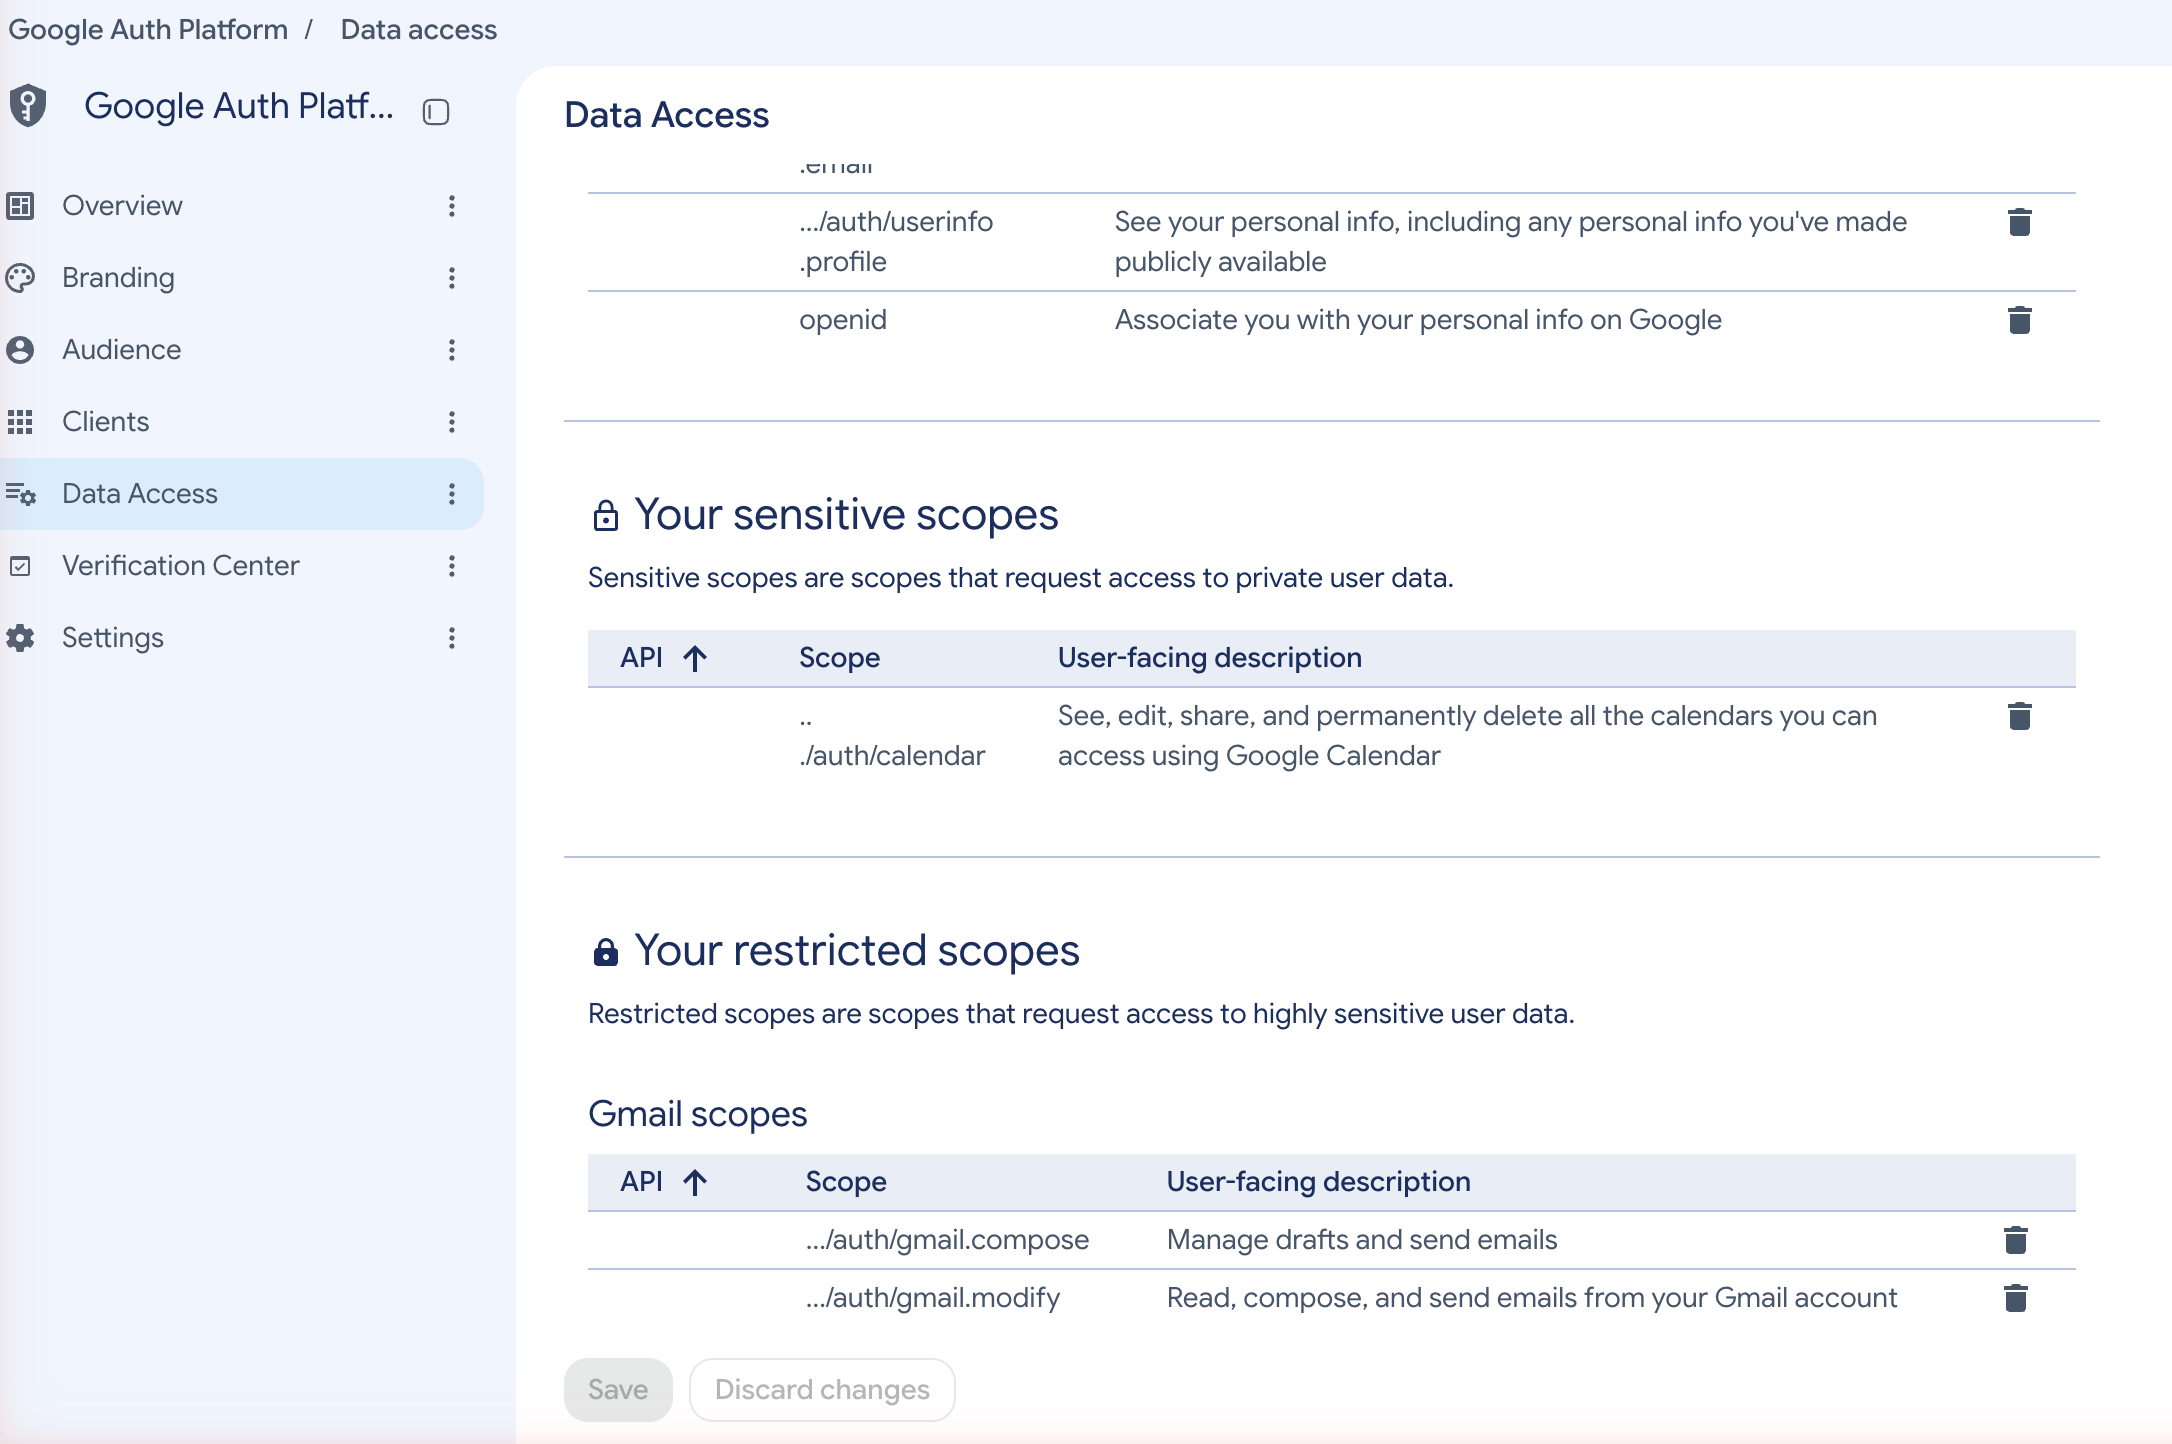
Section titled “Add scopes to your Google auth app”- In Google Auth Platform, select Data Access and click Add or remove scopes.
- Select
.../auth/userinfo.email,.../auth/userinfo.profile, andopenid. - Under Manually add scopes, enter the full URI of each feature scope, separated by commas or new lines, and click Add to table.
- Click Update.
- On the Data Access page, click Save.
The Data Access page groups your scopes as non-sensitive, sensitive, or restricted. Sensitive and restricted scopes require Google verification for external apps.
Automatically include previously granted scopes
Section titled “Automatically include previously granted scopes”Nylas sets Google’s include_granted_scopes parameter on Google OAuth 2.0 requests. Google then includes any scopes the user already approved for your Google auth app, so users don’t re-select those scopes when they authenticate again.
Publish an external app
Section titled “Publish an external app”An external app starts with a Testing publishing status. While the status is Testing, only the test users you add on the Audience page can authenticate, and Google counts them toward the 100-user cap.
- In Google Auth Platform, select Audience.
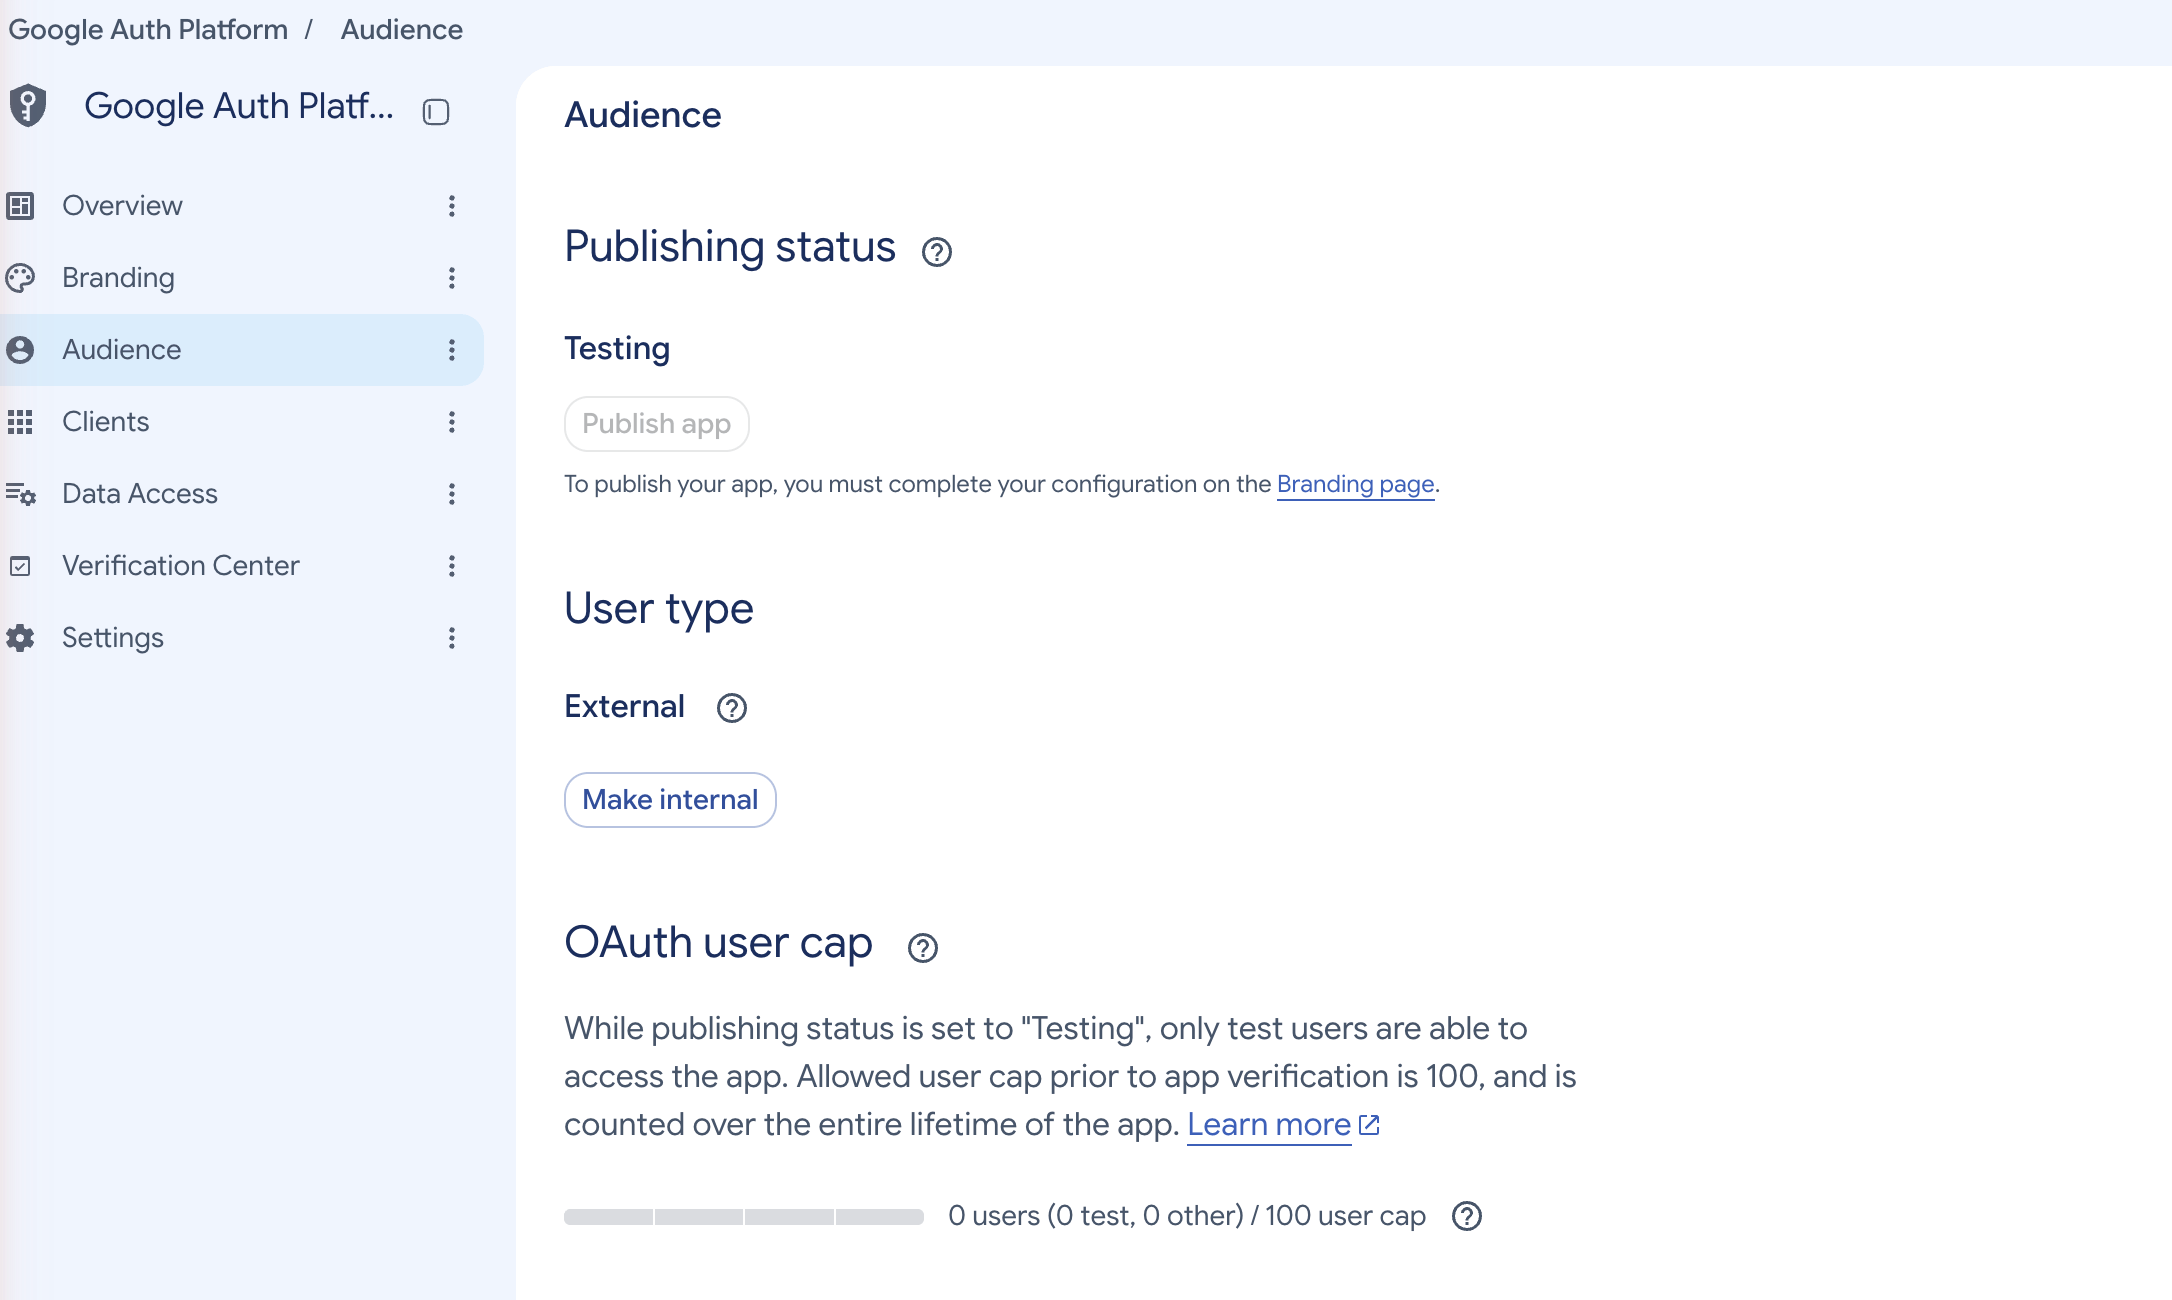
- To test before you publish, click Add users under Test users and enter the Google accounts to test with.
- When you’re ready for any Google account to authenticate, click Publish app under Publishing status.
If Publish app is unavailable, complete your configuration on the Branding page first.
After you publish the app, you authorize users with the Nylas APIs instead of adding them as test users. Google lists the app as unverified until you complete its security review process. Internal apps skip this section.
Create an OAuth client ID and secret
Section titled “Create an OAuth client ID and secret”Nylas needs your Google auth app’s client ID and client secret to authenticate users. You get both when you create an OAuth client.
-
In Google Auth Platform, select Clients and click Create client.
-
Set the Application type to Web application.
-
Enter a Name. Google shows this name only in the console.
-
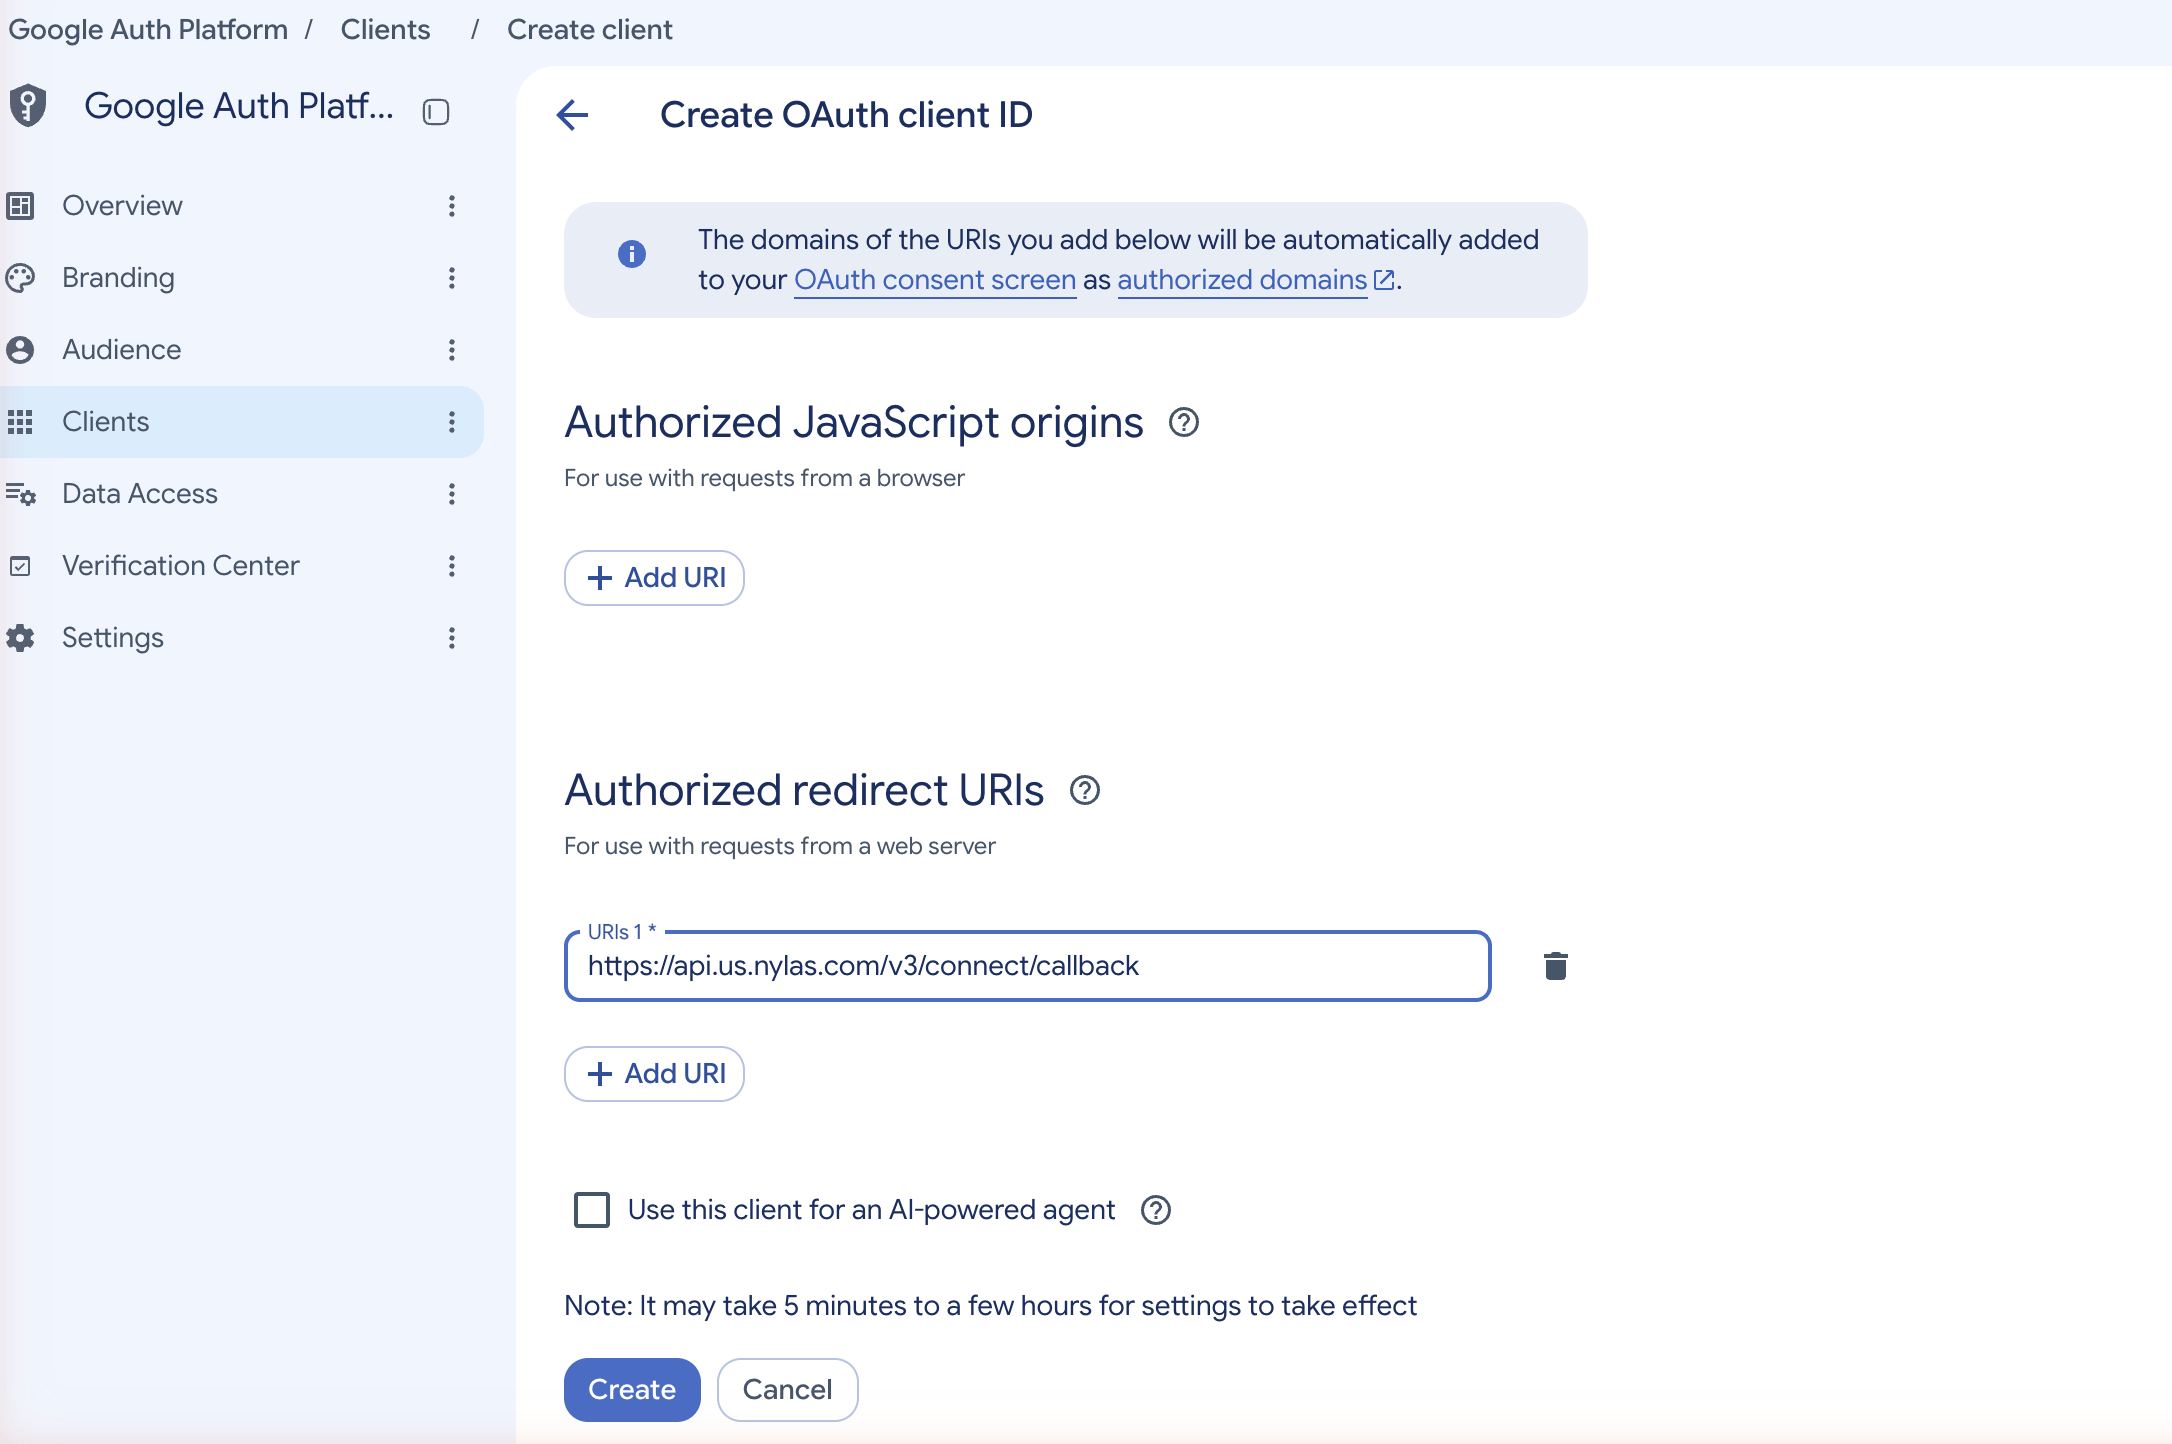
Under Authorized redirect URIs, click Add URI and enter the URI for your authentication method:
- U.S. Hosted OAuth:
https://api.us.nylas.com/v3/connect/callback - E.U. Hosted OAuth:
https://api.eu.nylas.com/v3/connect/callback - BYO Authentication: Your project’s callback URI.
- U.S. Hosted OAuth:
-
Click Create.
-
Copy the client ID and client secret, or click Download JSON, before you close the dialog.
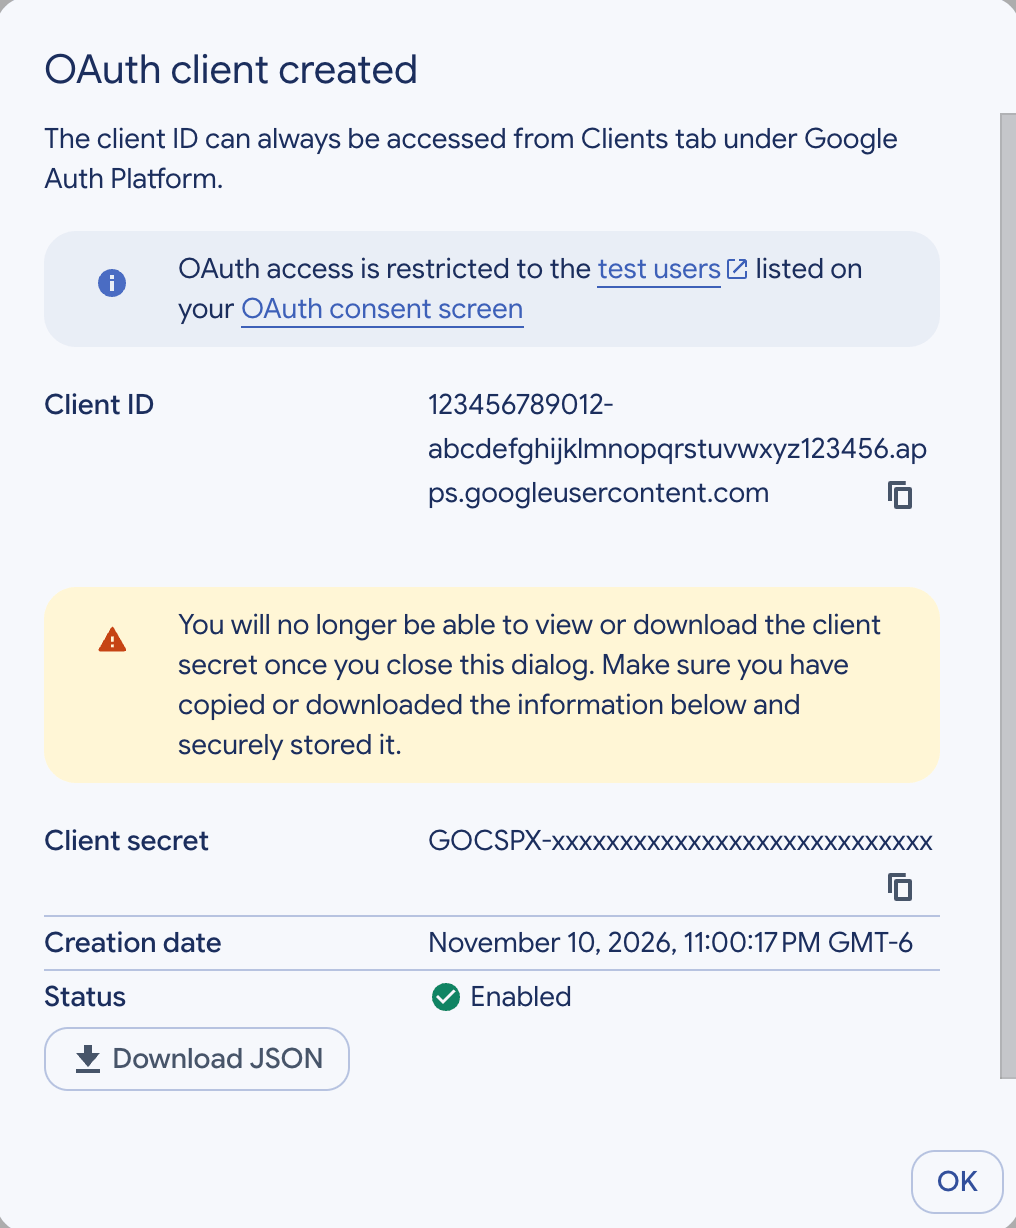
Google adds the domain of each redirect URI to the Authorized domains list on the Branding page. New client settings can take from 5 minutes to a few hours to take effect.
Add Nylas to your Google application
Section titled “Add Nylas to your Google application”Add [email protected] to your Google Cloud project as an owner. Google verification requires this if you use Hosted OAuth, and it lets the Nylas Support team diagnose issues with your Google auth app.
- From the navigation menu, select IAM & Admin > IAM.
- Click Grant access.
- Enter
[email protected]in New principals. - Under Select a role, search for
Ownerand select Owner (Legacy).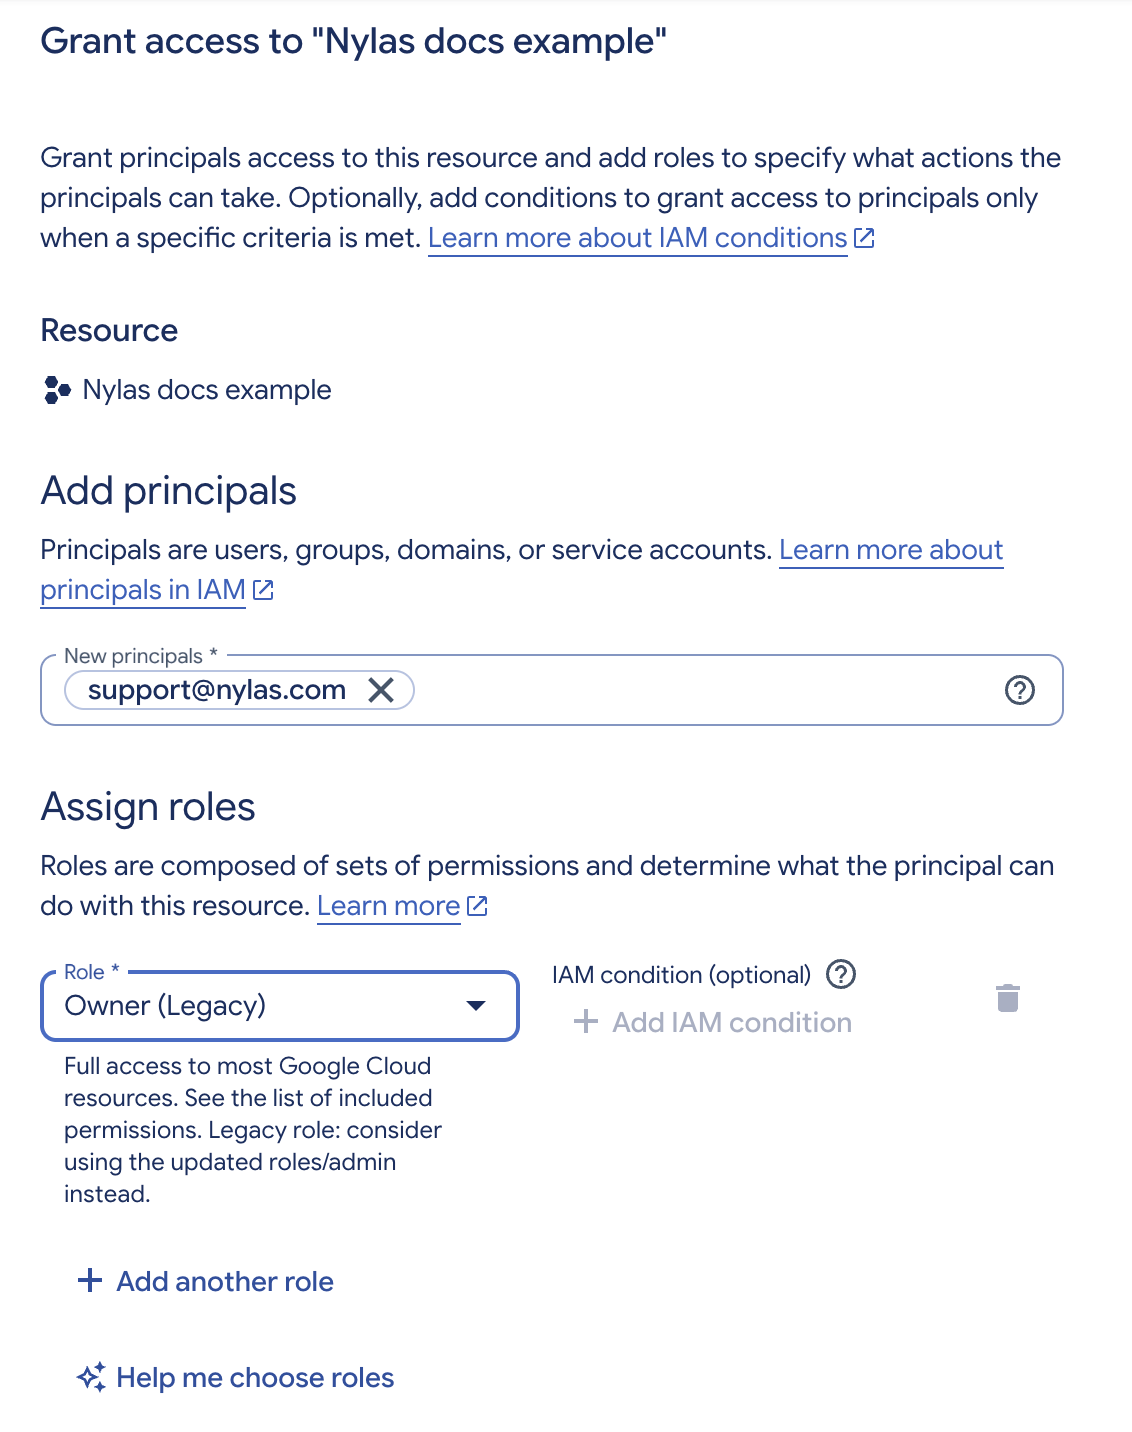
- Click Save.
Add the “Sign in with Google” button
Section titled “Add the “Sign in with Google” button”Your application needs a “Sign in with Google” button that meets Google’s branding guidelines. This applies to the OAuth flow for both personal Gmail (@gmail.com) and Google Workspace email addresses.
For Hosted authentication, Nylas recommends you do one of the following:
- Configure the OAuth login prompt by setting the
promptparameter withselect_providerordetect,select_provider. For more information, see Configuring the OAuth login prompt.- If you add a
login_hintthat’s a personal Gmail or Workspace email address and you don’t configure apromptduring the Hosted auth flow, the user is immediately directed to the Google OAuth screen, without clicking the “Sign in with Google” button. This can result in delays or failure in verification.
- If you add a
- Use the pre-approved “Sign in with Google” button with the “Connect your account” button or other provider login buttons in your application. For more information, see Google’s official Sign in with Google branding guidelines.
For Bring Your Own Authentication, use the pre-approved “Sign in with Google” button with the “Connect your account” button or other provider login buttons in your application.
Add a connector to your Nylas application
Section titled “Add a connector to your Nylas application”A connector stores your Google client ID, client secret, and default scopes in your Nylas application. Create it in the Dashboard or with the API.
Create the connector in the Dashboard
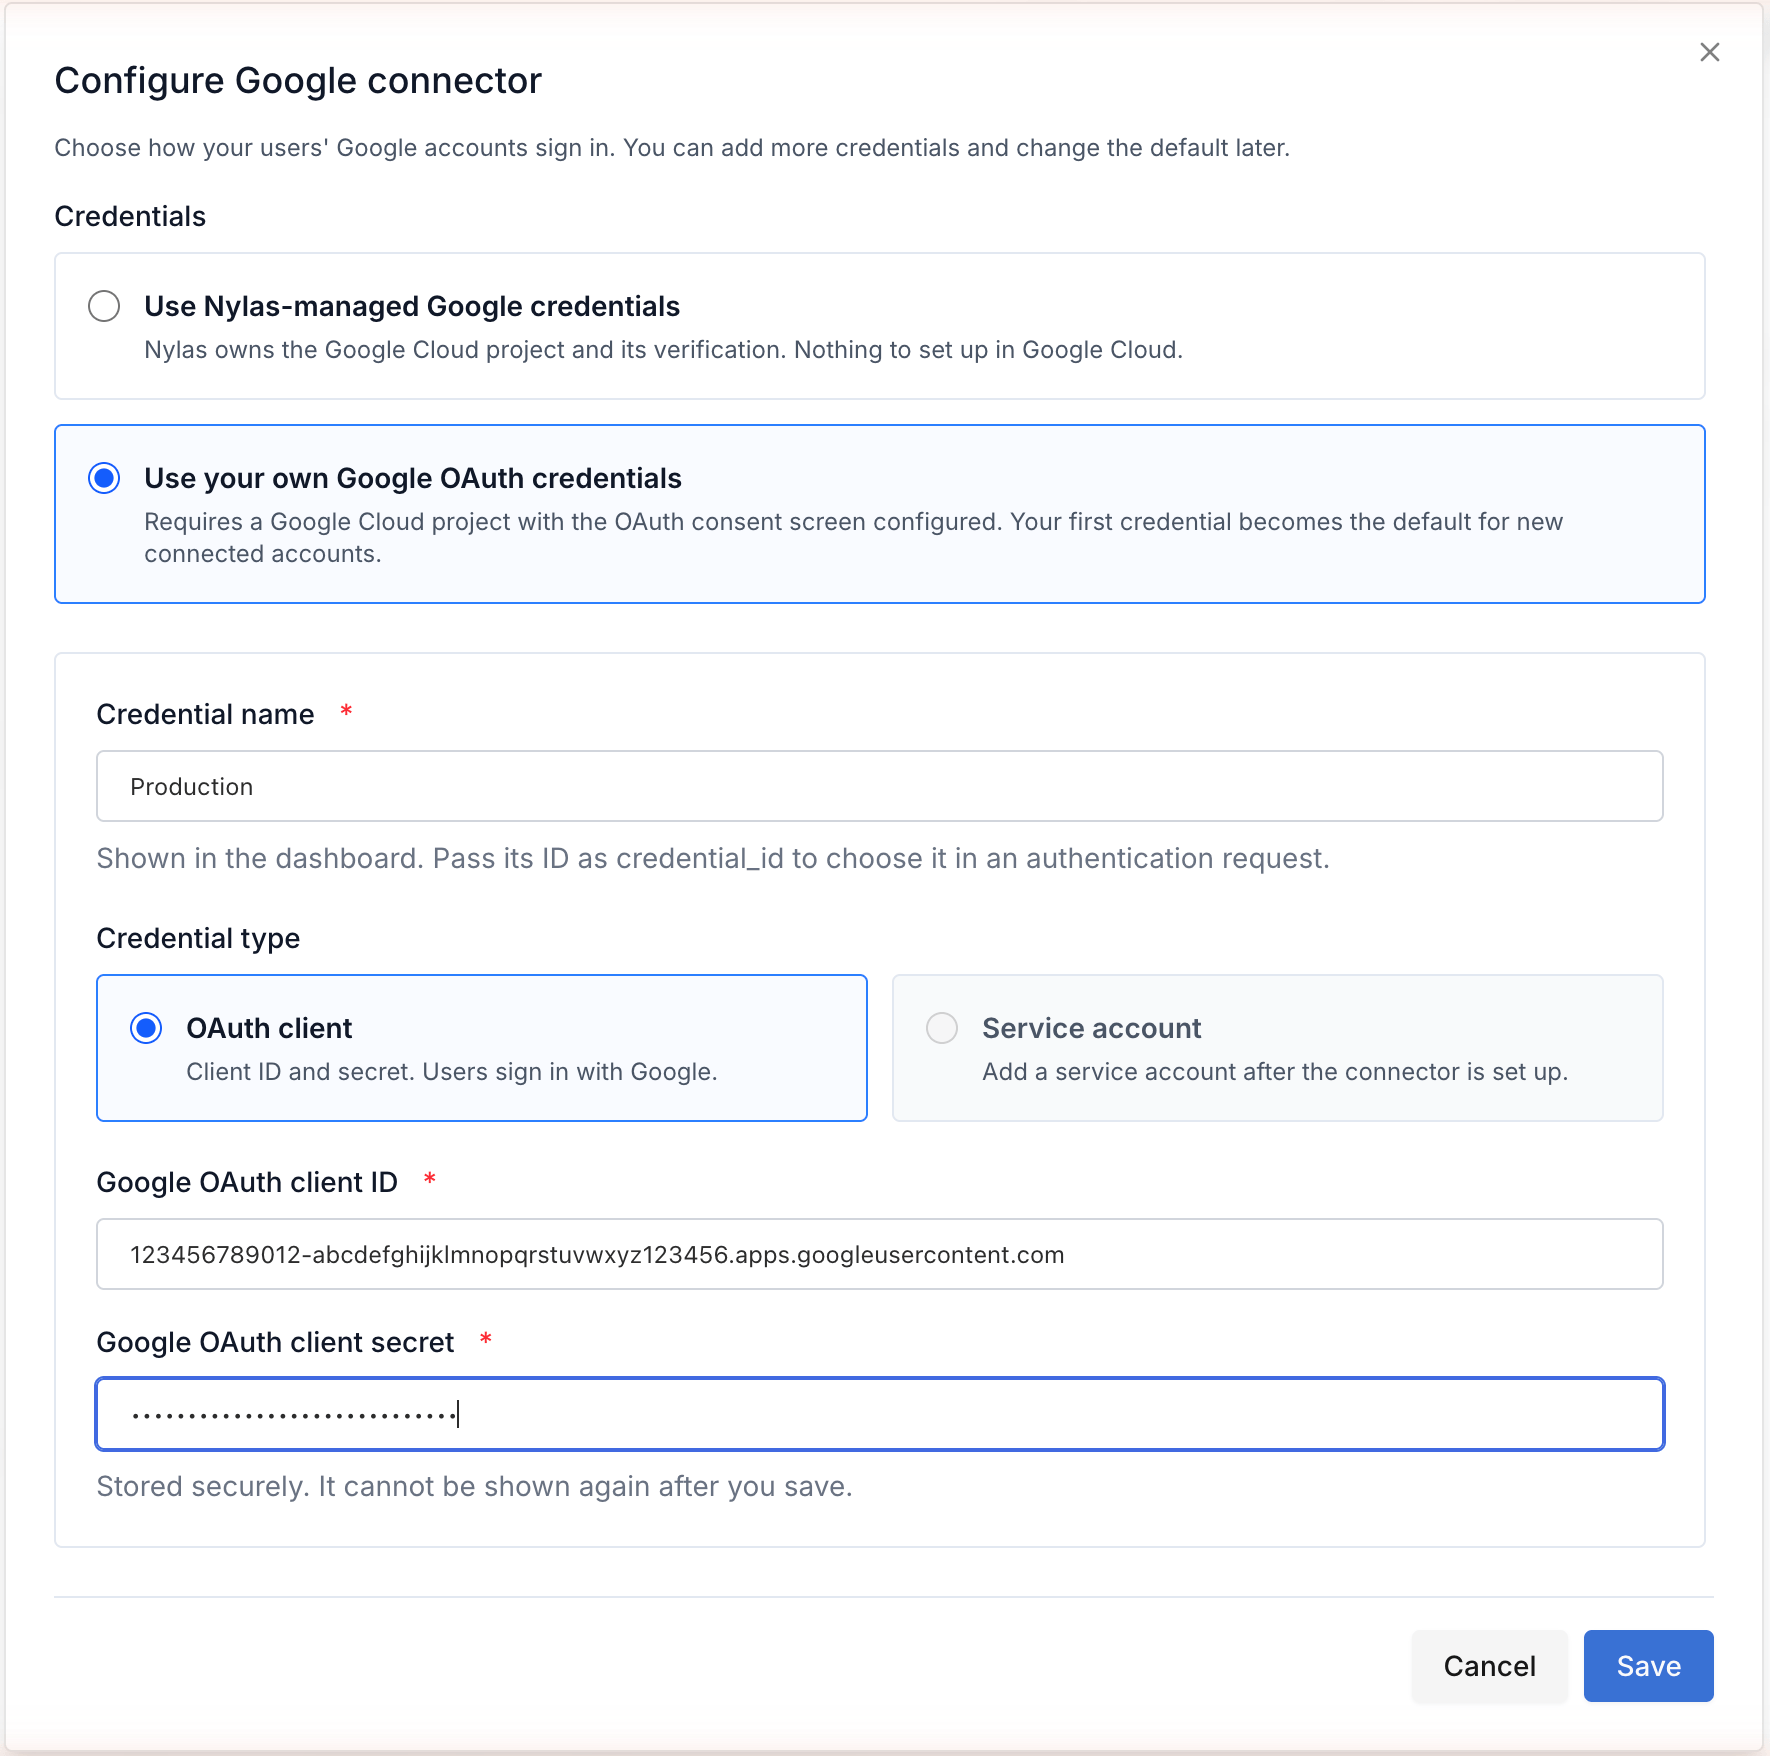
Section titled “Create the connector in the Dashboard”- In the Nylas Dashboard, open your application and select Connectors.
- In the Google row, click Configure.
- Select Use your own Google OAuth credentials.
- Enter a Credential name. The Dashboard shows this name; API requests use the credential’s ID.
- Enter the Google OAuth client ID and Google OAuth client secret.
- Under Connector settings, enter the Google Pub/Sub topic name and select the OAuth scopes your users are asked to grant.
- Click Save.
If the Google connector already exists, add the Google Cloud project as another credential instead. See Using multiple provider applications.
Create the connector with the API
Section titled “Create the connector with the API”Make a Create Connector request with your client ID, client secret, Pub/Sub topic name, and scopes.
curl -X POST 'https://api.us.nylas.com/v3/connectors' \ --header 'Authorization: Bearer <NYLAS_API_KEY>' \ --header 'Content-Type: application/json' \ --data '{ "name": "google example", "provider": "google", "settings": { "client_id": "<GOOGLE_CLIENT_ID>", "client_secret": "<GOOGLE_CLIENT_SECRET>", "topic_name": "<PUBSUB_TOPIC_NAME>" }, "scope": [ "openid", "https://www.googleapis.com/auth/userinfo.email", "https://www.googleapis.com/auth/userinfo.profile", "https://www.googleapis.com/auth/calendar", "https://www.googleapis.com/auth/gmail.compose", "https://www.googleapis.com/auth/gmail.modify" ] }'Set up the Google auth app with a browser agent
Section titled “Set up the Google auth app with a browser agent”An AI agent that can control your browser can complete the Google Cloud console steps on this page. Copy the following sample prompt, replace the placeholder values, and run it in a browser where you’re already signed in to Google Cloud. The prompt keeps the policy agreement, publishing, and client secret steps with you.
Sample prompt: set up the Google auth app
Set up a Google Cloud project for use with Nylas in my signed-in browser athttps://console.cloud.google.com. Follow the steps athttps://developer.nylas.com/docs/provider-guides/google/create-google-app/(request the page with "Accept: text/markdown" if you can).
Inputs- Project name: <PROJECT_NAME>- Audience: <Internal or External>- Nylas region: <US or EU>- Feature scopes (full URIs): <SCOPE_URIS>- User support and contact email: <EMAIL>
Steps1. Create the project, then select it. Before every later step, confirm the   project picker shows <PROJECT_NAME>.2. Enable the Gmail API, Google Calendar API, and People API.3. Open Google Auth Platform, click Get started, and complete App Information,   Audience, and Contact Information with the inputs above.4. On the Data Access page, add openid, userinfo.email, userinfo.profile, and   each feature scope. Click Update, then Save.5. On the Clients page, create a Web application client with this authorized   redirect URI: https://api.us.nylas.com/v3/connect/callback for US, or   https://api.eu.nylas.com/v3/connect/callback for EU.
Rules- Stop and ask me before you agree to the Google API Services User Data  Policy, click Publish app, or grant any IAM role.- When the OAuth client is created, don't read, copy, or screenshot the client  secret. Tell me the dialog is open so that I can download the JSON myself.- Don't enter passwords or complete sign-in prompts. If Google asks me to sign  in, stop and tell me.- Don't change any project other than <PROJECT_NAME>.
When you finish, report the project ID, the client ID, the enabled APIs, thescopes on the Data Access page, and the publishing status.